Start by walking the path after rain and flag ponding, algae, rocking pavers, and washed-out fines. Sweep, pull weeds at the crown, scrub with biodegradable soap, and use oxygen bleach in shade; avoid pressure washing over 1,500 psi. Regrade for a 1–2% cross-slope, then lift and reset loose stones on compacted base, topping joints with angular sand or polymeric sand. Finish by tightening edges, spot-topping low spots, and maintaining weekly debris removal—next you’ll see targeted fixes for each surface type.
Key Takeaways
- Inspect the full path for rocking pavers, cracks, ponding water, and algae; mark problem spots for targeted repairs.
- Clean thoroughly by sweeping, scrubbing with biodegradable soap, treating algae with oxygen bleach, and rinsing gently under 1,500 psi.
- Fix drainage by restoring a 1–2% cross-slope, filling low spots, and regrading adjacent soil to shed water off the path.
- Lift and reset loose stones on compacted base, then refill joints with angular sand or polymeric sand and tamp to lock.
- Maintain results by sweeping weekly, clearing leaves early, topping up joints after rain, sealing cracks with flexible polyurethane, and avoiding deicing salts.
Repair or Replace? 5-Minute Garden Path Check
Before you buy new pavers or gravel, run a quick, site-specific check: walk the path end to end and flag what’s actually failing—surface, base, or drainage. Note ponding after rain, algae in shade, and fines washing onto beds; those point to slope and outlet issues, not worn materials. Kick-test each unit: if it rocks, the base has voids; if it’s solid but cracked or spalled, you’ve hit material durability limits or freeze–thaw stress. Scrape joints and look for ants or soil pumping; that signals edge restraint gaps and migration. Measure crossfall with a level and a 2×4; aim for ~2%. If failures are localized, plan targeted resets to preserve your garden path aesthetic and avoid landfill.
Prep Your Garden Path: Clean, Weed, and Lift Loose Pieces
Start by sweeping your garden path, then scrub off embedded grime with a stiff brush and a low-flow rinse so runoff stays on-site. Pull weeds at the crown, extract roots, and top up jointing with reclaimed sand or gravel to suppress regrowth without herbicides. Lift any loose stones or pavers, re-level them on a compacted base, and reset them tight so water sheds cleanly and trip points disappear.
Deep Clean Surface Grime
Once you’ve cleared loose debris, deep-clean the path surface so new sand, mortar, or sealer bonds to solid material instead of grime. Start by pre-wetting pavers or stone to limit absorption and reduce chemical demand. Mix warm water with biodegradable soap; scrub with a stiff nylon brush to lift surface grime from pores and joints. For algae on shaded runs, apply oxygen bleach, keep it damp 10 minutes, then agitate again. Rinse with a controlled hose spray, directing runoff onto planted beds, not storm drains. If you use a pressure washer, stay under 1,500 psi, use a 25–40° tip, and keep the wand moving to avoid etching or dislodging fines. Let the path dry fully before any repairs.
Remove Weeds And Reset Stones
After the wash-down dries, tackle weeds and any wobbling stones so the base and joints can accept fresh sand or mortar without future heave. Start weed removal by scraping joints with a narrow weeding knife, then pull roots completely; don’t leave crowns that’ll resprout. For tight cracks, use a stiff wire brush or boiling water instead of herbicide to protect nearby beds and runoff drains. Bag debris, don’t compost seed heads.
Next, test each paver with your foot. Lift any loose units with a flat pry bar, keeping edges intact. Excavate soupy fines, then rebuild the setting bed with compacted crushed stone and a thin leveling layer of grit or bedding sand. Tap stones to grade, maintain crossfall for drainage, and finish stone resetting with uniform joint widths.
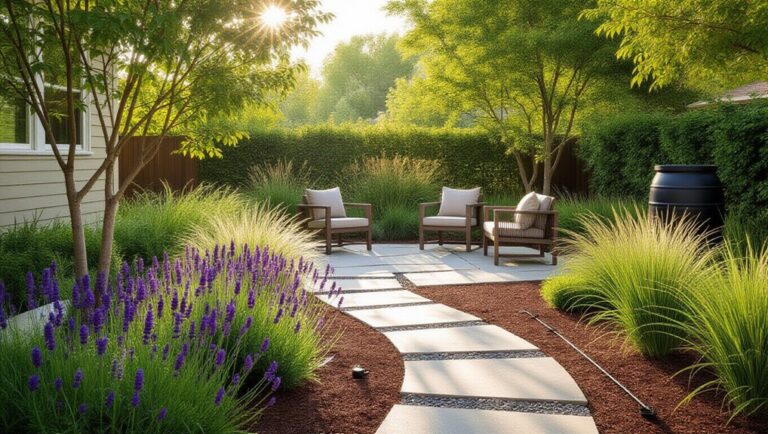
Stop Sinking: Regrade and Improve Path Drainage
Because standing water and soft subgrade are what make a garden path sink and heave, regrading for positive drainage is the fastest way to stabilize it without adding more material every season. Set a 1–2% cross-slope away from buildings and toward planted areas, not storm drains. Use a string line and a 4-ft level to map low spots, then cut high edges and pull fines into depressions. Keep the finished grade slightly crowned so your path material sheds water quickly. Where runoff concentrates, install a shallow swale or French drain alongside, wrapped in geotextile and filled with washed gravel. Add a thin layer of angular screenings to firm the surface, then compact. Finish with biodegradable coir logs or native groundcover for erosion control.
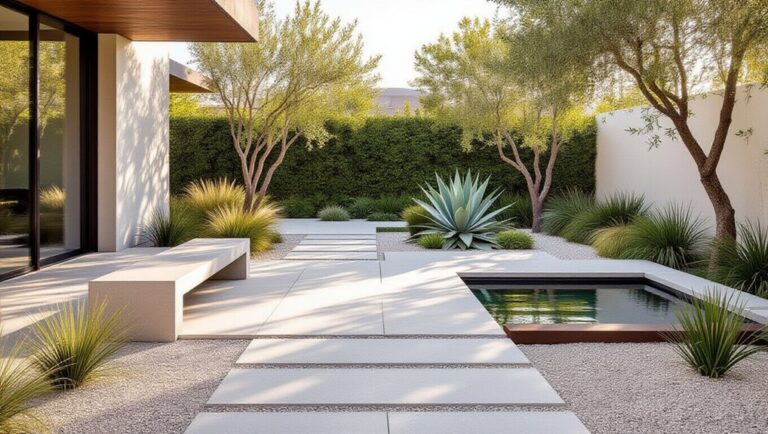
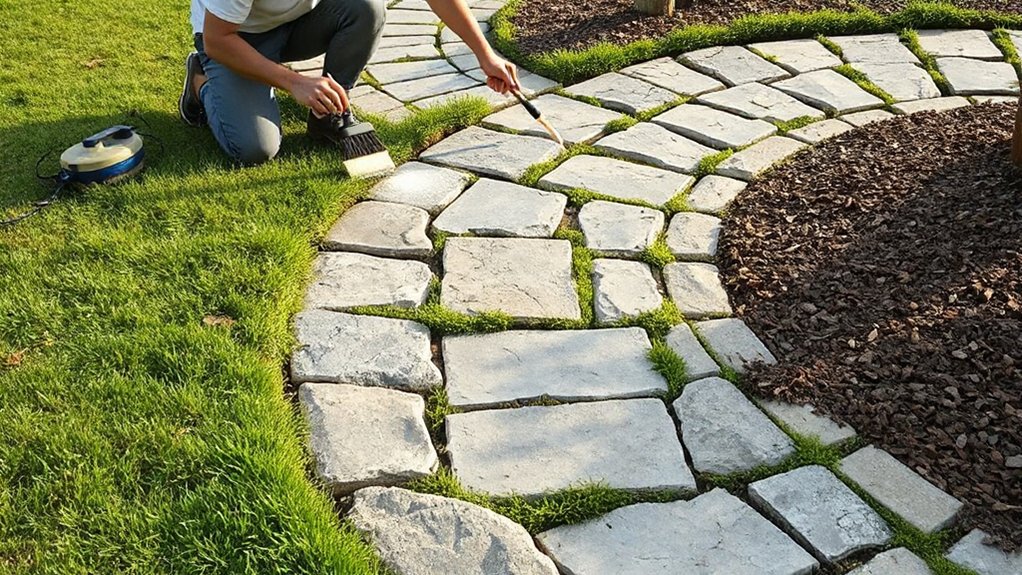
Relevel a Stone Garden Path and Reset Stones
You’ll start by spotting where stones have settled and where water still ponds or cuts channels, because those clues tell you whether the base or drainage needs correction. You’ll lift each loose stone, scrape out contaminated fines, and rebuild the bed with compacted, well-graded aggregate and a thin leveling layer that sheds water away from structures and plantings. Then you’ll reset the stones to a consistent plane and pitch, lock them in with joint material, and tamp to restore a stable, low-maintenance walking surface.
Assess Settling And Drainage
Before you lift a single stone, map where the path has settled and how water moves across it, since drainage failures usually cause the worst heaving and washout. Walk the route after a rain and mark puddles, rills, and splash zones with flags or chalk. Use a 4-foot level or straightedge to find dips and crowned sections, then note grade direction toward beds, foundations, or drains. Probe joints with a screwdriver to gauge base loss versus soil compaction under edges. Check adjacent downspouts, hoses, and hardscape that may concentrate water runoff onto the path. If you’re on clay, expect slow infiltration; on sandy soil, look for undermining. Document sun/shade and moss, which signal persistent moisture. Sketch fixes that route water to planting areas, not sewers.
Lift, Rebed, And Reset Stones
Once you’ve flagged the low spots and mapped runoff, lift the stones in the problem section and rebuild the bedding so each piece bears evenly and sheds water. Pry up units with a flat bar, stack them in order, and scrape out contaminated fines. Re-establish grade with 1–2 inches of compacted, angular stone dust or decomposed granite; avoid round sand that pumps under foot traffic. Match your stone selection to exposure: thicker slabs for wheelbarrow lines, cleft faces for traction, and consistent thickness to minimize shim waste. Reset stones tight to your garden layout stringlines, keeping a 1–2% cross-slope away from beds. Tap to seat, check with a level, then sweep reclaimed joint fines and mist to lock.
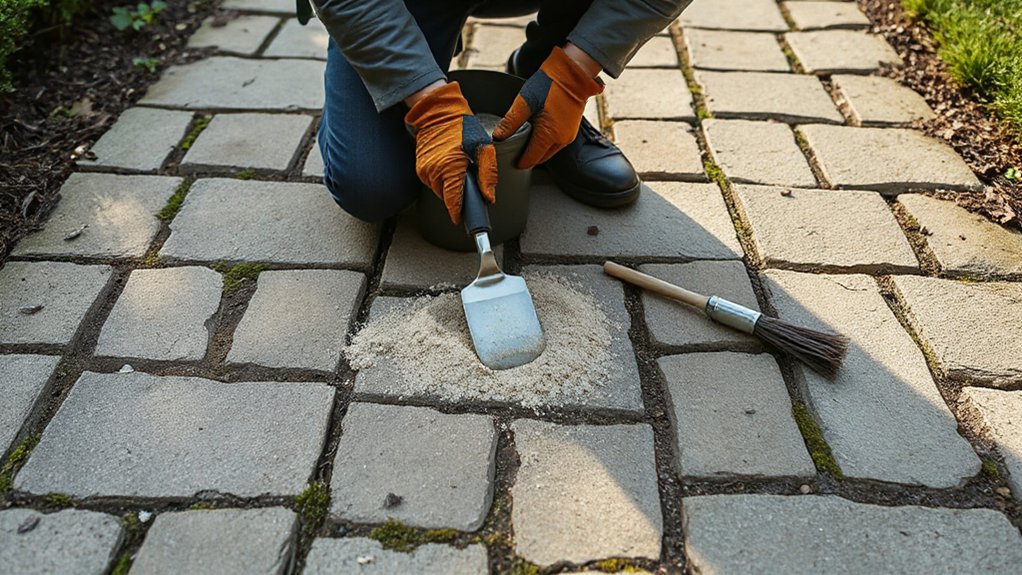
Tighten Brick Pavers and Re-Sand Joints
Although your brick path may look settled, small shifts in the pavers can loosen joints and invite weed growth or washout during rain. Start Paver maintenance by sweeping the surface clean, then use a flat screwdriver to rake out failed sand to a consistent depth without chipping edges. Reset any wobbly bricks by tapping them level with a rubber mallet and a scrap board, checking grade so water sheds off the path, not into beds. Refill joints with clean, dry, angular bedding sand; broadcast it, then work it down with a stiff broom across the joints. Compact by walking the path or using a hand tamper, then top up until joints stay full. Finish by lightly misting to settle fines and reduce tracking. This prep supports later joint sealing steps.
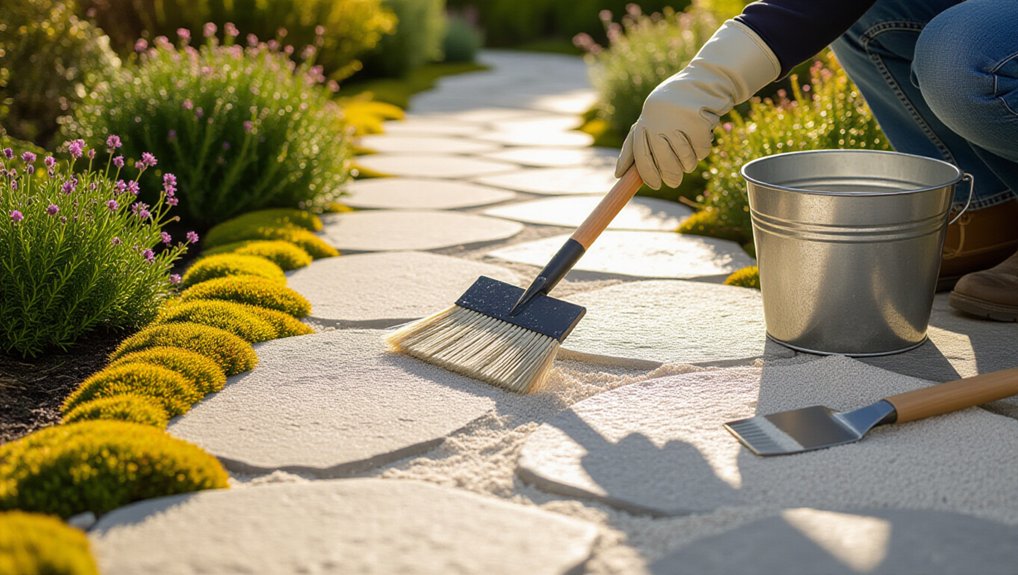
Lock Paver Joints (Polymeric Sand, No Concrete)
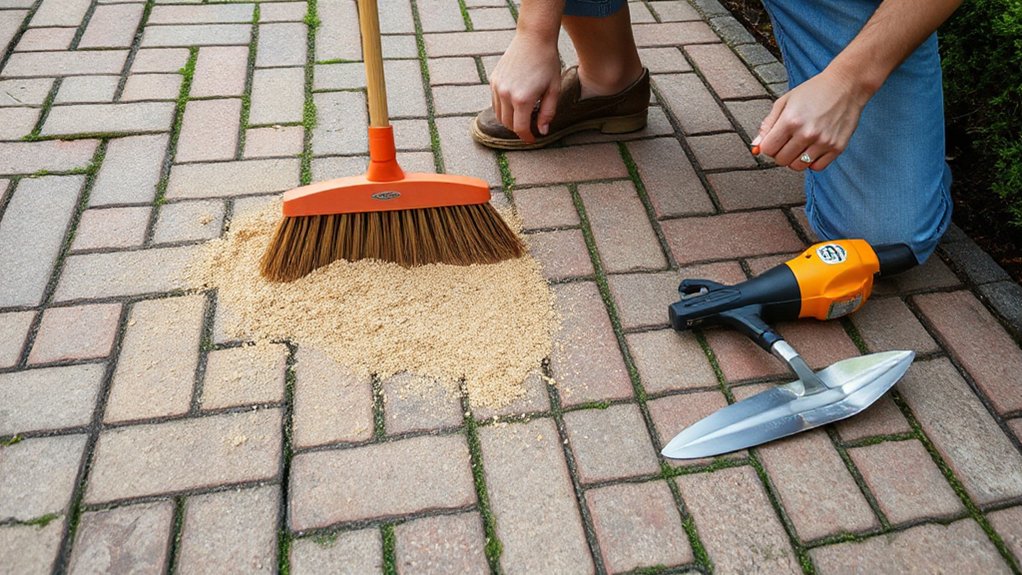
Because loose joint sand keeps migrating under foot traffic and stormwater, polymeric sand gives your brick path a durable, permeable lock without resorting to concrete. Work on a dry day with no rain forecast for 24–48 hours. Sweep Polymeric sand diagonally across the pavers so you don’t pull material back out of the joints, and keep filling until joints are consistently full and uniform. Use a stiff broom to pack it down, then blow or brush all residue off the paver faces; leftover dust can haze when activated. Lightly mist with a fine spray in multiple passes, letting water soak down rather than flood the surface. That staged wetting triggers binders for joint stabilization while preserving infiltration between bricks.
Edge, Top Up, and Compact a Gravel Garden Path
After you’ve stabilized paver joints, give gravel paths the same attention to containment and load support by rebuilding the edges, then topping up and compacting the surface. Start with edge trimming: cut back turf and organics to a clean vertical line, preserving a slight crown or 1–2% cross-slope for drainage. Reset edging (steel, aluminum, or rot-resistant timber) to grade, stake it tight, and maintain a consistent path width that matches wheelbarrows and foot traffic.
Rake out displaced stone, then add gravel topping in thin lifts (25–40 mm) using angular, well-graded aggregate that locks together. Lightly mist to control dust, then compact each lift with a plate compactor or hand tamper, especially at entrances and turns. Sweep excess off borders, and spot-top low areas after the first rain.
Patch and Resurface a Concrete Garden Path
When hairline cracks turn into spalls, trip edges, or standing puddles, you can restore a concrete garden path by patching damaged sections and resurfacing the wear layer instead of tearing out the slab. Start by pressure-washing, then chase cracks with an angle grinder and vacuum dust so repairs bond. Undercut loose edges, dampen the cavity, and pack polymer-modified repair mortar; feather to grade to eliminate ponding. If sections have settled, inject grout under the slab or rebuild the base at the perimeter before patching. After curing, roll on a thin cementitious resurfacer, broom-finish for traction, and tint it to match adjacent stone for garden path aesthetics. This approach cuts landfill waste and supports historical preservation by keeping original alignments and site patina.
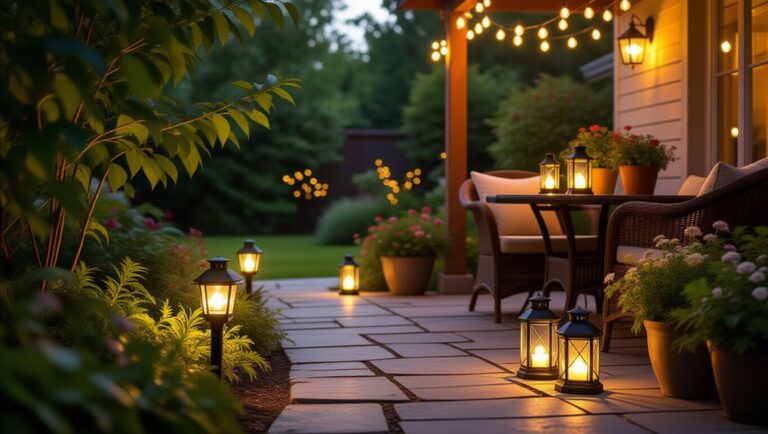
Keep Your Garden Path Looking New Year-Round
Fresh patches and a new resurfacer buy you years of service, but you’ll only keep that “just-finished” look if you manage water, grit, and seasonal movement before they start chewing up the surface again. Regrade adjacent soil so it sheds 2% away from the path, and keep edging flush to prevent ponding. Sweep weekly; grit acts like sandpaper under shoes and wheelbarrows. In fall, blow leaves off before tannins stain and algae takes hold. In winter, skip deicing salts; use coarse sand you can vacuum up in spring. Inspect joints and hairline cracks each season, then seal with flexible polyurethane to handle freeze-thaw. For seasonal maintenance plus aesthetic enhancements, refresh with a low-VOC penetrating sealer and add native groundcover strips to filter runoff.
Frequently Asked Questions
How Much Does Refreshing a Garden Path Typically Cost per Square Foot?
You’ll typically pay $1–$5 per square foot to refresh a garden path, depending on cost comparison and material options. For site-specific, sustainable results, you’ll reuse base aggregate, add polymeric sand, or seal permeable pavers.
What Tools Are Essential if I Don’T Own a Plate Compactor?
You’ll need a hand tamper, heavy rubber mallet, steel rake, screed board, and hose/sprayer; add landscaping tools like a shovel and broom. Wear safety equipment: gloves, eye protection, dust mask. Reuse on-site aggregate.
Can I Refresh a Path During Winter or Freezing Temperatures?
Yes, you can, but winter challenges limit bonding and compaction. You’ll need freezing repair techniques: work above 40°F, use cold-patch or polymeric sand, keep surfaces dry, and schedule thaw windows to minimize runoff.
How Long Should I Stay off the Path After Repairs?
Stay off 24–48 hours; wait 72 if it’s damp, shaded, or cool. Like mortar curing in a castle wall, path drying depends on repair timing: avoid traffic until firm, footprints don’t dent, joints stop shedding.
Do Refreshed Paths Increase Home Value or Curb Appeal Significantly?
Yes, refreshed paths can considerably boost curb appeal and modestly increase value by signaling maintained landscaping design. You’ll maximize impact with site-specific alignment, permeable bases, and high material durability, reducing runoff and future maintenance costs.
Conclusion
You don’t have to replace your garden path to make it perform like new. After you clean, weed, and reset loose stones or pavers, fix the cause—slope and drainage—so water leaves the site instead of undermining the base. Re-sand and lock joints with polymeric sand, top up and compact gravel, or patch thin concrete spalls as needed. Remember: an ounce of prevention is worth a pound of cure. Inspect seasonally.