Start by mapping no-wiring zones for paths, patio seating, and feature beds, then do a dusk walk-through to spot glare and dark footing. Space warm-white solar stakes 4–8 ft apart (4–6 ft near steps), aim diffusers at tread lines, and keep heads below eye level. Add IPX4+ battery lanterns on tables and step edges, hang weatherproof string lights overhead, and use IP65+ solar spotlights to graze trunks and art. Keep panels unshaded and lenses clean, and you’ll pick up extra pro tips next.
Key Takeaways
- Map your garden into zones (paths, patio, beds, features) during a dusk walk to plan no-wiring light placement.
- Use solar stake path lights spaced 4–8 ft apart, closer near steps, aiming diffusers at tread lines below eye level.
- Add solar spotlights with narrow-to-medium beams to highlight trunks, foliage, and garden art while minimizing glare and spill.
- Create patio ambiance with battery lanterns and weatherproof string lights, keeping fixtures low-glare, warm white, and safely secured.
- Maintain performance by cleaning panels and lenses monthly, re-leveling stakes seasonally, and keeping solar panels unobstructed for full sun.
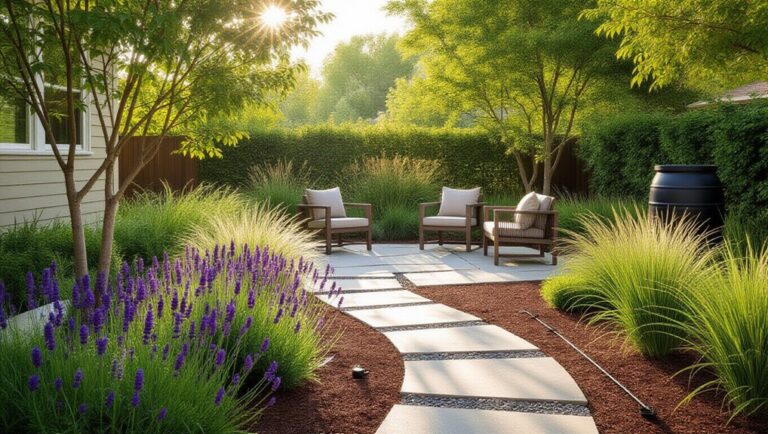
Map Your No-Wiring Garden Lighting Zones (Path, Patio, Plants)
Before you buy a single solar stake light, map your garden into no-wiring lighting zones—path, patio, and plants—so you can control glare, reduce trip hazards, and keep the look intentional. Walk the space at dusk and note where you need horizontal visibility versus vertical accent. Define a patio zone for low-glare, seated-height illumination; aim fixtures downward and keep color temperature consistent to avoid harsh contrast. Define a plants zone to highlight structure: place lights at the edge of a garden bed, grazing foliage rather than blasting it. If you’ve got a water feature, avoid aiming beams across reflective surfaces; instead, use soft sidelighting to prevent sparkle-driven glare and to protect night vision. Verify clear sightlines.
Light Paths and Borders With No-Wiring Solar Stake Lights
You’ll get the cleanest, safest path lighting when you choose solar stake styles with the right lumen output, beam spread, and IP rating to match your borders and weather. You should space and place them to eliminate dark gaps and glare—typically 4–8 ft apart, set just outside the walking line, and aimed to graze edges rather than shine into eyes. To keep performance consistent, you’ll wipe panels, level stakes after frost heave, and swap batteries or reposition units seasonally for full sun exposure.
Choosing Solar Stake Styles
Three solar stake styles cover most beginner garden layouts: path markers, border grazers, and accent stakes. Choose among these solar stake styles by matching beam pattern, lumen output, and color temperature to your garden aesthetic. Path markers use diffused lenses to reduce glare and improve foot visibility; pick lower lumens and warm white for comfort. Border grazers throw a shallow, directional wash that defines edging; select shielded heads to keep light out of eyes and windows. Accent stakes concentrate light for a focal point; use adjustable heads to aim away from walkways and prevent hotspots. Prioritize IP65+ weather ratings, corrosion-resistant stakes, and sealed battery compartments. Avoid flimsy plastic spikes that snap in compacted soil.
Ideal Spacing And Placement
Although solar stake lights don’t require wiring, you still need disciplined spacing and placement to get safe footing and clean sightlines without glare. Set stakes 6–8 feet apart on straight runs, then tighten to 4–6 feet near steps, turns, and grade changes so you define edges without hotspotting. Keep the fixture head below eye level from typical approach angles, and aim diffusers toward the tread line, not outward.
For borders, offset lights 6–12 inches inside the bed to avoid clipping by mowers and to maintain plant compatibility with spreading groundcovers. Use lighting symmetry on formal paths by mirroring positions; on informal paths, repeat consistent intervals to signal direction. Avoid placing lights where foliage blocks solar panels or throws harsh leaf shadows.
Maintenance And Seasonal Tips
Good spacing and glare control only hold up if the lights stay clean, aligned, and charging at full output through weather swings. Wipe panels and lenses monthly, and after pollen or storms, so lux levels don’t drop and shadows don’t widen into trip hazards. Re-seat each stake to keep beam angles consistent along edges; use a rubber mallet, not your foot, to avoid snapping housings.
In fall, trim back plants that shade panels, then check soil heave after freezes and re-level stakes to maintain a smooth visual line. In winter, store removable units above freezing and keep batteries dry. During spring bed work, coordinate soil nutrient management so fertilizer doesn’t cake on panels. For garden pest control, keep mulch off fixtures and remove slug shelters near warm housings.
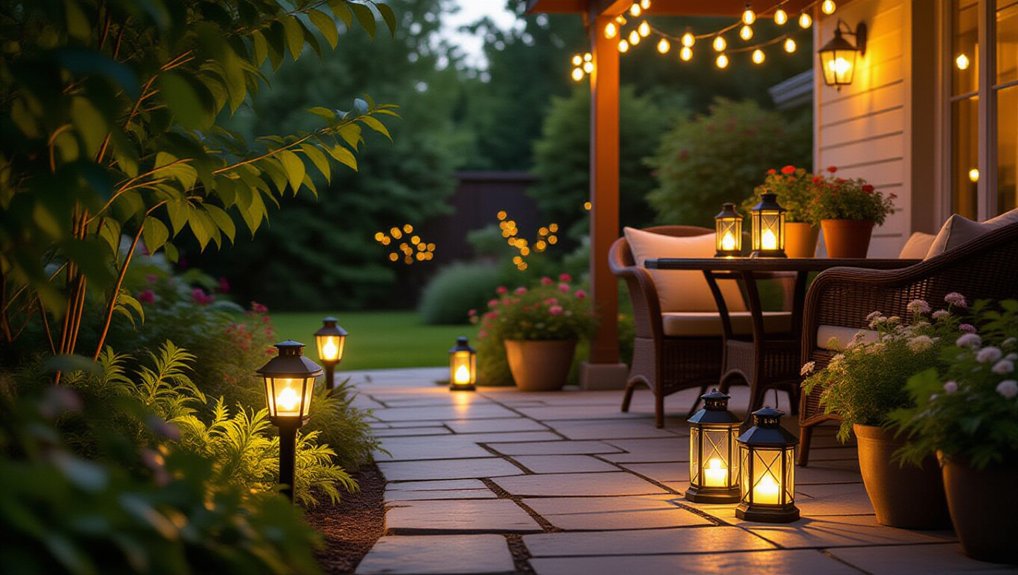
Add Portable No-Wiring Light With Battery Lanterns (Tables, Steps)
When you want instant garden illumination without touching a breaker, battery lanterns let you add controlled light exactly where you need it—on patio tables for task glow and on steps for safer footing. Choose Battery lanterns rated IPX4 or higher for splash resistance, and prioritize warm-white LEDs (2200–3000K) to preserve night ambiance while keeping faces and food color-accurate. For Portable lighting on tables, set the lantern low and centered to reduce glare and shadowing; use a frosted lens or diffuser to soften hotspots. On steps, place lanterns on the outer edge, never the tread center, so you don’t create trip hazards. Verify stable bases, lock handles, and keep flames away from dry mulch. Rotate fresh batteries before events.
Hang No-Wiring String Lights on Patios, Fences, and Pergolas
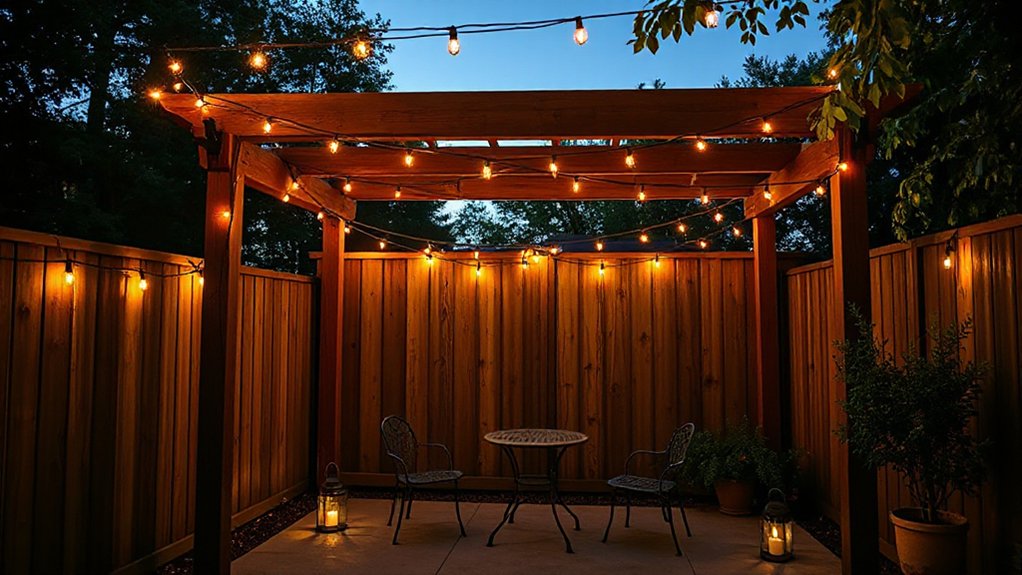
Since you don’t need a junction box or buried conduit, no-wiring string lights give you fast, controllable ambient light across patios, fences, and pergolas while keeping the install reversible. Choose outdoor-rated LEDs (IP65 or better) and a weatherproof plug-in or solar/battery controller, then map your run to avoid door swings and heat sources. You’ll get cleaner lines by anchoring a guide wire first and clipping the strand every 12–18 inches with UV-stable hooks or stainless eyelets. Keep the cord off walking paths, add drip loops at any connector, and protect outlets with an in-use cover plus GFCI. For a festive party, use warm-white globes; for decorative accents, mix micro-lights with dimming and timers.
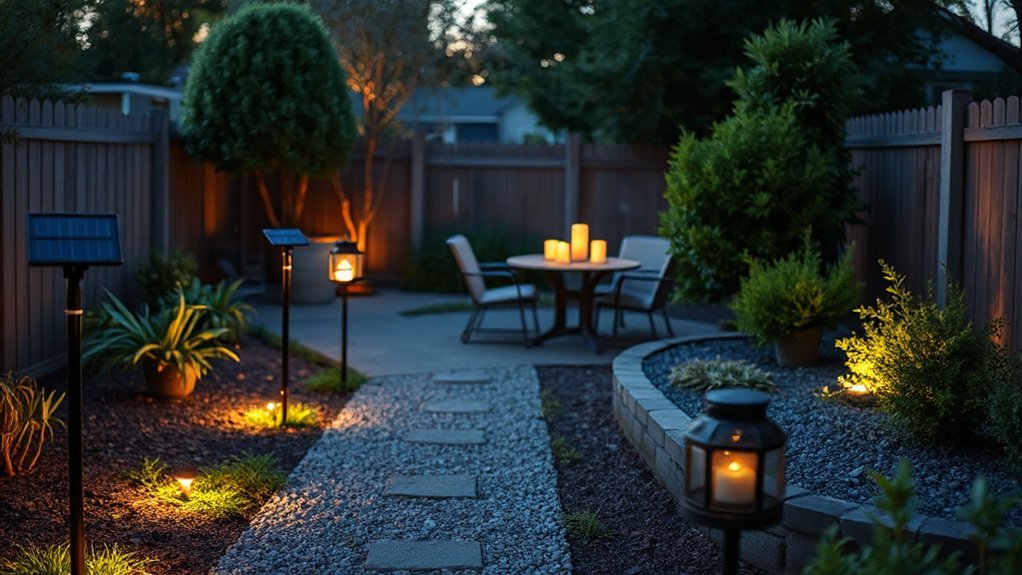
Create a Safe Glow With Outdoor LED Candles
You can add a candlelit look without open-flame risk by choosing outdoor LED candles rated for weather exposure (sealed battery compartment, IP-rated housing, UV-stable shell). Place them on stable, non-combustible surfaces or in lanterns, and keep them clear of sprinklers, pooled water, and high-traffic paths to prevent slips and tip-overs. Use warm-white flicker modes to maintain a natural glow while keeping sightlines bright enough for safe navigation.
Choosing Weatherproof LED Candles
How do you get a candlelit ambiance outdoors without open-flame risk or weather damage? Choose LED candles rated for outdoor use, not “indoor/outdoor” marketing vague claims. Look for an IP65 or higher enclosure to resist rain and dust, plus a sealed battery compartment with a gasketed door. Pick UV-stabilized plastic or coated resin so the shell won’t yellow or crack. For realistic ambient ambiance and mood lighting, select warm-white LEDs (2200–2700K) with a flicker algorithm and a diffused lens, not a bare point source. Prefer timer or remote-control models to reduce handling and keep seals intact. If you want lantern-ready sizes, verify diameter and height, and choose unscented bodies to avoid residue buildup.
Placement Tips For Safety
Outdoor-rated LED candles handle rain and dust, but smart placement is what keeps the glow safe, stable, and believable. Set each candle on a flat, noncombustible base—stone, pavers, or a metal tray—so wind or pets can’t tip it. Keep units off mulch and leaf litter to reduce trip hazards and maintain garden safety.
For clean light placement, tuck candles behind low edging or inside lanterns with drainage holes, then aim the “flame” toward the viewing angle from paths or seating. Maintain a 3-foot buffer from walkways, steps, and sprinkler heads to prevent glare, puddling, and slippery reflections. Group in odd numbers for depth, but space them so motion sensors and solar chargers don’t shadow each other. Use stakes or museum putty for extra stability.
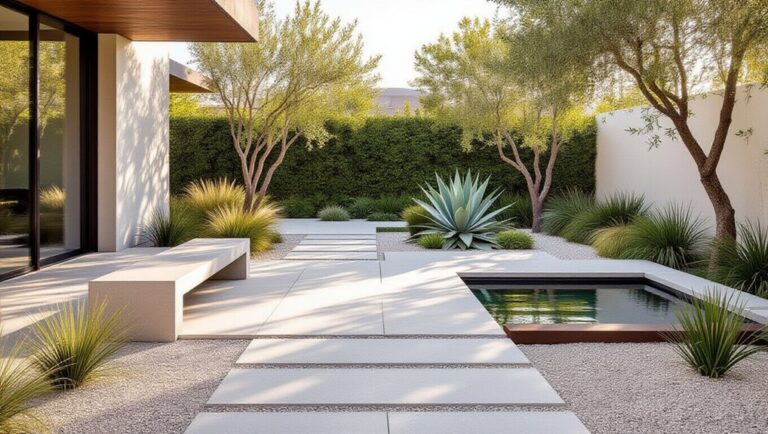
Highlight Plants and Décor With No-Wiring Solar Spotlights
Although hardwired fixtures can deliver high output, no-wiring solar spotlights let you accent specimen plants, sculptural décor, and textured walls without trenching, junction boxes, or exposure to mains voltage. You’ll get targeted beams that read as “gallery lighting” outdoors, ideal for isolating a Japanese maple, highlighting bark relief, or giving garden art crisp edge definition. Choose adjustable heads and narrow-to-medium optics so you can control spill and avoid glare toward paths, windows, and seating. For plant care, aim light at trunks and structural foliage rather than blasting tender blooms, and keep fixtures clear of irrigation spray to reduce corrosion. Look for stable stakes and sealed housings, then use consistent color temperature across units for a cohesive night scene.
Keep Lights Bright: Placement, Weather Ratings, and Quick Fixes
When you place fixtures with intention, you’ll keep output high, reduce glare, and avoid water-related failures. Aim path lights downward at 30–45° to define edges without hot spots. Keep solar panels unobstructed; even partial shade cuts energy efficiency and triggers early dimming. For uplights, offset the beam from trunks to prevent harsh shadows and protect night vision.
Choose outdoor ratings: IP65 for exposed beds, IP44 under eaves. Seal battery doors and gaskets; replace cracked O-rings to stop corrosion. If a unit flickers, clean contacts, swap rechargeable cells, and reset lighting automation modes. Re-aim after storms, stake bases firmly, and wipe lenses monthly to maintain crisp, safe illumination.
Frequently Asked Questions
What’s the Average Lifespan of Solar Garden Lights Before Replacement?
You’ll typically replace solar garden lights in 2–4 years. Battery longevity fails first; expect 1–3 years per pack. Solar panel durability often lasts 5+ years, but weather sealing and corrosion control preserve safe, consistent, attractive output.
Do No-Wiring Lights Attract Insects More Than Wired Outdoor Lights?
You’ll see similar insect attraction with no-wiring and wired lights; spectrum and brightness matter most, not power source. Choose warm LEDs, shield fixtures, and dim outputs to cut light pollution, protect eyes, and preserve ambiance.
Can Renters Install No-Wiring Garden Lights Without Violating Lease Rules?
Yes—you can, but you must check lease restrictions and get installation permissions; beauty versus liability. Choose non-damaging stakes or clamps, avoid drilling, keep paths glare-free, and use weather-rated solar LEDs for safe, clean aesthetics.
How Do No-Wiring Lights Perform During Winter or Prolonged Cloudy Weather?
In winter or long cloudy spells, you’ll see dimmer, shorter runtimes because solar panel efficiency drops; choose larger panels or backup batteries. For safety and aesthetics, pick warm light color options and add reflective path markers.
Are There Recycling Options for Used Solar Light Batteries and Components?
Yes—you’ve got recycling options: use local battery recycling for NiMH/Li-ion packs, and follow solar component disposal rules for panels, LEDs, and wiring. You’ll reduce fire risk, meet regulations, and keep your garden’s look clean.
Conclusion
You’ve mapped your zones, and it coincides with what your garden needs most: clear paths, calm patios, and highlighted plants. You’ve set solar stakes where feet land, and it coincides with dusk’s edge; you’ve placed lanterns on tables and steps, and it coincides with safer sightlines. You’ve hung string lights on fences and pergolas, and it coincides with soft ambience. You’ve checked IP ratings, aimed spotlights, and replaced weak batteries before weather does.