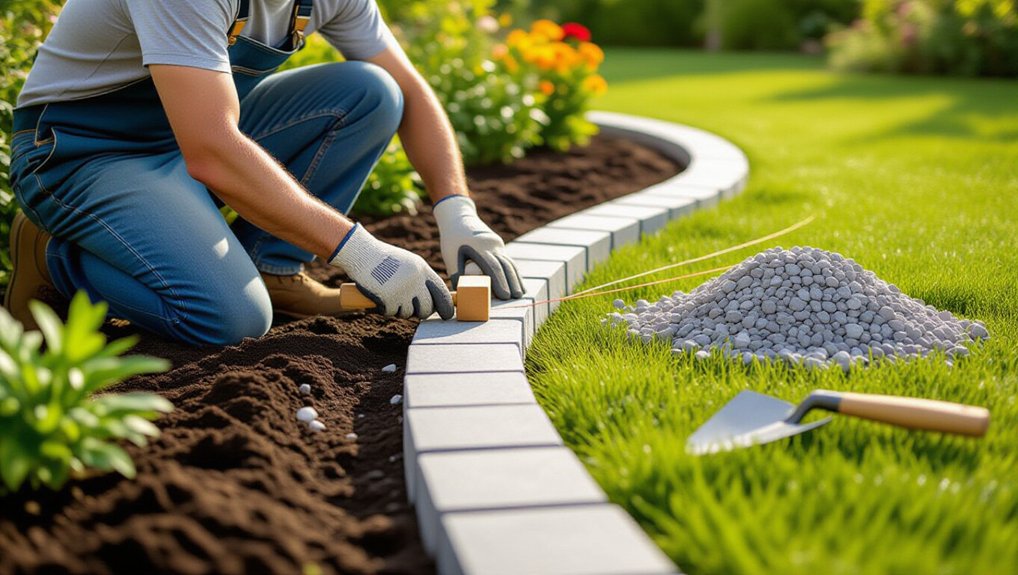
Start by choosing dense, freeze–thaw rated edging (sealed concrete, granite, or basalt) sized for your soil and slope. Lay out straight runs with stakes and string, or mark smooth curves with a swung string and spray paint. Dig a trench 1/3–1/2 stone height deep and stone thickness plus 2–3 inches wide, sloped 1–2% away for drainage. Add 2–4 inches compacted crushed gravel (use geotextile in clay), set stones level, then backfill and tamp in lifts for lock-in. Keep going to see how to fine-tune alignment, cuts, and finishing cover.
Key Takeaways
- Choose edging stones suited to soil, moisture, and climate; prioritize durable, freeze–thaw rated materials for long-term stability.
- Plan straight lines with stakes and string, or smooth curves by swinging a string compass; mark the final path with spray paint.
- Excavate a trench burying 1/3–1/2 the stone height, wider than the stone, and slope 1–2% for drainage away from beds.
- Build a stable base with compacted crushed gravel or coarse sand, using geotextile in clay or frost zones to prevent shifting.
- Set stones level and plumb, then backfill and tamp in lifts, rechecking stringline every few feet for a clean, consistent finish.
Choose the Best Edging Stones for Your Yard
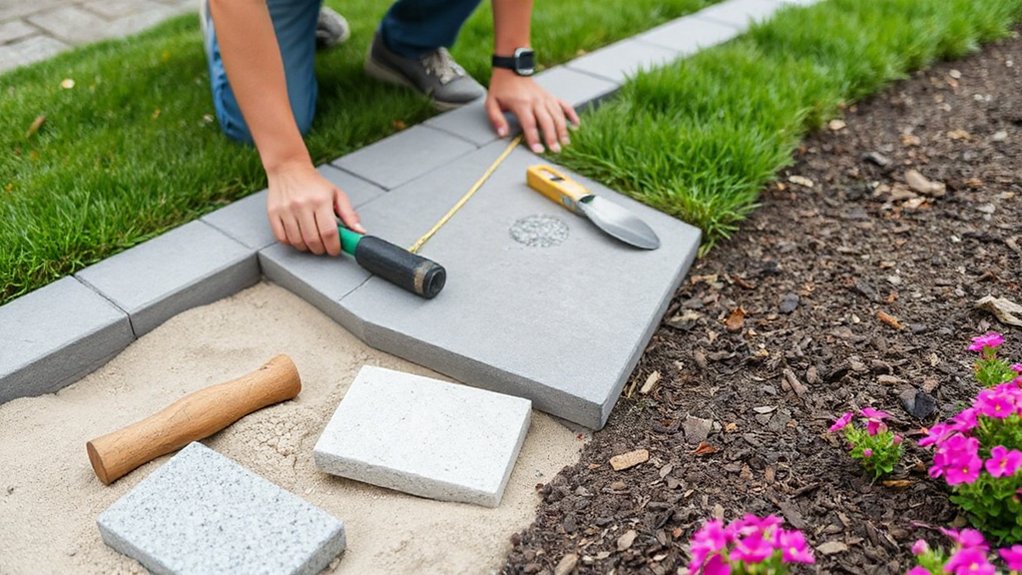
Before you break ground, match your edging stones to your yard’s conditions—soil type, drainage, slope, and the hardscape lines you need to define. In expansive clay, choose dense concrete or granite to resist heave; in sandy soils, heavier stone limits migration. If water lingers, avoid porous limestone and pick sealed concrete or basalt to reduce spalling. On slopes, use taller, thicker units that accept spikes or a concrete toe, so runoff won’t undercut them. Check freeze–thaw ratings and compressive strength for material durability, especially in de-icing salt zones. For aesthetic appeal, echo existing paver color, wall stone, or house trim, and choose a consistent face finish (tumbled, sawn, split) to control shadow lines.
Plan the Edging Layout (Straight or Curved)
Decide whether you’re running a straight line along a fence or driveway edge or sweeping a curve around a bed, because the choice sets your cut lengths and joint spacing. Mark the layout with taut string for straight runs, staking it every 4–6 ft and checking alignment against fixed site references like corners or slab edges. For curves, pin the string to a series of stakes to form a smooth radius, then walk the line and adjust until the arc reads clean from your main viewing angles.
Decide Straight Vs Curved
Although edging stones can follow almost any line, you’ll get cleaner cuts and tighter joints if you choose a straight run or a sweeping curve up front and mark it on the ground. Go straight where you need crisp separations: along patios, drive edges, fence lines, and narrow side yards. Straight runs simplify base grading, keep consistent reveal, and maximize structural stability because each stone bears evenly against its neighbors. Choose a bend where the bed widens, wraps a tree, or shifts around a feature; a broad radius reads intentional and boosts ornamental appeal. Avoid tight bends that force gaps or require excessive trimming. Check sightlines from primary viewpoints (porch, path, window) and confirm mower-wheel clearance and drainage fall before committing.
Mark Layout With String
Once you’ve chosen a straight run or a broad curve, lock it in on the ground with a tight string line so the stones follow a consistent face. Drive wooden stakes at both ends, then pull mason’s line taut at finished-edge height. On slopes, step the string in short sections to reflect grade changes instead of letting it sag. For curves, anchor a center stake and swing the line like a compass, or use multiple stakes to “fair” the arc with even tension. Measure offsets from the string to fixed points (walkway edge, fence) to verify parallel spacing. Mark the trench line with spray paint directly under the string. This precision improves landscaping aesthetics and makes future garden maintenance easier and faster overall.
Get the Right Tools and Base Materials
Before you break ground, you’ll stage essential edging tools—spade or trenching shovel, hand tamper or plate compactor, rubber mallet, masonry chisel/saw, and a level—so you can cut, seat, and align stones on-site without stoppages. You’ll also choose a base system that matches soil and load: compacted crushed stone (road base), leveling sand, or a concrete bed where freeze–thaw or traffic demands extra restraint. For measuring and layout, you’ll run a tight string line (or flex hose for curves), mark paint/chalk lines, and verify elevations with a tape measure and line level to keep the edge consistent across the run.
Essential Edging Tools
To set edging stones straight and keep them from creeping over time, you’ll need a tight tool kit and the right base materials matched to your site’s soil and drainage. Start with layout control: stakes, mason’s line, tape, and marking paint to lock curves and sight lines for Gardening aesthetics. Use a trenching spade or half-moon edger for clean cuts, plus a mattock for roots and compacted clay. Keep grade consistent with a 2–4 ft level and a straightedge; check fall away from beds where water pools. Compact with a hand tamper in tight runs, or a plate compactor on long, open borders. Set stones with a dead-blow mallet, and use knee pads and gloves. A stiff broom and shop vac speed Edging maintenance cleanup.
Base Material Options
If your edging line heaves, settles, or drifts, the base material is usually the culprit, so match what you place under the stones to your soil type and how water moves through the edge. In sandy, fast-draining soils, set stones on 2–3 in of compacted 3/8-in minus crushed gravel for interlock and Material durability. In clay or frost-prone zones, add a geotextile separator, then 3–4 in of crushed gravel to reduce pumping and freeze-thaw lift; keep the base sloped slightly away from beds. For decorative, low-load borders on stable loam, a 1–2 in bedding layer of coarse sand can fine-tune grade and boost aesthetic appeal. Avoid rounded pea gravel; it migrates and won’t lock.
Measuring And Layout Gear
Although edging stones look forgiving once they’re set, your layout tools determine whether the line stays true through curves, grade changes, and tight shifts at walks or drives. Start with a 25–50 ft tape, marking paint, and a stout stringline on stakes. Use a line level or laser level to reference finished height, especially where edging meets pavement. For curves, swap string for a garden hose or flexible strip, then pin the radius with landscape staples before you paint. Carry a framing square to keep corners crisp and a 4-ft level to check cross-slope so runoff doesn’t saturate adjacent garden soil. Mark utility lines and root zones; you’ll protect plant health by avoiding deep cuts near trunks. Keep extra flags for joints and cut points.
Dig the Trench (Depth, Width, and Slope)
Once you’ve locked in the layout line, cut and excavate a trench that matches the stone’s geometry and the site’s drainage. Set depth so the edging’s bottom bears on undisturbed subgrade and your reveal stays consistent; typically, bury 1/3 to 1/2 of the stone. Make the trench width the stone thickness plus 2–3 inches to allow positioning and backfill without sloughing. Keep sidewalls near-vertical in cohesive soils; in sand or disturbed fill, cut a slight batter and plan soil stabilization with temporary boards or geotextile to prevent cave-ins. Grade the trench with a 1–2% fall away from beds toward a safe outlet, maintaining continuous slope. Use trench reinforcement at roots, utilities, or soft spots to prevent raveling.
Build a Compacted Base for Edging Stones
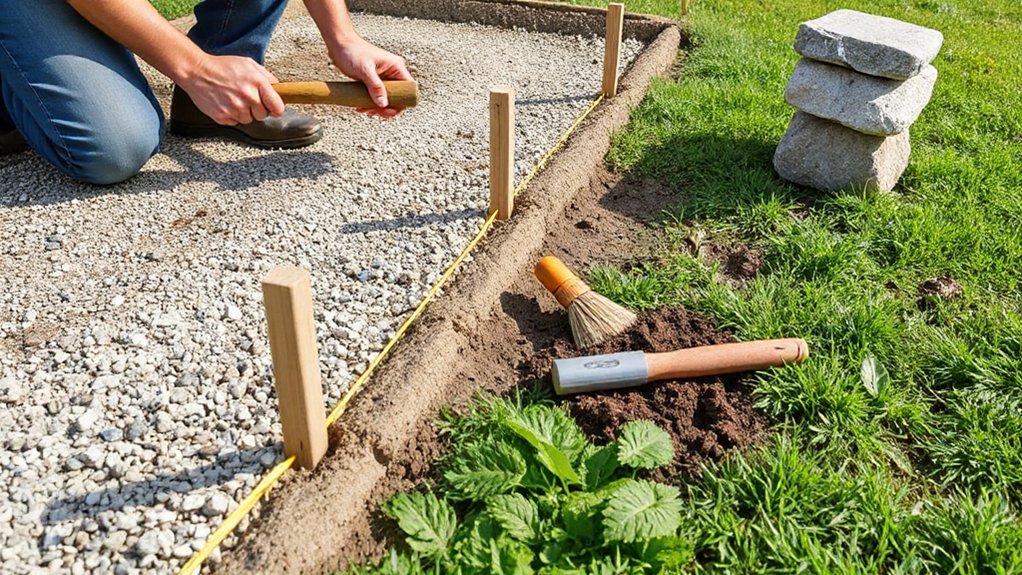
After you’ve excavated to grade, build a stable, drainable base so the stones don’t settle or roll under foot traffic and freeze–thaw. Start soil preparation by trimming loose sidewalls and raking the trench bottom flat, then compact the native subgrade with a hand tamper in 3–4 passes, focusing on soft spots. For weed control, lay permeable landscape fabric only where persistent rhizomes are present, overlapping seams 6 inches and pinning it tight. Add 2–3 inches of 3/4-inch minus crushed stone (or decomposed granite in tight curves), wet it lightly, and compact in 1–1.5 inch lifts until it feels firm and doesn’t pump under pressure. Check thickness with a ruler and maintain consistent base depth along the run.
Set Edging Stones Level and in a Clean Line
Before the base dries out and loosens, start setting stones from a fixed reference point—typically a corner, a straight run off a patio edge, or a staked stringline—so the whole course tracks true. Dry-fit three to five units first to confirm stone selection, joint rhythm, and any tapers you’ll need on curves. Set each stone into the bedding, press down evenly, and check top elevation with a 2–4 ft level; correct by lifting and shaving or adding a thin skim of bedding, not by rocking the stone. Keep faces plumb with a small torpedo level. For line alignment, sight along the front arris, then verify to the stringline at multiple points. Maintain consistent gaps and rotate stones to hide chipped edges.
Backfill, Tamp, and Lock the Edging in Place
With the stones set to line and level, lock that alignment in by backfilling immediately so the bedding can’t shift under load. Shovel native soil or 3/8-inch minus aggregate tight against the outside face, filling in 2–3 inch lifts. If your site has sandy loam, mist lightly to help it knit; if it’s clay, break clods so voids don’t settle later and compromise soil stability.
Tamp each lift with a hand tamper, working parallel to the edge so you don’t kick stones inward. Check stringline every 3–4 feet, and correct before the backfill stiffens. Cap the last inch with topsoil or mulch on the bed side, and consider decorative options like river rock or decomposed granite on the path side.
Frequently Asked Questions
How Do I Prevent Weeds From Growing Between Edging Stones?
Stop weeds by excavating joints, laying geotextile, and packing polymeric sand or crushed fines, then wet-set. Apply pre-emergent for weed control, edge-mulch lightly, and follow planting tips: keep runners away, spot-spray promptly.
Can Edging Stones Be Installed Over Existing Concrete or Pavers?
Yes, you can install edging stones over existing concrete or pavers if the surface is stable and level. Material selection matters; use thin-set or construction adhesive. Installation tips: clean, etch, prime, and check drainage slope.
How Do I Handle Edging Around Sprinkler Heads and Irrigation Lines?
You’ll locate irrigation lines, then trench edging outside them, keeping 2–3 inches clearance. Set stones with cutouts around heads, allow Sprinkler adjustment access, sleeve crossings for Irrigation protection, and backfill gently to avoid shifting fittings.
What Maintenance Keeps Edging Stones From Shifting Over Time?
You’ll keep edging stones from shifting by re-compacting base gravel yearly, topping joint sand, and resetting low units promptly. Check drainage and frost heave zones; adjust edging design, prioritize stone durability, and trim roots nearby.
Do I Need Permits or HOA Approval to Add Garden Edging?
Often yes—you’ll need HOA approval, and permits vary; about 40% of U.S. homes fall under HOAs. Check your city zoning for garden bed edging height/setbacks, and HOA rules for decorative options, materials.
Conclusion
Now you’ve chosen durable stones, mapped your straight or sweeping curve, and built a compacted gravel–sand base that won’t heave after freeze-thaw. You’ve set each unit to grade with a stringline and level, then backfilled and tamped to lock joints tight. Take one last pass like a Roman surveyor with a laser level: check reveals, reset any proud edges, and broom in fines so water sheds cleanly and the line stays crisp.
About the Author