
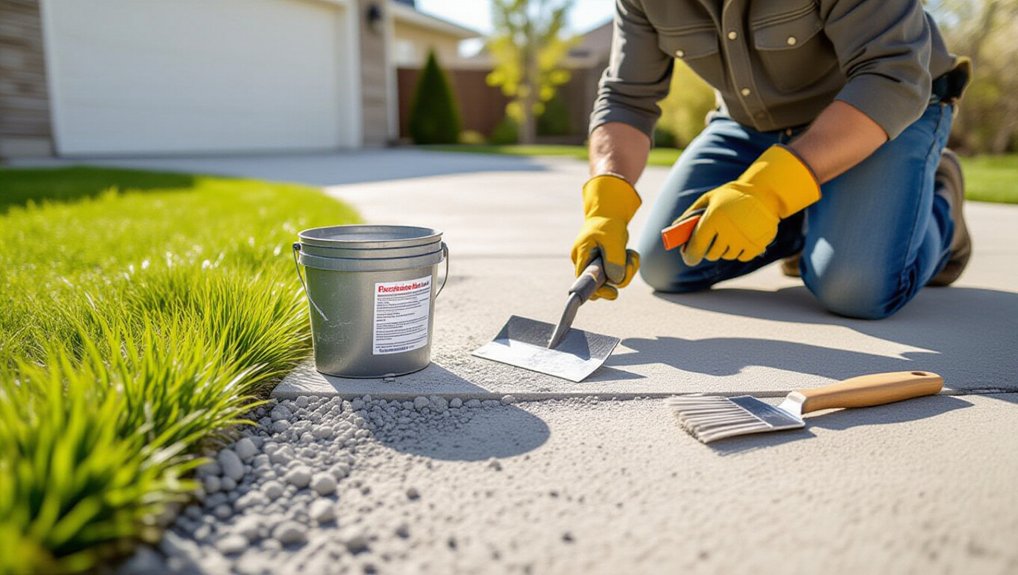
Repairing cracked driveway edges isn’t always a huge job. Start by fixing drainage, since water erodes soil under the thin edge and creates voids; regrade, extend downspouts, and clear joints. If cracks are hairline with no vertical offset and the edge feels solid, you can DIY: wear gloves, eye protection, and an N95, chisel to sound concrete with an undercut, wire-brush, vacuum, dampen, then apply bonding agent and a repair mortar. Finish with a penetrating sealer and cure 24–72 hours. Next, you’ll see when to patch, form, or call a pro.
Key Takeaways
- Confirm it’s DIY: hairline, stable cracks with no vertical offset; settling, voids, roots, or widening cracks need a pro.
- Fix water causes first: regrade soil away, extend downspouts, and clear joints so runoff can’t undermine the edge.
- Prep properly on a budget: chisel to sound concrete, undercut edges, wire-brush, vacuum dust, and dampen before patching.
- Use affordable materials correctly: fill cracks with concrete crack sealant, and rebuild edges with vinyl concrete patcher plus bonding agent.
- Protect the repair: cure as directed, avoid traffic 48–72 hours, then seal exposed edges every 2–3 years for freeze-thaw resistance.
Why Driveway Edges Crack (Water, Weeds, Freeze)
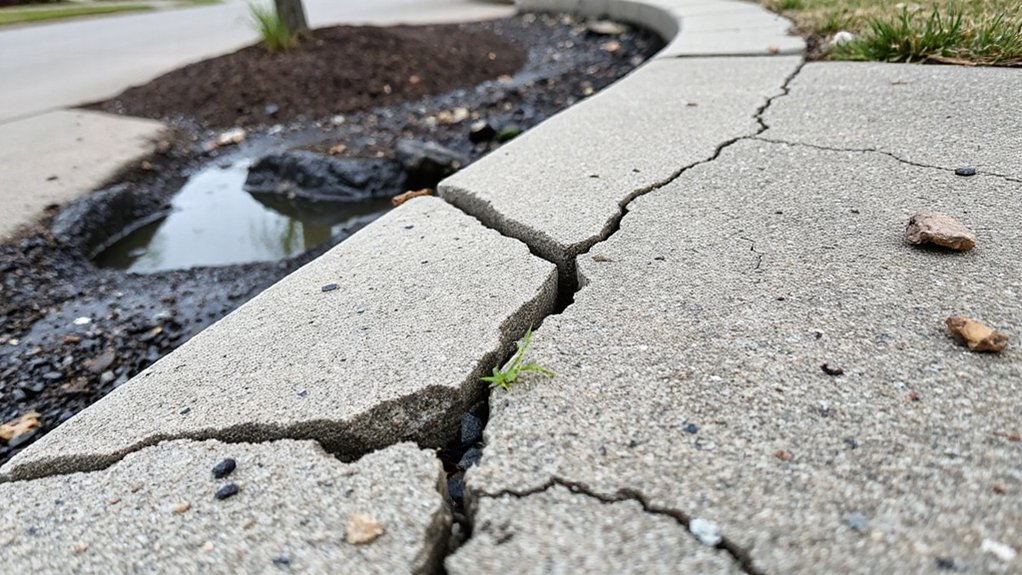
Although driveway edges look solid, they crack first because they’re thin, lightly supported, and constantly exposed to water and plant growth. Water runs off the slab, saturates the adjacent soil, and erodes base material, leaving voids that let the edge flex under tires. When you skip driveway maintenance, clogged joints and poor grading keep moisture against the concrete, accelerating scaling and microcracking. Weeds worsen it: roots pry open hairline cracks, trap moisture, and funnel more water below the edge. In freeze-thaw climates, trapped water expands about 9% as it freezes, jacking the edge upward, then dropping it as thawed soil softens. Keep landscape edging from directing irrigation onto the slab, and wear gloves when probing cracks for sharp aggregate.
DIY or Pro for Driveway Edge Cracks?
If you’re deciding between a DIY patch and calling a pro, start by judging the crack’s size, movement, and what’s happening under the edge. Hairline, stable cracks with solid subgrade and no vertical offset usually suit DIY; you can clean, prep, and monitor without specialized tools. If the edge is settling, rocking, or spalling in chunks, a pro can diagnose base failure, drainage, and load transfer issues.
Choose a pro when cracks run through control joints, widen over time, or appear after heavy vehicle loads. Also hire out if you see voids, undermining from runoff, or nearby tree roots. For safety, avoid grinding or cutting without PPE and dust control. Consider landscape integration and aesthetic considerations so repairs match grade and borders.
Choose a Driveway Edge Fix: Patch vs Replace
You’ll choose between patching and replacing based on total cost (materials, tool rental, and your time) versus the risk of failure if the edge keeps moving. Use a damage-severity checklist—spalling depth, crack width, loose sections, and base washout—to decide whether a patch can structurally bond or if full removal is safer. Match the fix to your tools and skill level, and don’t skip PPE (eye protection, gloves, and a dust mask) when cutting, grinding, or mixing cementitious products.
Patch Vs Replace Costs
A smart driveway-edge fix starts with a clear cost comparison between patching and full replacement, because each option carries different material, labor, and risk tradeoffs. You’ll typically spend less upfront on patching: polymer-modified concrete, bonding agent, and forms, plus basic tools. However, you may pay more later if the patch debonds or spalls, so evaluate Material durability and expected service life. Full replacement costs more due to saw-cutting, removal, disposal, subbase prep, and rebar or fiber reinforcement, but it reduces callbacks and joint failures. For safety, budget for PPE, silica-dust control, and traffic isolation. If you hire help, labor often exceeds materials, especially for demolition and forming. Include curing time in your schedule and costs.
Damage Severity Checklist
Cost only tells part of the story, so check the damage severity before you decide whether patching will hold or replacement makes more sense. Start by mapping cracks: hairline (<1/8 in.) with no vertical offset usually patches well; wider cracks, spalling, or missing chunks at the edge signal deeper failure. Measure differential settlement: if one side sits >1/4 in. lower, replacement is safer because freeze-thaw and wheel loads will reopen repairs. Probe the base: soft, pumping, or eroded soil under the edge means the slab has lost support. Look for rebar exposure, repeated heaving, or drainage concentrating at downspouts—these justify full edge removal. Finally, assess Driveway aesthetics and landscaping integration; misaligned edges telegraph repairs and can trip pedestrians.
Tools And Skill Level
Before you pick patching or full edge replacement, match the repair to the tools you can safely control and the skill you can execute cleanly. Start with a tools overview: wire brush, cold chisel, hammer, shop vacuum, margin trowel, mixing bucket, bonding agent, and patch mix. You’ll also need PPE—gloves, eye protection, N95, and hearing protection if you cut concrete. If you can clean to sound concrete, undercut loose edges, and trowel a tight feather-to-zero without leaving voids, patching fits your skill level assessment. Choose replacement only if you can saw-cut straight lines, compact base, set forms, mix to proper slump, and finish without overworking. When unsure, rent tools and practice on scrap.
Cheap Tools for Cracked Driveway Edge Repair
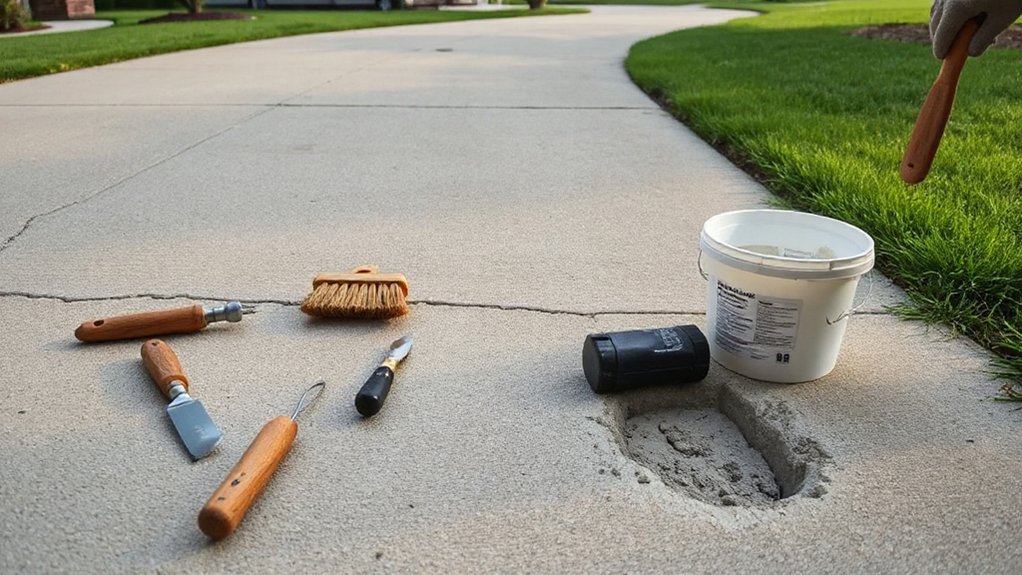
If you’re repairing cracked driveway edges on a tight budget, you can still get clean results with a small set of low-cost, high-utility tools: a stiff wire brush for removing loose concrete and debris, a cold chisel and 2–3 lb hand sledge for undercutting weak edges, and a margin trowel plus a cheap pointing trowel for packing and shaping patch material. Add nitrile-coated work gloves, ANSI Z87.1 safety glasses, and hearing protection; small chips fly fast. A $10–$20 shop vacuum or broom helps control dust around garden edging and decorative borders. Use a 5-gallon bucket and a drill with a $6 mixing paddle (or a paint-stir stick) to blend repair mix consistently. Keep a spray bottle for light misting during placement, and a straightedge for checking line and height.
Prep the Edge So the Patch Sticks
With your basic tools on hand, focus next on surface prep, because patch materials fail most often when they’re bonded to dust, laitance, or crumbling concrete instead of solid edge. Put on safety glasses, gloves, and a dust mask before you disturb concrete fines.
Chisel or grind back to sound material, undercutting slightly where you can so the repair has a mechanical “key.” Wire-brush aggressively, then vacuum; don’t just sweep. Flush with a hose, then remove standing water so the edge stays damp, not dripping. For Edge stabilization, set temporary forms or a straight board to support weak corners and protect the margin from impact. Finally, widen and clean hairline cracks with a crack chaser or blade to improve Crack prevention by eliminating loose lips and hidden debris.
Patch Driveway Edge Cracks (No Missing Chunks)
Although edge cracks don’t have missing concrete, you still need to bond and seal them so water can’t work under the slab and pry the margin apart through freeze–thaw and wheel loads. Wear nitrile gloves, eye protection, and a respirator if you’ll grind. Open hairline cracks with a V-groove blade or cold chisel to roughly 1/4 in. wide, then blow out dust with compressed air. Brush on concrete bonding adhesive if your patch system requires it. Gun in a flexible polyurethane crack sealant, pushing the nozzle deep to avoid voids. Tool it flush with a putty knife for clean driveway aesthetics. Broadcast fine sand for texture and slip resistance. Keep traffic off until cured; this improves crack prevention.
Rebuild a Broken Driveway Edge With a Form
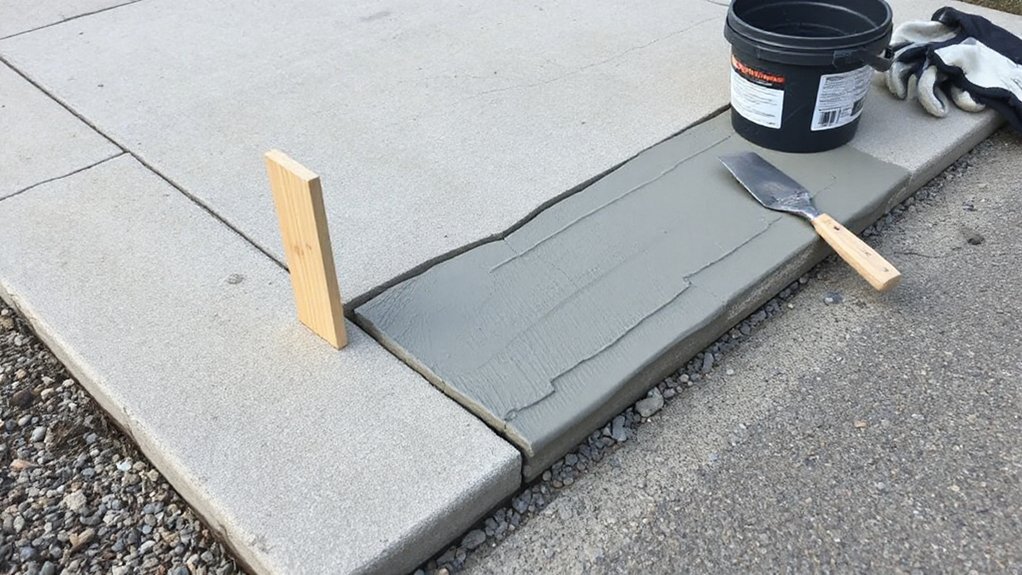
Hairline edge cracks seal up well, but once the driveway margin has snapped off or crumbled away, sealant won’t hold shape—you need to rebuild the edge using a temporary form and new concrete. Put on gloves, eye protection, and a dust mask, then chisel back to sound concrete with a cold chisel and hammer. Undercut slightly so the patch keys in. Brush and vacuum dust, then wet the area to SSD (damp, no standing water). Stake a straight 2×4 or plywood form tight to the edge, matching the original profile for Landscaping aesthetics. Mix a polymer-modified repair concrete suited to your driveway materials, pack it firmly, rod it level, and trowel the face smooth. Keep traffic off while it cures.
Seal the Repaired Driveway Edge to Block Water
Pick a concrete-compatible sealer that matches your exposure (freeze–thaw, de-icers, UV) and wear nitrile gloves plus eye protection to prevent skin and splash contact. Apply it in thin, continuous coats with a brush or roller, keeping full edge coverage and avoiding puddles that can cure soft or slippery. Let it cure for the full manufacturer-specified time, then protect the area from rain, dust, and traffic so water can’t wick into the repair.
Choose The Right Sealer
Once your patch has cured to the manufacturer’s minimum time, seal the repaired driveway edge so water can’t wick into the bond line and reopen the crack during freeze–thaw cycles. Pick a sealer matched to your driveway: penetrating silane/siloxane for porous concrete, or acrylic film-formers for older, stable slabs needing mild sheen. Verify Sealant compatibility with your patch material (polymer-modified, epoxy, or cementitious) and any existing sealer; incompatible layers can blister or delaminate. Check label specs for moisture tolerance, UV resistance, and de-icing salt protection. Prioritize low-VOC products to reduce Environmental impact, and avoid coal-tar sealers near lawns or drains. Wear chemical-resistant gloves and eye protection, and guarantee ventilation. Choose a product rated for your climate’s temperature range.
Apply Sealer For Coverage
With the right sealer selected and the patch past its minimum cure time, you’re ready to apply it in a way that creates continuous coverage over the repaired edge and adjacent concrete. Wear chemical-resistant gloves, eye protection, and a respirator if the label requires it; guarantee ventilation. Sweep and blow off dust, then mask nearby asphalt, brick, or garage doors to prevent staining. Stir, don’t shake, to avoid bubbles that weaken film build. Cut in along the edge with a brush, then roll or spray a thin, even coat 4–6 inches onto sound concrete to bridge pores and microcracks. Maintain a wet edge and back-roll to level. For color matching, feather the overlap and avoid puddles. Proper thickness improves Sealer longevity without trapping debris.
Cure Time And Protection
After you lay down the sealer, you’ve got to protect it through its cure window so it actually blocks water instead of trapping it. Follow the label: most acrylic sealers need 24–48 hours dry time; solvent-based products may need longer. Keep foot traffic off immediately, and block vehicles for at least 72 hours or until the film feels hard, not tacky.
Control moisture and temperature. Don’t seal if rain’s forecast within 24 hours, if the slab’s below 50°F, or if dew will form overnight. Rope off the edge, set cones, and place plywood bridges if you must cross. Prevent runoff by directing sprinklers away and keeping mulch and soil back for clean landscaping integration. A uniform cure also preserves Driveway aesthetics and reduces edge spalling.
Stop Driveway Edge Cracks From Returning
Although patching the edge will make your driveway look solid again, you won’t keep cracks from reappearing unless you remove the stresses that caused them in the first place. Control water first: regrade soil to slope away, extend downspouts, and keep joints clear so runoff can’t undermine the edge. Add compacted gravel backfill along the shoulder, then cap with topsoil to support landscaping integration without trapping moisture. Don’t let vehicles ride the edge; paint a guide line until habits change. If tree roots are lifting the slab, cut roots only if safe and permitted, then install a root barrier. Seal exposed edges with a concrete sealer every 2–3 years to protect driveway aesthetics and limit freeze-thaw spalling. Wear gloves and eye protection.
Frequently Asked Questions
How Long Should I Keep Cars off the Repaired Edge?
Keep cars off the repaired edge for 48–72 hours; wait 7 days for full cure. Use sealing techniques after initial set, and add edge reinforcement before loading. You’ll prevent cracking, spalling, and unsafe failures.
What’s the Best Repair Method for Asphalt Driveway Edges?
Use a saw-cut, excavate loose edge, compact base, then place hot-mix asphalt and compact; add driveway reinforcement with edging or geogrid. Finish with asphalt sealing after cure. Wear PPE, control dust.
Can I Repair Driveway Edges in Winter or Rainy Weather?
Yes, but only if you control moisture and temperature—72% of asphalt failures trace to water intrusion. In winter weather or rainy conditions, don’t patch; use temporary cold-mix, improve drainage, and keep surfaces dry, slip-safe.
How Can I Match the Patch Color to Existing Concrete?
You’ll match patch color by using tinted repair mix, trial batches, and wet-on-dry color blending with your existing slab. Keep patch consistency identical, damp-cure, and seal uniformly. Wear gloves, goggles, and avoid silica dust.
Will Repairing the Edge Affect My Driveway’s Drainage Slope?
Yes—if you build the patch proud, you’ll change runoff; 1/8” per foot slope moves water fast. To limit drainage impact and prevent slope alteration, you’ll screed flush, check grade, and wear PPE.
Conclusion
You’ve turned a crumbling driveway edge into a tight seal—like a levee holding back water. Keep it that way: let patches cure fully, then seal the repair to block moisture, salt, and weed roots. Watch for hairline cracks after freezes; touch them up before they widen. Wear gloves, eye protection, and a dust mask when sanding or mixing. Clean runoff and tools promptly so grit doesn’t become tomorrow’s fracture line.
About the Author



