You’ll catch small roof flashing gaps early by checking penetrations (chimneys, vents, skylights), sidewalls, valleys, and drip edges for lifted laps, shadow lines, cracked sealant, corrosion streaks, or loose fasteners. Inside, look for localized ceiling stains, blistered paint, musty odors, or damp attic sheathing near those junctions. Inspect only in dry, calm weather with a stable ladder and fall protection. Clean, dry, then reseal pinholes with butyl tape or roof-rated polyurethane, and refasten into solid decking. Keep going to see storm checks and common mistakes.
Key Takeaways
- Inspect common gap zones: chimneys, vents, skylights, valleys, step flashing, headwalls, and drip edges at eaves and rakes.
- Look for lifted laps, shadow lines, wrinkled metal, corrosion streaks, cracked sealant, and exposed or missing fasteners.
- Check indoors for early intrusion: localized ceiling stains, blistered paint, musty odors, damp sheathing, or rusted nail heads near penetrations.
- In dry weather, clean debris and reseat loose edges; seal pinholes and fasteners with UV-rated roof sealant compatible with the flashing material.
- Replace split vent boots or deformed flashing, and call a pro if daylight shows, reglet/counterflashing is missing, or rot and active leaks appear.
Where Roof Flashing Gaps Usually Form
Because flashing has to bridge changes in plane and protect joints that naturally move, small gaps most often show up at roof penetrations and shifts—chimneys, plumbing vents, skylights, dormer sidewalls, and where a roof meets a vertical wall (including kickout and step flashing locations). You’ll also find gaps where metal transitions occur: valley-to-flashing tie-ins, drip edge at eaves and rakes, and around counterflashing reglet cuts. Inspect exposed fasteners, sealant laps, and hemmed edges for separation after thermal cycling; darker Roof color can increase heat gain and movement. Follow fall protection, keep three points of contact, and don’t lift shingles in high winds. Prioritize gutter maintenance so overflow doesn’t back up behind fascia metal or soak wall flashings. Check for corrosion or loose masonry joints nearby.
Spot Flashing Gap Signs Inside the House
Although roof flashing gaps start outside, you’ll often catch the earliest warning signs indoors—so inspect the highest ceilings and the areas directly below chimneys, vents, skylights, dormers, and wall/roof intersections for sharp, localized clues. Look for brown rings, damp drywall seams, blistered paint, or sagging texture that appears after wind-driven rain or snowmelt. Check trim and nail heads for rust bleed, and probe suspected spots with a moisture meter to confirm active wetting. In closets and upper corners, note musty odors, dark speckling, or peeling wallpaper—especially when Indoor humidity runs high. In the attic, use a flashlight and stay on framing; don’t step on insulation. Scan for wet sheathing, stained rafters, or compressed insulation, and verify attic ventilation isn’t blocked.
Spot Roof Flashing Gaps on the Roof
On the roof, you’ll check the most common flashing gap locations—chimneys, sidewalls, valleys, skylights, and plumbing vents—where movement and fastener wear often open seams. Look for lifted edges, cracked or missing sealant, exposed nail heads, rust, or daylight at overlaps, and note any displaced shingles that leave flashing unprotected. Inspect safely: use a stable ladder, wear non-slip footwear and fall protection where required, avoid wet/windy conditions, and keep your hands free by using a tool belt.
Common Flashing Gap Locations
Even if your shingles still look tight, small flashing gaps often open up at roof change points where materials move and fasteners loosen. Start at step flashing along sidewalls and dormers, then check headwall flashing where a roof meets vertical siding. Inspect valleys where two slopes intersect, and look at counterflashing at chimneys, skylights, and masonry parapets. Pay close attention to plumbing vent boots, B-vent collars, and any roof-to-deck ledger penetrations. At eaves, examine drip edge shifts and fascia returns; overflow from clogged gutters can stress joints, so include gutter maintenance in your routine. Use a stabilized ladder, fall protection, and avoid walking on brittle roofing materials. Confirm fasteners and laps follow manufacturer instructions and local code.
Visual Signs Of Separation
Before you pull fasteners or add sealant, spot the early visual cues that flashing has separated so you can address the issue without trapping water. Look for lifted edges at step, apron, and counterflashing laps; even a 1/8-inch shadow line can signal capillary pathways. Check for wrinkling, oil-canning, or bent kickouts that break the intended shingle-to-flashing plane. Staining matters: dark streaks below joints, rust bleed, or white oxidation often marks repeated wetting. Watch sealant joints for cracking, shrinkage, or gaps at terminations, especially where dissimilar metals meet. Poor Color matching can indicate prior patching; mismatched pieces may not meet Material durability needs or compatible corrosion resistance. Note exposed fastener heads and elongated holes too.
Safe Roof Inspection Steps
Although you can spot many flashing gaps from the ground, you’ll get the most reliable read by inspecting the roof with fall protection and a controlled approach: set a stable extension ladder (4:1 angle, rails at least 3 ft above the eave, tied off if possible), wear a harness to an appropriate anchor, and work only on a dry, low-wind surface with shoes that grip. Keep three points of contact and carry tools in a belt, not your hands. Start at penetrations: chimneys, plumbing vents, skylights, and sidewall step flashing. Look for lifted edges, nail pops, split sealant, or missing counterflashing. Don’t block Roof ventilation paths at ridge or soffit while you work. Note wet decking near vents that can indicate attic insulation saturation below. Mark findings, then descend safely.
Do This Quick Flashing Check After Storms
After a heavy storm passes, run a quick, ground-level flashing check to catch small gaps before water gets driven under the roof covering. Stay off wet or damaged surfaces and follow your local code’s safety requirements for access and fall protection. Walk the perimeter and scan step flashing, counterflashing, valleys, and vent boots for lifted edges, missing fasteners, bent metal, or exposed sealant lines. Look for debris piles at transitions; they can wick water and hide separations. Note discoloration on soffits or fascia that suggests overflow. As part of storm preparedness, document any suspected gaps with date-stamped photos. Do roof cleaning only from the ground by clearing downspout outlets and visible splash blocks, so drainage works as designed. If you see openings, schedule prompt repair.
Safe Tools for a DIY Flashing Inspection
Since roof-edge work turns a minor check into a fall hazard fast, use tools that let you inspect flashing from the ground or a properly secured access point: binoculars or a zoom phone camera for close-up views, a bright flashlight to rake light across seams and lifted edges, and a stable extension ladder rated for your weight and set on firm, level footing (tie off when required). Wear cut-resistant gloves and safety glasses before you touch metal edges. Carry a non-contact voltage tester if you’ll work near service drops. Use a plastic putty knife to probe gently without scratching coatings. Mark suspect spots with painter’s tape, not nails. Keep both hands free by using a tool belt. Schedule the inspection with Roof maintenance and gutter cleaning so you’re already staged safely.
What Causes Small Flashing Gaps Over Time
Over time, you’ll see small flashing gaps form as daily heat and cold cycles make metal expand and contract, stressing seams and sealant lines. You’ll also find gaps when fasteners back out, loosen under wind uplift, or corrode, reducing clamping force and letting flashing shift. Treat these conditions as a water-entry risk and inspect from a stable, tied-off position before you attempt any adjustment.
Thermal Expansion And Contraction
Even if your flashing was installed tight to the deck and sealed correctly, daily temperature swings make the metal and surrounding roofing materials expand and contract at different rates. That mismatch creates thermal stress at laps, corners, and connective points, slowly pulling sealant lines thin and opening hairline separations along edges.
You’ll see it most around chimneys, skylights, and wall intersections where movement concentrates. Material expansion is greatest on dark, sun-exposed slopes, then reverses fast when clouds or night cooling hits. Over time, repeated cycling can “ratchet” the flashing slightly, leaving a visible gap that catches wind-driven rain. To manage movement, verify required clearances at joints, use compatible sealants rated for roof temperatures, and keep overlaps sized per manufacturer instructions. Work from stable ladders, use fall protection, and avoid stepping on unsupported metal.
Fastener Loosening And Corrosion
When fasteners back out or corrode, they stop clamping the flashing tight to the roof deck and you’ll get small gaps at laps, edges, and corners. Vibration, freeze-thaw cycling, and wind uplift can work nails and screws loose, especially if you’ve missed solid decking or overdriven the head and crushed the metal. Fastener corrosion accelerates when dissimilar metals touch, coatings are scratched, or sealant traps moisture at the shank. Those failures reduce pullout resistance and can breach underlayment overlaps. For Loosening prevention, you should use corrosion-rated fasteners matched to the flashing metal, set proper embedment, and tighten to manufacturer torque without stripping. Replace rusted hardware, add approved washered screws where specified, and re-seal penetrations per code.
When a Roof Flashing Gap Needs Urgent Help
If you spot active leaking or rapid water staining near a chimney, vent, skylight, or wall-to-roof junction, treat the flashing gap as urgent and plan a same-day fix or professional service. Don’t wait for the next storm: saturated sheathing can rot quickly and trigger mold. Treat any daylight visible at step flashing, missing counterflashing reglet, lifted sealant line, or loose fasteners at metal junctions as a priority. If water tracks behind siding or stains ceilings, the assembly may already be bypassing the secondary water barrier. You should stop using ladders in wind, rain, or icy conditions and follow fall-protection rules. Schedule qualified evaluation if you can’t confirm proper overlap, underlayment tie-in, or code-compliant clearance. Keep Roof maintenance and Gutter cleaning current.
Fast Temporary Fixes to Stop Water Now
Active leaking at a flashing joint means you need a stopgap measure immediately, then a proper repair as soon as conditions allow. Work only in dry, calm weather; use fall protection, stable ladders, and keep clear of power lines. First, divert water: clear debris, check downspouts, and improve Gutter maintenance so runoff doesn’t back up under flashing. From the roof, gently lift the Roof material just enough to place a temporary slip-sheet of compatible membrane or metal, shingled to shed water. Seal only as a last resort: apply exterior-grade, UV-rated roofing sealant to small pinholes or exposed fasteners, not as a bridge across moving joints. Press, tool, and verify drainage, then monitor after the next rain event.
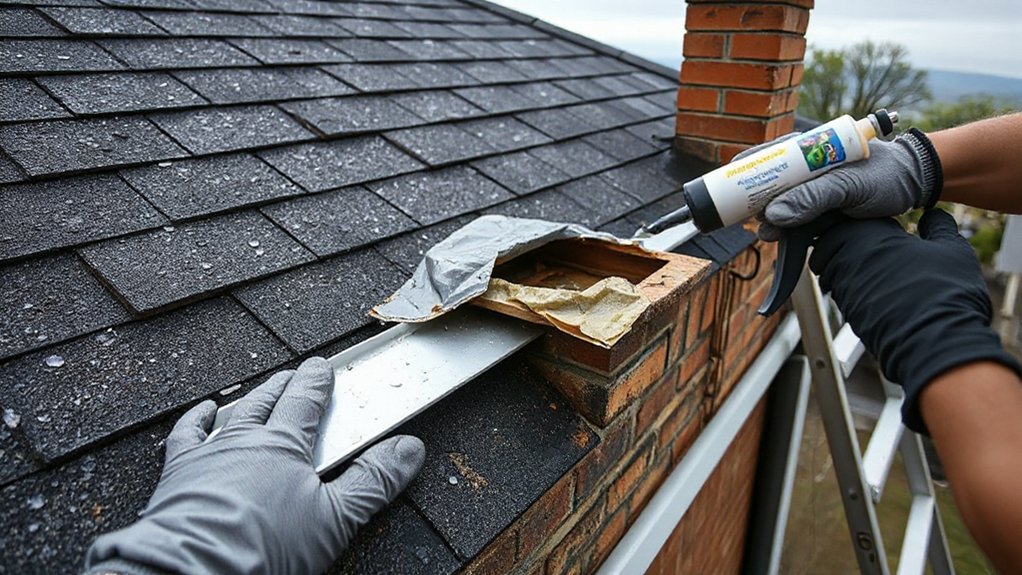
Fix Step Flashing Gaps at Walls and Chimneys
Even though step flashing looks simple, small gaps at a wall or chimney can route water behind the roof covering and into the sheathing fast. Work dry, use fall protection, and confirm your ladder and anchors meet OSHA and local code.
Carefully lift each shingle course, remove loose nails, and replace bent or short step flashing. Each piece should overlap the one below by at least 2 inches and extend up the wall 4 inches (or per code). Match corrosion-resistant metal to your Roof material to prevent galvanic reaction. Re-nail high, never through the exposed lower edge, then re-seat shingles. At chimneys, check counterflashing reglet and repair mortar joints before resetting. Finish with Gutter maintenance so runoff doesn’t back up at the wall line.
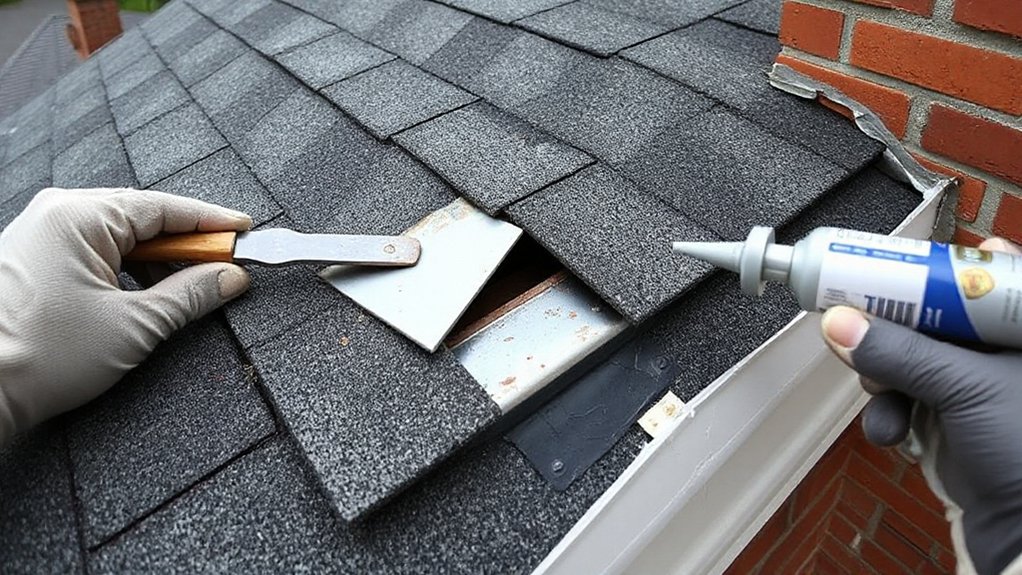
Seal Flashing Gaps Around Vents and Pipes
Start by inspecting each vent and pipe penetration for gaps at the pipe boot seal, split rubber, loose fasteners, or lifted flashing, and don’t step on brittle boots while you work. Clean and dry the surfaces, then apply roofing sealant in a continuous, tooled bead at the flange and around fastener heads per the manufacturer’s instructions—don’t rely on sealant to bridge large voids. If the vent flashing is cracked, deformed, or UV-rotted, you’ll replace the boot/flashing assembly to restore a code-compliant, watertight seal.
Inspect Pipe Boot Seals
Up on the roof, where do small leaks around vents usually begin? They often start at the pipe boot seal, where UV and movement crack the rubber and open a capillary gap. Use fall protection, dry shoes, and stable ladder access, and avoid stepping on brittle shingles. Check that the boot’s flange lies flat under the upper courses and over the lower courses, with fasteners set per manufacturer and local code. Inspect the Vent gasket for splits, hardening, or shrinkage, and look for staining at the pipe joint that signals seepage. Confirm the boot fits tight to the pipe without wrinkles or gaps. If you find deterioration, plan prompt repair before the next storm and document conditions for records.
Apply Roofing Sealant Correctly
After you’ve confirmed the pipe boot and flashing are intact, seal only the small, clean gaps that can wick water. Work on a dry roof, wear slip-resistant footwear, and use fall protection where required. Brush away grit, then wipe with a solvent approved by the sealant manufacturer so you don’t trap debris.
Choose a roof-rated polyurethane or butyl sealant compatible with asphalt and metal. Cut the nozzle small, apply a continuous bead along the joint, and tool it firmly to bridge the gap without blocking weep paths or creating dams. Keep sealant off shingle laps so water still sheds. Observe cure times and temperature limits. This Roof maintenance step strengthens your Weatherproofing techniques and reduces leak risk.
Replace Cracked Vent Flashing
Sealant can handle hairline gaps, but a cracked vent boot or split flashing collar won’t stay watertight and needs replacement. Set up fall protection, wear cut-resistant gloves, and work on a dry roof. Lift surrounding shingles carefully, remove fasteners, and slide out the old flashing without damaging underlayment. Install a new boot sized to the pipe, centered, and lapped correctly under the upper course and over the lower course for proper drainage. Nail where code allows, keep fasteners high, then re-seat shingles and seal exposed nail heads with compatible roofing cement. Don’t block Roof ventilation paths or compress attic insulation while working around vent stacks. Finish by water-testing and inspecting from the attic for dampness.
Repair Valley Flashing Gaps Without Trapping Water
Because valleys carry the highest volume of runoff, you need to close small flashing gaps in a way that preserves a clear drainage path and doesn’t create a dam. Set ladder and fall protection per OSHA, then inspect the valley for lifted edges, fasteners in the water channel, or sealant voids. Match your repair to the roof material: open metal valleys need hemmed edges and compatible butyl tape; shingle valleys need intact underlayment and cut lines that keep the centerline open. Remove debris, dry the area, and re-seat the flashing with corrosion-resistant nails placed outside the flow line. Use a high-quality polyurethane sealant only at laps, not across the channel. Verify overlap per code and check for Weather impact issues like ice backup.
Fix Skylight Flashing Gaps and Corner Lifts
While skylights look straightforward, their step flashing, head flashing, and corner shifts create multiple leak paths when even a small gap opens up or a corner lifts. Set up fall protection, then remove shingles around the curb to expose the flashing without damaging the roof material. Verify the curb is square and fastened to framing; resecure loose corners with approved corrosion-resistant fasteners at manufacturer spacing. Replace bent step pieces, ensuring each course overlaps the one below and extends up the curb per code. Check head flashing for proper uphill coverage and add an ice-and-water membrane patch only where it remains shingle-lapped. Reinstall shingles with correct offset and nail placement. Keep weep paths clear so condensation drains and ventilation airflow stays unobstructed.
Reseal Small Flashing Gaps With Roof Caulk
For small flashing gaps that don’t require replacement, you can reseal them with roof-rated caulk that’s compatible with your flashing metal and roofing material and approved for exterior UV exposure. You’ll get a code-sound seal by cleaning and drying the joint, then laying a continuous, controlled bead that fully bridges the gap without smearing onto the shingle water path. Work from a stable ladder or roof anchor point, wear gloves and eye protection, and keep the sealant off hot flues and other high-heat surfaces.
Choose The Right Caulk
Before you crack open a tube, choose a roof caulk that matches your flashing material and your roof’s exposure so the seal stays watertight and code-worthy. For Choosing sealant, verify the product is labeled for roofing and exterior UV exposure, and check the temperature range for application and service life. Use polyurethane or tripolymer for most metal and masonry connections; use butyl for high-movement laps where the manufacturer approves it. Avoid painter’s acrylics and generic silicone unless the flashing manufacturer specifies silicone compatibility, since some won’t adhere or may trap dirt. Confirm it’s paintable if needed and rated for wet/dry cycling. Read the SDS, wear gloves and eye protection, and keep ignition sources away from solvent-based products.
Apply A Clean Bead
You’ve picked a roof-rated caulk that matches the flashing and exposure, so now focus on laying down a clean, continuous bead that actually seals. Work on a dry, debris-free surface; brush off grit, then wipe with a manufacturer-approved solvent if allowed. Keep three points of contact on the ladder and wear cut-resistant gloves and eye protection. Cut the nozzle to match the gap width, pierce the seal, and run steady pressure so the bead bridges both materials without voids. Tool it lightly within the caulk’s open time to force contact and shed water, not trap it. Don’t smear onto shingles; match Roof color only if specified by the manufacturer. Keep caulk clear of Attic insulation and vents. Let it cure fully before rain exposure.
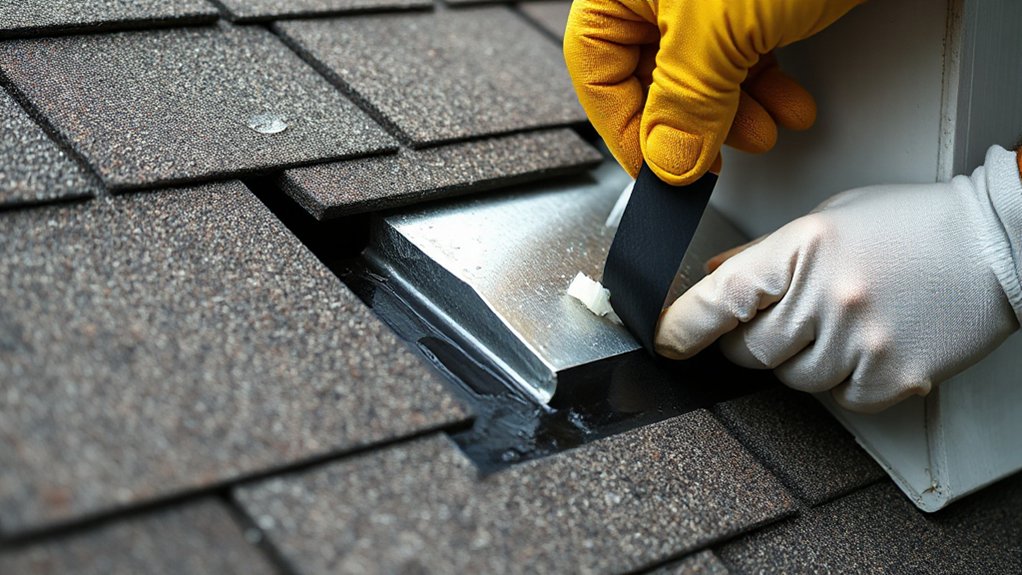
Seal Pinhole Leaks With Butyl Flashing Tape
Where do those maddening pinhole leaks in flashing seams come from? UV aging, freeze-thaw cycling, and grit trapped at overlaps can open tiny channels that bypass sealant. Start with Roof debris removal so tape bonds to sound metal, not dirt. Work on a dry roof, wear cut-resistant gloves, and use fall protection per local code and manufacturer instructions.
To seal pinhole leaks, scrub the seam with a non-residue cleaner, then dry it fully. Prime if the tape maker requires it. Cut butyl flashing tape long enough to extend past the defect by at least 2 inches each way, center it over the seam, and roll it hard with a steel roller to eliminate voids. Lap tape edges shingle-style to shed water. Inspect for wrinkles and tight adhesion.
Refasten Loose Flashing Safely (No Cracking)
Butyl tape can seal a seam, but it won’t stop leaks if the flashing itself has lifted or shifted and leaves a capillary gap. Set up fall protection, stabilize your ladder, and work on a dry roof. Gently lift the edge with a plastic putty knife so you don’t crease or crack thin flashing materials. Re-seat the piece tight to the roofing material, keeping the required overlap and shingle course alignment. Drive corrosion-resistant roofing nails or exterior screws only where the manufacturer allows, into solid decking or framing—not just sheathing edges. Pre-drill metal to prevent splitting, and keep fasteners flush, not overdriven. If a fastener hole is elongated, move the fastener slightly upslope and cover per spec. Recheck for movement.
Mistakes That Make Flashing Leaks Worse
Even if the gap looks minor, a few common “quick fixes” can violate manufacturer instructions and code requirements and turn a manageable seep into a recurring leak. Don’t smear roofing cement over step flashing; it traps water, cracks, and blocks designed drainage paths. Don’t drive nails through exposed metal where water sheds; you’ll create capillary leaks and void warranties. Don’t bend flashing tight against siding or stucco; codes require clearance so water can exit and materials can move. Avoid mixing dissimilar metals that accelerate corrosion. Don’t skip underlayment repairs beneath lifted shingles, and don’t reuse deformed flashing. For Roof flashing maintenance, follow specified fasteners, laps, and sealants. Finally, don’t rely on gutter protection to solve flashing failures; keep gutters clear and downspouts directed away.
Frequently Asked Questions
Will My Homeowner’s Insurance Cover Damage From a Flashing Gap Leak?
Your homeowner’s insurance might cover flashing-gap leak damage if it’s sudden and accidental, but it often won’t cover wear, poor maintenance, or gradual seepage. Document promptly, mitigate hazards, and prioritize leak prevention to support insurance coverage.
How Much Does a Professional Flashing Repair Typically Cost?
You’ll typically pay $200–$800 for professional flashing repair. About 90% of roof leaks start at penetrations, so prioritize Cost considerations and repair timing. You’ll get code-compliant flashing, proper fasteners, sealant, and fall-protection.
What’s the Best Season or Temperature Range for Sealing Flashing Gaps?
Seal flashing gaps in mild, dry weather—ideally spring or fall—around 50–80°F. For Seasonal timing and Temperature considerations, avoid freezing heat, wet decks, or high wind. Follow sealant specs, use fall protection.
Do Roof Flashing Repairs Require a Permit or HOA Approval?
You might need a permit or HOA sign-off; it depends on roof flashing regulations and your HOA approval process. Call your building department and review covenants before work. Use licensed, insured pros and follow fall-protection.
How Long Should a Proper Flashing Repair Last Before Needing Maintenance?
You can expect 10–20 years before maintenance if you install matching flashing material correctly; ignore it and water will wage war overnight. You’ll extend repair longevity by sealing per manufacturer, using PPE, and meeting local code.
Conclusion
Ignore that tiny flashing gap if you enjoy surprise indoor waterfalls and a “spa day” for your insulation. Or, do the sensible, code-minded thing: inspect after storms, keep three points of contact, and stay off steep or wet roofs. Clean, dry, and reseal small separations with approved roof sealant or butyl tape, then refasten without overdriving fasteners. When metal’s bent, corroded, or improperly lapped, stop—call a qualified roofer before the leak “graduates.”