
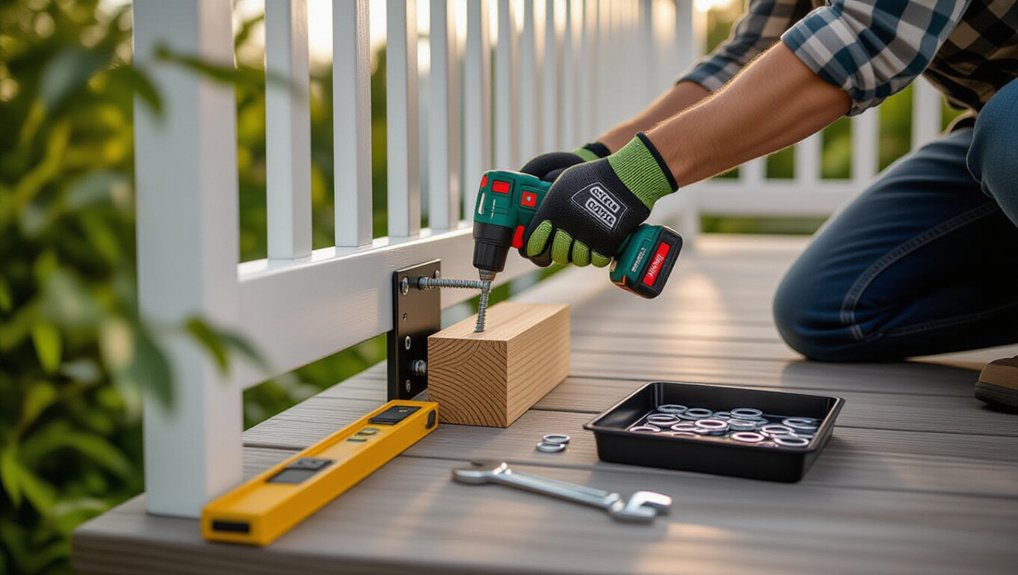
Treat a loose outdoor handrail as a fall hazard, so block access and tag it “Do Not Use” until it’s secure. Brace it temporarily with a 2×4 to a solid element, then locate the wobble at the rail, bracket, or post by pushing and pulling near each support. Tighten or replace corroded fasteners with exterior-rated screws or through-bolts into studs, sound wood, or approved masonry anchors, then seal penetrations to stop water. Next, you’ll see how to load-test and prevent future movement.
Key Takeaways
- Treat a loose handrail as a fall hazard; test gently, locate movement at rail, bracket, or post base before repairing.
- Control access: tape off steps, post “Do Not Use Rail” signs, and work in dry daylight with proper PPE.
- Tighten or replace corroded/missing fasteners using exterior-rated hardware, correct pilot holes, and snug torque without overtightening.
- Fix stripped wood holes with hardwood dowels and exterior epoxy, or upgrade to through-bolts with washers and locknuts.
- Verify post anchors and surrounding material for rot or cracked concrete, then seal bases and fasteners to prevent water intrusion.
Decide If the Loose Handrail Is Dangerous
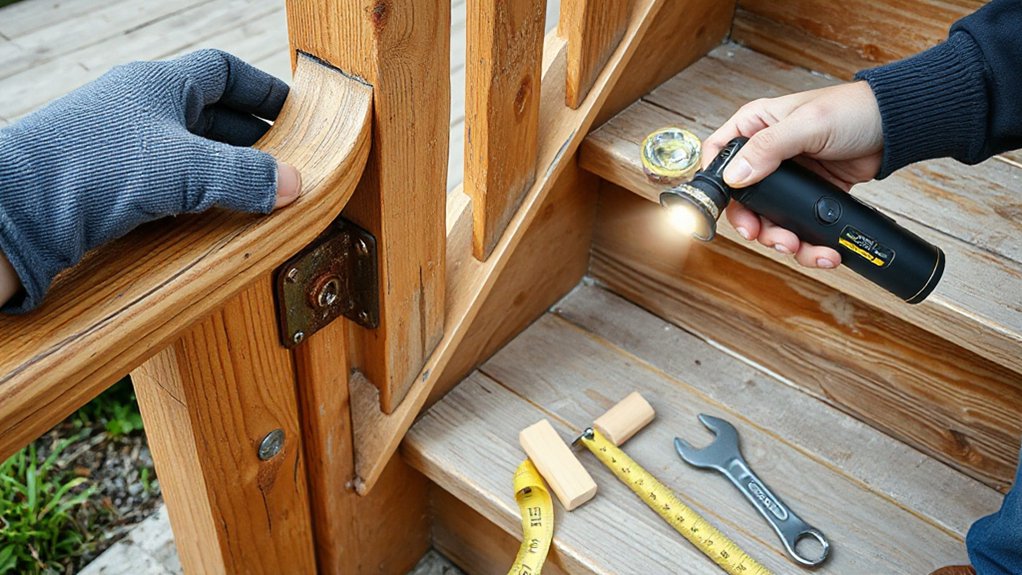
A loose outdoor handrail isn’t automatically an emergency, but you should treat it as a potential fall hazard until you confirm otherwise. Test it with controlled pressure in multiple directions: push down, pull outward, and shake lightly while keeping your feet planted. If it shifts more than a slight flex, wobbles at posts, or makes grinding sounds, assume it can’t support a fall-arrest grab.
Check for missing fasteners, rotted wood, split post bases, cracked welds, or spalling masonry at anchors. Verify the handrail height and continuity meet local code, and confirm it can withstand expected loads. Don’t ignore Handrail aesthetics; cosmetic covers can hide failures. Preserve historical accuracy by identifying original materials and attachment methods before planning repairs.
Stabilize the Railing Temporarily (If Needed)
If you can’t complete a permanent repair right away, stabilize the handrail so nobody relies on a shaky grab point in the meantime. Block access first: tape off the steps, post a “Do Not Use Rail” tag, and provide an alternate route if possible. For Temporary stabilizing, brace the rail to a solid element with a 2×4 or adjustable support post, then secure it using rated exterior screws or through-bolts with washers—never drywall screws. Add a temporary clamp at the railing joint only if it fully captures the member and can’t slip. As a quick fix, tighten any accessible fasteners to snug, but don’t overtighten and strip wood. Keep bracing clear of walking paths and trip hazards. Recheck stability daily until repairs are completed.
Locate the Wobble: Rail, Bracket, or Post
With the rail temporarily stabilized, you’ll pinpoint the exact failure point before you tighten or replace anything. Push and pull the rail to confirm where movement starts, then inspect each bracket for loose, missing, or corroded fasteners seated into solid framing. Finally, rock each post at the base to verify it’s rigid and properly anchored, since a moving post requires a different code-compliant fix than a loose rail or bracket.
Check Rail Movement
Before you tighten anything, test the handrail’s movement so you can pinpoint exactly where it’s failing—at the rail itself, the bracket connection, or the post/base. Put on gloves and eye protection, clear the steps, and work in dry conditions. Grip the rail near each support and push/pull in three directions: up/down, in/out, and side-to-side. Note whether the motion is localized at one point or transfers along the run. If the rail twists between supports, you’re likely dealing with rail deformation or a failed splice. If the entire assembly rocks with the post, the issue is at the post/base. Mark suspect locations with tape so you don’t damage Decorative finishes during Historical restoration work.
Inspect Bracket Fasteners
Now that you’ve identified where the rail moves, inspect each bracket fastener to confirm whether the wobble comes from loose hardware, stripped holes, or a failing bracket. Put on eye protection, then support the rail so it can’t shift while you work. During bracket inspection, check every screw or bolt head for backing out, corrosion, or missing washers. Try fastener tightening with the correct driver to avoid cam-out; tighten evenly, but don’t over-torque and crush wood fibers or deform metal. If a fastener spins without biting, flag it as a stripped hole. If the bracket flexes, cracks, or pulls away from the mounting surface, treat it as compromised. Verify all hardware seats flush, and recheck for movement at the bracket only.
Test Post Stability
If the brackets and fasteners check out, test the post itself to pinpoint where the movement starts. Grip the post near the top and push/pull in line with the rail, then perpendicular to it. Watch the base: if the post moves while the rail stays steady, you’ve found the culprit. If only the rail flexes, inspect the rail splice or internal sleeve. If the bracket shifts against the post, you likely have crushed wood or an oversized hole. For safety and code compliance, don’t rely on “tight enough”; verify the post can resist firm body-weight loading without racking. Mark movement with painter’s tape, then recheck after tightening. Maintain handrail aesthetics by choosing repairs that match finishes and respect design considerations.
Find the Failed Joint: Screws, Bolts, or Wood Rot
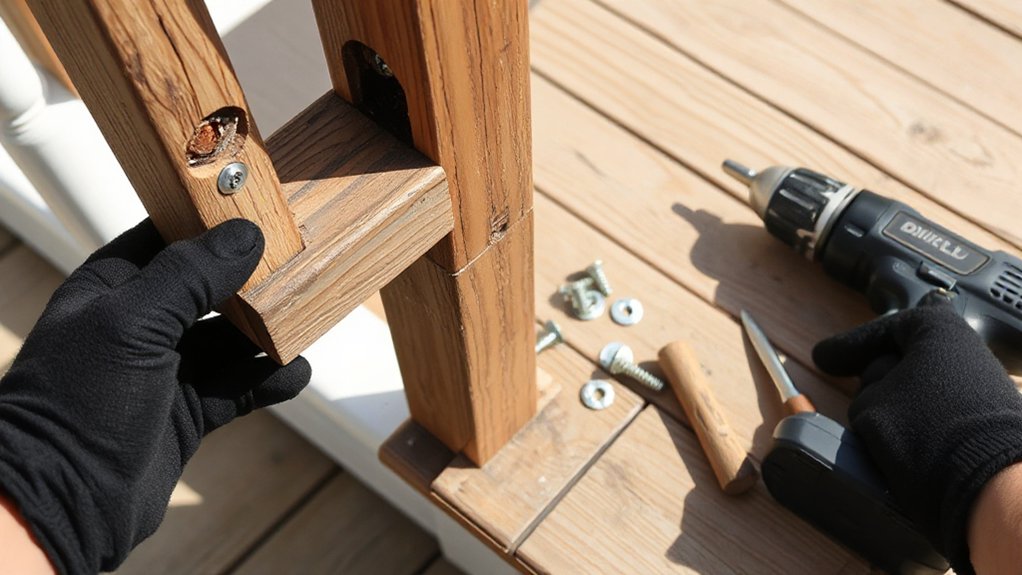
Although a loose handrail can feel like a simple tighten-and-go fix, you’ll get a safer, code-compliant repair by pinpointing exactly which joint has failed—loose screws, a shifting through-bolt, or deteriorated wood at the post, bracket, or rim joist connection. Start by removing any paint touch ups or decorative accents that hide fasteners. With a bright light, look for enlarged screw holes, stripped heads, rust bleed, and gaps that open when you push the rail sideways. Grab the rail and load it in the direction a fall would pull; watch each bracket and post base for movement. Check through-bolts for washer bite, crushed fibers, and ovalized holes. Probe wood with an awl; soft, punky areas signal rot that can’t hold tension.
Pick the Right Fix for Wood, Metal, or Vinyl
You’ll get a safer, code-compliant repair when you match the fasteners to the handrail material—use exterior-rated screws for wood, corrosion-resistant bolts for metal, and manufacturer-approved hardware for vinyl or composite. Choose anchors that fit the substrate too, since wood blocking, masonry, and hollow posts each require a different rated anchor and embedment depth. If the hardware isn’t listed for outdoor structural use or won’t bite into solid framing, don’t force it—swap to the correct fastener-and-anchor combination before you tighten anything down.
Match Fasteners To Material
Because outdoor rail systems mix wood, metal, vinyl, and masonry parts, match your fasteners to the exact material at the loose connection so the repair stays tight and code-compliant. Start by identifying what the screw or bolt is biting into, not just what the bracket is made of, then plan for Material compatibility and smart fastener selection.
For exterior wood, use corrosion-resistant structural screws or through-bolts with washers to prevent pull-through and splitting. For steel or aluminum rails, use stainless fasteners and isolate dissimilar metals with nylon washers to reduce galvanic corrosion. For vinyl components, don’t overtighten; use machine screws with backing plates where allowed so you don’t crack the sleeve. Replace stripped or rusty hardware immediately, and torque fasteners evenly so the rail won’t twist under load.
Choose Material-Specific Anchors
When a handrail loosens outdoors, the anchor matters as much as the fastener, so choose an anchor that matches what’s behind the bracket—solid wood, hollow metal, vinyl sleeve, or masonry—before you tighten anything. For solid lumber, use exterior-rated structural screws or lag bolts into sound framing; if the hole’s stripped, reset with a larger diameter or a threaded insert made for wood. For hollow metal posts, don’t rely on sheet-metal threads alone; use rivet nuts, through-bolts with backing plates, or expansion anchors rated for the gauge. For vinyl-wrapped posts, penetrate to the structural core; add a trim ring and sealant to prevent water entry. Masonry needs sleeve or wedge anchors set to required embedment. Prioritize Material compatibility in Anchor selection.
Gather Tools and Exterior-Rated Fasteners
Before you touch a loose handrail, stage the right tools and exterior-rated fasteners so the repair meets basic safety expectations and holds up to weather. Bring a drill/driver, bits, torque setting, level, tape, square, stud finder, and a pry bar. Keep a vacuum and brush for clean seating surfaces, plus a caulk gun for exterior sealant. Use stainless or hot-dip galvanized structural screws, lag screws, and washers rated for treated lumber and exterior exposure; avoid interior zinc. Match fastener length to embedment and edge-distance needs, and keep manufacturer load ratings on hand. If you must preserve Decorative finishes or Historical accuracy, stage painter’s tape and touch-up materials. Wear gloves and eye protection.
Set Up a Safe Work Zone on Steps or Deck
Even if the handrail only wiggles a little, treat the steps or deck as a fall-hazard and set a controlled work zone. Block access at the top and bottom with cones or tape, post a warning sign, and route people to an alternate entry. Work in dry weather and full daylight; keep treads clean, swept, and free of hoses, cords, and debris. Wear eye protection, cut-resistant gloves, and non-slip footwear, and use hearing protection if you’ll drill. Set a stable ladder only on level ground and maintain three points of contact. Protect Decorative finishes with painter’s tape and drop cloths. Confirm Material compatibility for any cleaners or rust removers so you don’t damage coatings or accelerate corrosion. Keep pets and kids away.
Tighten Loose Handrail Screws and Bolts
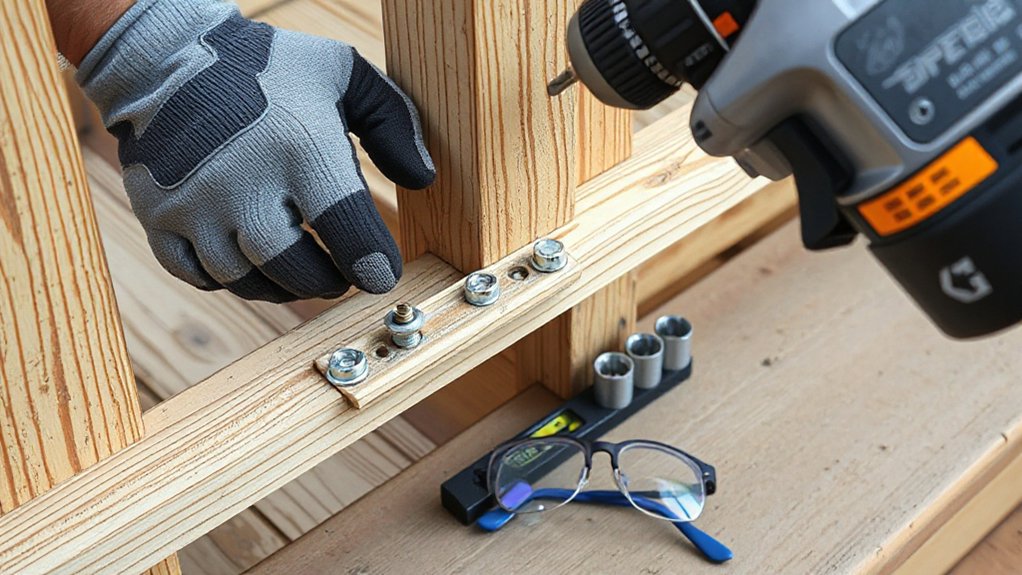
Although a small wobble can seem harmless, you should treat any loose handrail fastener as a safety defect and tighten it immediately with the correct tool and hardware. Use Safety precautions: keep three-point contact, wear gloves and eye protection, and support the rail so it can’t shift while you work.
Match the driver to the head (Phillips, Torx, hex) to avoid stripping, then snug screws and bolts evenly—don’t overtighten and crush wood fibers or deform metal brackets. For Material selection, confirm the fastener is exterior-rated (stainless or hot-dip galvanized) and the washer type matches the bracket so the head seats flat. Tighten until the rail feels rigid and the bracket doesn’t gap, then recheck each connection after applying firm hand pressure along the rail.
Reset Loose Brackets With New Fasteners
When a bracket still wiggles after you’ve tightened it, reset the connection by removing the bracket, inspecting the mounting surface for rot, cracks, or wall-anchor failure, and installing new exterior-rated fasteners sized for solid framing (not just sheathing or trim). Support the rail so it can’t drop, and verify you’re fastening into a stud, post, or blocking. Clean the bracket and contact area with Cleaning tools, then dry-fit and mark holes level. Use stainless or hot-dipped galvanized screws/bolts compatible with treated lumber; match diameter and length to achieve full embedment without splitting. Pre-drill as required, drive fasteners straight, and torque snug—don’t crush fibers. Seal penetrations with exterior sealant. Recheck deflection and confirm graspability and bracket spacing meet local code. Consider Design ideas for wider backing plates.
Fix Stripped Screw Holes in Wood (Plug or Epoxy)
If a handrail bracket still feels loose after you’ve upgraded the fasteners, treat the stripped screw holes in the wood as a failed connection and rebuild them before you rehang the rail. Remove the bracket, probe the hole, and cut back to solid wood. For a plug repair, drill the hole clean and round, then glue in a hardwood dowel with exterior-rated adhesive; align grain when possible. Let it cure fully, then trim flush. For epoxy filling, use a structural, exterior wood repair epoxy; mix per label, pack the void completely, and keep it proud for sanding after cure. Keep surfaces dry, remove rot, and don’t rely on filler over punky wood.
Upgrade to Longer Screws and Proper Pilot Holes
After you’ve restored solid wood at the bracket, upgrade the connection with longer, exterior-rated structural screws and correctly sized pilot holes so the fasteners bite deep without splitting the post or rail. Select screws long enough to reach sound wood (often 2-1/2 to 4 inches), with corrosion protection rated for treated lumber and coastal exposure. Drill a pilot hole matching the screw’s root diameter, and add a clearance hole through metal brackets so threads don’t bind and jack the joint apart. Countersink only if the hardware allows full bearing. Drive screws straight with controlled torque; stop when the bracket seats tight, not when fibers crush. Touch up exposed heads to maintain Decorative finishes and other aesthetic enhancements while preserving weather resistance.
Use Through-Bolts When Screws Won’t Bite
Even with longer structural screws and correct pilot holes, you can still hit punky cores, oversized holes, or hardware that simply won’t hold torque, so switch to a through-bolt connection that clamps the rail and post together. Drill a straight, level hole through both members, then install a galvanized or stainless bolt sized for exterior loads. Use a washer under the bolt head and under a locknut to spread bearing stress and prevent crushing. Tighten until snug; don’t overcompress wood fibers. For code-minded safety, keep edge distances per fastener guidelines and avoid splitting by drilling cleanly. Verify Material compatibility between treated lumber and your metal to prevent corrosion. Cover exposed hardware with Decorative accents like bolt caps, but don’t hide inspection access points.
Reinforce a Loose Post at the Base (Post Anchor)
Start by inspecting the post anchor and surrounding concrete/wood for rust, cracks, rot, or fastener pullout, and don’t reuse compromised hardware. If the anchor’s sound but loose, re-secure it with code-approved expansion bolts set to the proper embedment and torque, then recheck the post for plumb. Finish by sealing the base and fastener penetrations with exterior-grade sealant so moisture can’t wick in and loosen the connection again.
Inspect Post Anchor Damage
Because a loose handrail often traces back to a failing post anchor, inspect the base connection before you tighten anything. Put on gloves and eye protection, then check for movement at the post-to-concrete interface while a helper lightly rocks the rail. Confirm post stability by looking for gaps, crushed shims, or a tilted base plate that suggests the post’s no longer plumb. Examine fastener heads and the anchor body for Anchor corrosion, stripped threads, elongation of bolt holes, or cracked welds. Probe rusted areas with an awl; soft metal means loss of section and capacity. Inspect surrounding concrete for spalling, radial cracks, or moisture staining. If you find severe rust, cracking, or looseness, treat the anchor as compromised and restrict use until repaired.
Secure With Expansion Bolts
When the post itself is sound but the base plate shifts on the slab, you can lock the anchor down with properly sized expansion bolts. Shut off access, wear eye/ear protection, and confirm the rail height and post plumb meet local code before fastening. Mark new holes through the plate, avoiding cracks and edges. Drill with a hammer drill to the bolt maker’s diameter and embedment, vacuum dust, then set the anchors. Tighten nuts evenly in a cross pattern so the plate seats flat without bending; don’t overtighten and spall concrete. Recheck plumb and handrail rigidity, then torque to spec. Touch up hardware for Handrail aesthetics. Add maintenance tips: periodically re-torque and inspect for movement after freeze-thaw cycles.
Seal Base Against Moisture
Even if you’ve tightened the anchors, water can still wick under the base plate and loosen the post again through corrosion and freeze–thaw movement, so seal the base once the rail is plumb and solid. Clean the concrete and plate, then dry it fully. Mask the perimeter and apply a continuous bead of exterior polyurethane or MS polymer sealant around all edges, tooling it to shed water away from the post. Don’t block any required weep holes; if none exist, leave a small gap on the downhill side. Wear gloves and eye protection, and follow cure times before loading the rail. For Creative decor, you can color-match the sealant. If the railing has Historical significance, choose a reversible, non-staining sealant and avoid grinding or drilling.`
Add Blocking Behind Deck Rim-Joist Mounts
If your handrail post bolts only clamp to the deck’s rim joist, that rim can flex and the connection will loosen over time, so add solid blocking directly behind the rim at each post location. Use preservative-treated 2x lumber the same depth as the joists, and fasten it tight between the adjacent joists, flush to the rim. Pre-drill to prevent splitting, then install two structural screws or through-bolts per end, following the fastener manufacturer’s schedule. Keep hardware hot-dip galvanized or stainless for treated wood compatibility. Reinstall the post, through-bolt it through rim and blocking with washers on both sides, and torque snug. Seal penetrations, then touch up Decorative finishes with careful paint matching to protect cuts.
Secure a Loose Wall-Mounted Handrail (Hit Studs)
To secure a loose wall-mounted handrail, you’ll first locate the wall studs precisely with a stud finder and a small test hole, not just drywall anchors. You’ll then re-seat each bracket so at least one fastener per bracket bites into solid framing, using code-appropriate structural screws of the correct length for full embedment. Don’t reuse stripped holes—shift the bracket slightly or upgrade the mounting layout so every connection is tight, aligned, and load-ready.
Locate Studs Accurately
Because a handrail’s strength depends on what it’s fastened to, you’ll need to locate studs precisely before you reattach any brackets. Scan the wall with a stud finder and mark both stud edges, then mark the centerline; verify by finding two studs at 16 or 24 inches on center. If you’re on masonry or concrete, you won’t have studs—identify solid substrate and confirm thickness so you don’t drill into hollow block cores or utilities. Use painter’s tape to mark planned hole locations at least 1 inch from stud edges to reduce splitting. Probe carefully with a small bit to confirm wood resistance, then stop. If no stud aligns with a bracket, plan to relocate hardware rather than rely on wall anchors alone.
Reinforce Bracket Into Studs
Once you’ve marked solid stud centers, pull the loose bracket, set it back over the layout line, and fasten it with structural wood screws that fully penetrate the stud (not drywall screws). Pre-drill pilot holes to prevent splitting, and drive screws straight so the bracket seats flush. Use exterior-rated, corrosion-resistant screws (stainless or hot-dip galvanized) and match length to achieve at least 1-1/2 inches of embedment in framing. If old holes are wallowed out, shift slightly within the stud or plug with exterior epoxy before re-fastening. Confirm the handrail height and bracket spacing meet local code, then test by applying firm downward and lateral load. Reinstall any decorative accents and caps after tightening to protect handrail aesthetics and reduce water intrusion.
Remove Rot and Stop Water Around Fasteners
Where’s that wobble really coming from—loose hardware or hidden rot? Back out the fasteners and probe the post, tread, or rim with an awl. If the tip sinks easily or you see dark, crumbly fibers, you’ve got decay. Remove all soft wood to solid material; don’t “sister” over rot. For historical preservation or decorative finishes, lift trim carefully, label parts, and avoid prying that splinters profiles.
Next, stop water at the source. Check for gaps around bolt holes, misaligned brackets, or fasteners that bottom out before clamping. Replace rusted screws with exterior-rated stainless or hot-dip galvanized to match treated lumber requirements. Use proper washers so the bracket bears evenly, and re-drill clean, snug pilot holes to reduce water pathways.
Seal and Protect the Repair for Weather Exposure
You’ve removed the rot, corrected the fastener fit, and tightened the connection, but the repair won’t last if water can wick back into the end grain or sit around the hardware. Flood all exposed end grain with a penetrating epoxy sealer, then prime and paint or stain per manufacturer specs. Brush sealant under the handrail bracket, around bolt holes, and along any cracks; don’t trap water behind plates. Tool a thin, continuous exterior-grade polyurethane sealant bead at joints where water can pool, leaving a small weep path at the lowest edge. Use hot-dip galvanized or stainless hardware for Material durability, and match coatings to avoid galvanic corrosion. Confirm your Handrail design keeps a drainage gap from siding or trim.
Load-Test the Handrail and Prevent Future Wobble
Before you call the job finished, load-test the handrail in a controlled, code-minded way so you can confirm it won’t loosen again under real use. Put on gloves, clear the landing, and check every fastener for full thread engagement. Apply firm, gradual force downward and outward at mid-span and at each post—don’t jerk. You’re looking for zero movement, no squeaks, and no fastener spin. If it shifts, re-seat brackets, add blocking, or upgrade to structural screws with proper embedment.
Next, prevent future wobble: re-caulk penetrations, keep water from pooling, and tighten hardware annually. If you add Creative decoration, don’t compromise grip or clearance. On railings with Historical significance, match hardware style while meeting strength requirements.
Frequently Asked Questions
Do I Need a Permit or Inspection to Repair an Outdoor Handrail?
You often don’t need a permit for minor handrail repairs, but Permit requirements vary by city. Call your building department. If you alter height, posts, or stairs, expect an Inspection process. Keep fasteners rated, secure.
What Are the Current Code Height and Graspability Requirements for Handrails?
Like a lifeline, you’ll meet code by setting handrail height 34–38 inches above nosings; you’ll guarantee graspability with a 1.25–2 inch circular grip (or equivalent). Use durable handrail materials and follow safety standards.
Can I Repair a Loose Handrail in Freezing or Rainy Weather?
You can, but you shouldn’t unless you can keep surfaces dry and ice-free. Weather considerations matter: rain and freezing reduce adhesion and footing. Use safety precautions—delay if slippery, cover work, wear traction, gloves, eye protection.
How Do I Match Replacement Hardware to Existing Handrail Finishes?
You don’t need perfect color vision: for finish matching, you’ll bring a sample/clear photo, note metal type and sheen, then use corrosion‑rated hardware selection (stainless/galvanized) that matches existing coating; verify fit, load rating, and code requirements.
When Should I Replace the Entire Handrail Instead of Repairing It?
Replace the entire handrail when you can’t restore structural integrity, meet code-required strength, or stop recurrent movement, rot, or corrosion. If Material durability is compromised or aesthetic matching needs a new system, don’t patch.
Conclusion
You’ve tightened the fasteners, and—almost by coincidence—you’ll notice the wobble was coming from the same damp spot that’s been staining the post. Now you can finish safely: seal every penetration, cap end grain, and prime/paint or coat exposed metal so water can’t return. If it’s wall-mounted, you’ve hit studs or solid blocking, not just sheathing. Load-test gradually with body weight, then recheck torque. Schedule seasonal inspections.
About the Author



