
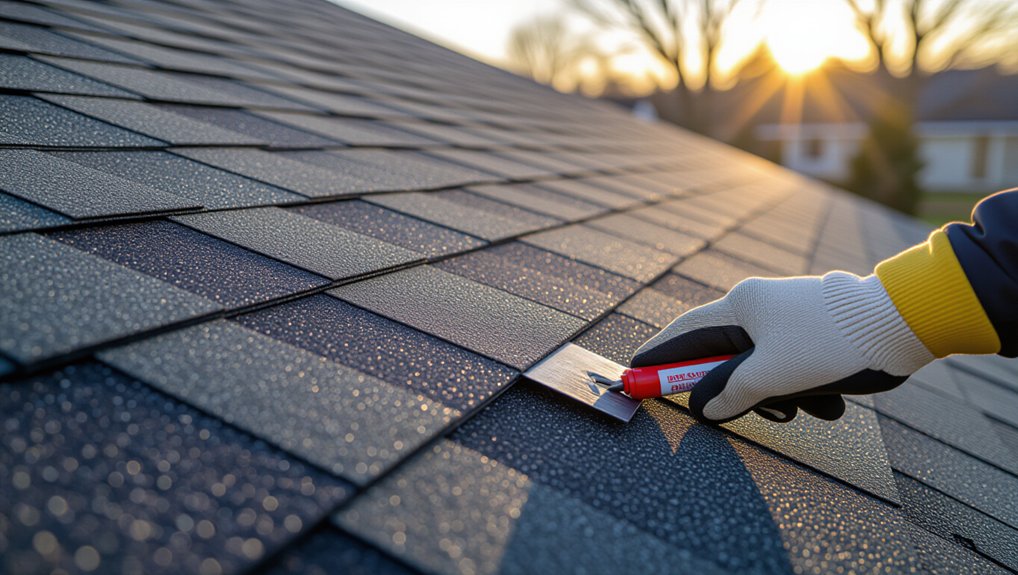
After high winds, you’ll start with a ground and attic check: look for downed conductors, arcing, gas odor, missing tabs, and fresh stains, and keep a 10‑ft exclusion zone. Don’t climb on wet, icy, spongy, or visibly sagging decking. If a tab’s sound, dry it, clean the bond line, and reset it with ASTM D4586 asphalt roofing cement. Replace torn or missing shingles and re-nail flush with corrosion-resistant roofing nails. More steps follow.
Key Takeaways
- Start with a ground safety check for downed wires, gas odors, or unstable branches, and keep a 10‑foot exclusion zone.
- Use binoculars and attic inspection to confirm lifted tabs or leaks, photographing all damage for insurance documentation.
- Don’t climb in wet, windy, or low‑visibility conditions, or if decking feels spongy, rafters sag, or the roofline deflects.
- For intact shingles, clean and dry under the lifted tab, then apply ASTM D4586 asphalt roofing cement and press 30–60 seconds.
- Re-nail or replace shingles with corrosion-resistant roofing nails at the nail line, and call a roofer for missing shingles, soft decking, or damaged flashing.
What to Do in the First 10 Minutes
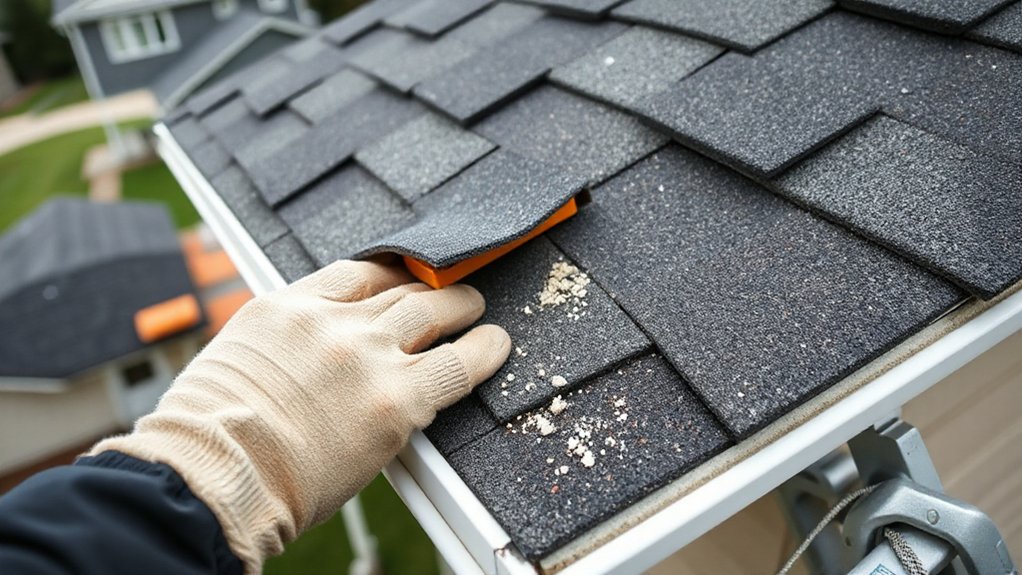
If the wind has just died down, treat your roof as a hazard zone and start with a rapid safety check from the ground. You’ll scan for downed conductors, arcing, gas odor, broken glazing, and hanging branches within the fall zone, then establish a 10-foot exclusion perimeter. Photograph shingle blow-offs, lifted tabs, and displaced ridge caps for insurance documentation. Check attic access for active leaks; if water’s entering, place buckets and plastic sheeting to protect electrical devices and drywall. Shut off power at the main breaker if circuits are wet. Apply Safety precautions: wear hard hat, eye protection, gloves, and boots; keep bystanders clear. Pull your emergency contacts list, notify property management, utilities, or emergency services if hazards exist.
Inspect Safely: When Not to Climb
Before you climb, verify weather and lighting are safe—no active gusts, wet decking, ice, or low-visibility conditions—so you don’t violate basic fall-protection requirements. From the ground, identify structural hazards like sagging roof planes, damaged sheathing, lifted ridge/hip lines, downed conductors, and unstable gutters or fascia that can’t support ladder loads. If you can’t set a ladder on firm, level footing with proper angle and tie-off, or you lack a stable anchor for fall arrest, you shouldn’t access the roof.
Assess Weather And Lighting
Although you may feel pressure to check the damage immediately, assess weather and lighting first because slick surfaces and poor visibility drive most fall hazards. Review local Weather patterns: sustained winds, gust forecasts, rain bands, lightning risk, and temperature swings that can soften asphalt or create frost. Don’t climb during active precipitation, within 30 minutes of thunder, or when winds can unbalance you on a ladder.
Verify Lighting conditions at the roof edge and ladder landing. Avoid dusk, glare, or deep shadow that hides shingle tabs and fasteners. If you can’t maintain three points of contact and a clear line of sight, postpone. Use ground-level binoculars and photos until conditions meet safe-access requirements and your ladder angle and footing stay stable.
Spot Structural Roof Hazards
Once high winds pass, scan for structural red flags that make roof access non‑permissible under basic fall‑protection principles. From the ground, evaluate structural integrity indicators: sagging ridgelines, displaced decking, bowed rafters, or a soft “oil-canning” roof plane. Flag any chimney separation, cracked masonry, or pulled flashing that suggests differential movement. Note torn fascia, detached soffits, or rotated gutters; they can signal rafter tail failure and unstable eave loading.
Continue hazard identification around roof penetrations and valleys where wind uplift concentrates: missing sheathing, exposed fasteners, or fractured truss plates. If you see active roofline deflection, interior ceiling cracking, water-stained drywall, or audible creaking, treat it as potential collapse risk and keep off the roof.
Know Your Access Limits
Structural red flags don’t just tell you what’s damaged—they tell you whether you’re allowed to access the roof at all under basic fall‑protection and load‑capacity limits. If you can’t maintain three points of contact on a properly rated ladder, you’ve exceeded safe access. Don’t climb when the deck feels spongy, rafters show sag, or you see cracked trusses, shifting sheathing, or ceiling deflection below—those indicate compromised live‑load capacity. Stop if wind debris blocks egress, power lines are within minimum approach distance, or surfaces are wet, icy, algae‑slick, or granular‑loss prone. Respect Access permissions from the property owner and any HOA. Set safety boundaries: keep bystanders clear, mark drop zones, and call a licensed roofer.
Spot Loose Shingles From the Ground
After high winds, you can often identify loose asphalt shingles without climbing a ladder by performing a controlled ground-level visual inspection. Stand back far enough to see each roof plane, then scan ridge, hips, rakes, and eaves for lifted tabs, missing corners, exposed nail lines, and uneven shadow lines that indicate loss of adhesion. Use binoculars to confirm creases, fishmouthing, or displaced starter strips. Check flashing edges for shingle blow-back without touching metal. Before you continue, do debris removal at grade: clear branches and granules from walks and downspout outlets so you don’t slip or block drainage. Photograph suspect areas for documentation and to plan compliant repairs. If you see widespread displacement, stop and call a qualified roofer.
Check the Attic for Fresh Leaks
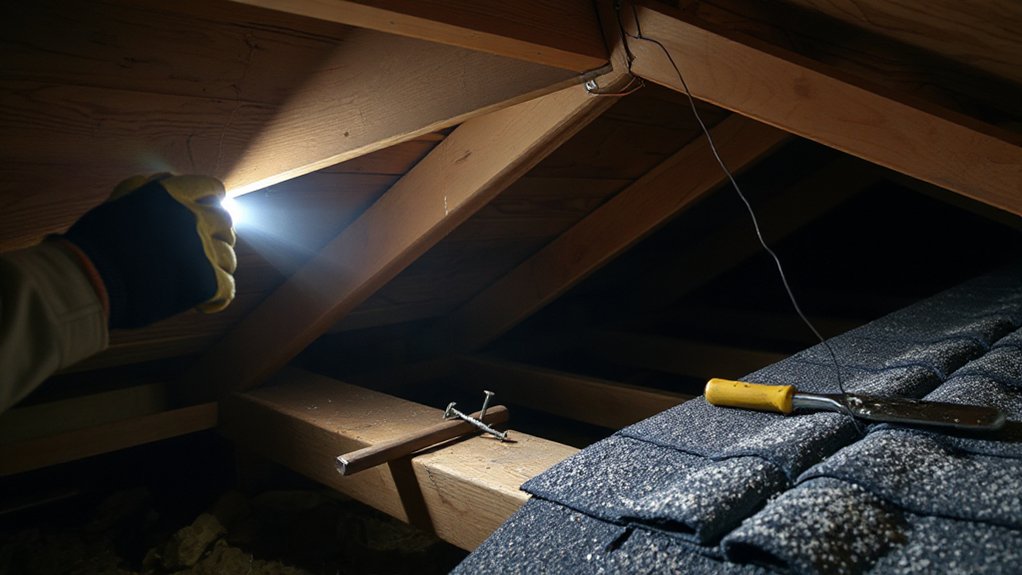
Before you get on the roof, you should check the attic for active leaks and storm-related intrusion. Use a flashlight to look for water stains on rafters, insulation, and ceiling drywall, then trace them upslope to the likely entry point. Inspect the roof decking (sheathing) for dampness, darkened plywood/OSB, and fastener back-out, and note any areas that may require code-compliant repair.
Look For Water Stains
If you suspect wind-lifted shingles compromised the roof covering, check the attic as soon as conditions are safe to identify active leaks. Use a headlamp, wear a respirator if insulation is disturbed, and walk only on joists or a secured platform to prevent falls through gypsum board.
Perform stain identification along rafters, truss chords, and the underside of roof sheathing, looking for dark rings, yellow-brown discoloration, or wet sheen that indicates recent water intrusion. Probe suspicious areas with a dry paper towel to confirm dampness, and note drip lines beneath fasteners, vent penetrations, or valleys. Mark locations with painter’s tape and document with photos and time. If you see active dripping, place a covered container and keep wiring clear to reduce shock risk.
Inspect Roof Decking
Once you’ve mapped any water stains, inspect the roof decking from the attic to confirm whether wind-lifted shingles exposed the sheathing to active moisture. Wear eye protection, gloves, and a respirator, and walk only on joists or a catwalk to avoid ceiling collapse. Use a bright flashlight to check for darkened OSB/plywood, delamination, softened fibers, or active drips at nail penetrations and shingle fastener lines. Probe suspect areas with an awl; spongy decking indicates saturation and requires repair. Review Roof insulation for compression, dampness, or mold, and bag any wet batts. Note Ventilation issues like blocked soffits or inadequate ridge vents that trap humidity and worsen deck rot. Photograph findings for documentation and scope.`
DIY or Roofer? Use This Damage Checklist
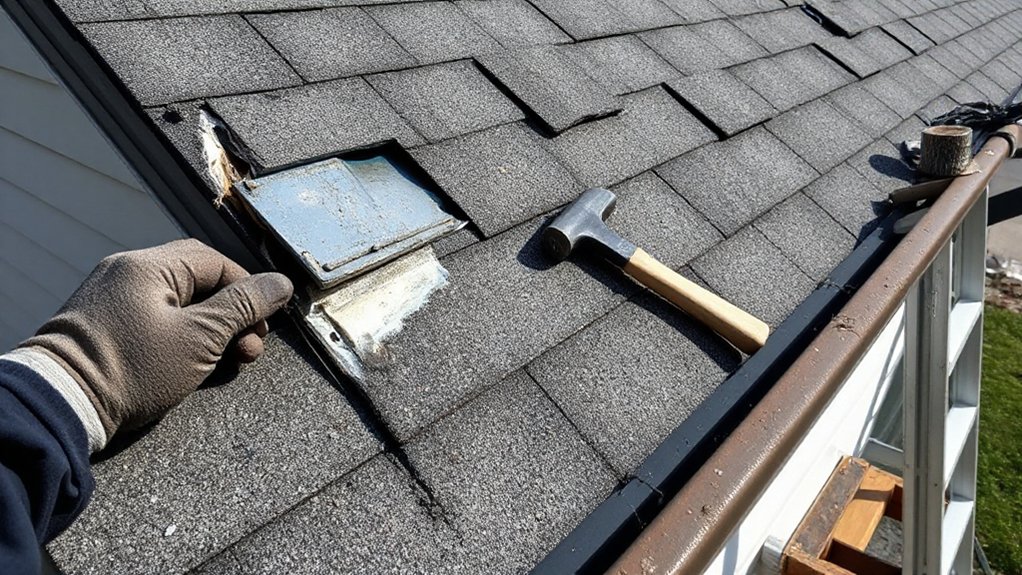
Although some wind-lifted asphalt shingles qualify for a careful DIY spot repair, you should use a quick damage checklist to decide when the condition crosses into roof-system work that requires a licensed roofer for code-compliant, safe correction. Start with DIY safety: if the roof is steep, wet, higher than one story, or you can’t maintain stable footing, stop and call a roofer. Proceed DIY only when damage is isolated to a few tabs with intact sealant strips and no exposed fasteners. Call a roofer if you see missing shingles, creased or torn laminations, widespread unsealing, lifted starter course, displaced ridge caps, punctured underlayment, rusted nails, or soft decking. Also escalate when flashing at valleys, chimneys, or vents is bent or unsealed. Protect roofing materials by limiting foot traffic.
Tools and Materials for Asphalt Shingle Repair
Before you lift a single tab, stage the right tools and code-accepted materials so you don’t crack shingles, overdrive fasteners, or compromise the self-seal system. Wear cut-resistant gloves, eye protection, and soft-sole shoes, and set an OSHA-rated harness if pitch or height demands it. Pack a flat pry bar, hook-blade utility knife, chalk line, tape measure, and a 1-1/4 in. roofing hatchet or pneumatic nailer with depth control for new roofing techniques. Use galvanized or stainless roofing nails sized for deck penetration, plus replacement shingles that match profile and weight; shingle material differences (3-tab vs laminated, fiberglass vs organic) affect thickness and nail placement. Bring a hand broom, magnetic nail sweeper, and spare underlayment patches for torn laps.
Choose the Right Roofing Cement for Shingles
Because the wrong mastic can block the shingle’s self-seal strip or fail under thermal cycling, you should select a roofing cement that’s labeled for asphalt shingles, meets ASTM D4586 (Type I or II as applicable), and stays pliable in your temperature range. Confirm it’s compatible with your Roofing material (fiberglass asphalt shingles) and any underlayment exposures. For Choosing adhesive, avoid generic construction caulk, silicone, or latex; they don’t bond reliably to granulated surfaces and can violate manufacturer instructions. Check the SDS for VOCs, skin/eye hazards, and required PPE, and verify it’s allowed by your shingle warranty. Prefer trowel-grade, non-sag cement for steep slopes and water-shedding laps. Don’t use cold-applied products below the minimum install temperature.
Reseal a Lifted Shingle Tab (Step-by-Step)
Before you reseal a lifted shingle tab, you’ll inspect the shingle for tears and verify conditions are dry, above the roofing cement’s minimum application temperature, and safe for roof access. Next, you’ll lift the tab carefully, apply a small bead of asphalt roofing cement to the bonding area, then press the tab flat to re-establish full contact. Finally, you’ll seal the leading edge and secure the repair per manufacturer instructions to prevent wind uplift and water intrusion.
Assess Shingle And Weather
Although it’s tempting to press a lifted tab back down immediately, you’ll get a safer, longer-lasting repair by first evaluating the shingle’s condition and the weather window. Check Shingle materials for brittleness, tears, creasing, exposed fiberglass mat, or granule loss; if the tab’s cracked or the self-seal strip is contaminated, plan replacement instead of reseal. Verify fasteners aren’t backing out and the course alignment hasn’t shifted.
Next, confirm Weather patterns support adhesion and safe access: choose a dry period with no rain forecast, low humidity, and moderate temperatures per the shingle manufacturer (typically 50–90°F). Avoid early-morning dew, frost, or wind gusts that can lift tabs and compromise footing. Follow fall-protection requirements and keep your ladder tied off.
Apply Roofing Cement
How do you lock a lifted shingle tab back down so it meets wind-uplift intent and stays sealed? You’ll apply asphalt roofing cement listed for exterior use and compatible with your roofing materials. Follow manufacturer instructions and local code requirements, especially for nail line and sealant placement.
Wear cut-resistant gloves, eye protection, and a fall-arrest system. Gently lift the tab with a flat bar without breaking the self-seal strip. Remove grit, old adhesive chunks, and moisture; the bond fails on contaminated surfaces. Load a caulk gun and place small dabs (about quarter-size) or a thin bead under the lifted tab, staying clear of the exposure edge to prevent squeeze-out. Respect weather considerations: don’t apply in rain, on frosted shingles, or below the product’s minimum temperature rating.
Press, Seal, And Secure
Once you’ve placed the roofing cement, press the shingle tab into full contact and re-establish the factory seal line so it resists wind uplift. Use a gloved hand or flat pry bar wrapped in cloth to avoid granule loss, then apply firm, even pressure along the bond line for 30–60 seconds. Confirm the tab lays flush with adjacent courses and doesn’t bridge over debris. Add a small dab at each corner if the tab wants to curl, but don’t overdrive cement into the keyway. For sealant application, keep the bead inside the manufacturer’s recommended area to maintain drainage paths. For weather considerations, work on a dry surface above the product’s minimum temperature, and allow cure time before rain or freezing.
Renail Loose Shingles Without Cracking Them
Where do most DIY shingle repairs go wrong after a wind event? You drive nails too high, overdrive them, or nail through cold, brittle asphalt, reducing shingle durability and wind resistance. Work only on a dry roof, use fall protection, and keep your ladder OSHA-stable. Lift the shingle tab gently with a flat bar; don’t tear the sealant strip. Use 11–12 gauge, corrosion-resistant roofing nails with 3/8-inch heads, sized to penetrate the deck per local code. Re-seat the shingle flush, then nail in the manufacturer’s nail line, not the exposure. Drive nails snug, not dimpled. If the mat starts to crack, stop and warm the area with sun time before nailing again.
Replace a Missing or Torn Asphalt Shingle
After a wind event strips or rips a shingle, replace it promptly to restore the roof’s water-shedding plane and wind rating. Work on a dry surface, use fall protection, and keep your ladder secured. Lift the overlying shingle tabs with a flat bar, then remove the damaged unit by pulling nails without tearing the underlayment. Slide in a like-for-like replacement that matches type, exposure, and thickness; Shingle color matching reduces visible patching and helps meet HOA requirements. Fasten per manufacturer instructions and local code: typically four nails, placed on the nailing line, driven flush (not overdriven). Seal the tabs with approved asphalt roofing cement if factory sealant won’t bond. Proper replacement preserves Asphalt shingle lifespan and prevents deck rot.
Fix Wind Damage Near Flashing and Vents
Although field shingles often fail first, high winds also pry at the weak points around step flashing, vent boots, and pipe collars, so inspect these penetrations for lifted edges, popped nails, cracked sealant, or bent metal. Perform a careful Flashing inspection from a stable ladder, using fall protection and dry, low-wind conditions. If step or counterflashing is deformed, gently reset it tight to the wall line and shingle course; replace pieces that are kinked or corroded to maintain a continuous water-shedding path. Refasten loose flashing with code-approved roofing nails placed high and covered by the next course. For Vent sealing, replace split neoprene boots and tool in compatible polyurethane roof sealant at the flange perimeter and fasteners, keeping sealant out of drainage laps. Check for daylight gaps.
Match Shingles and Seal Exposed Nail Heads
Even if the wind only loosened a few tabs, you still need to match replacement shingles by manufacturer, line, color blend, and exposure so the repair maintains the roof’s water-shedding plane and wind rating. Verify the shingle color in full sun, and confirm the same laminate profile and nailing zone location before you cut in a patch. Slide the new course under the upper shingles, align keyways, then fasten with code-approved roofing nails at the specified count and offset.
Any nail head left exposed becomes a leak point. Set nails flush, not overdriven, then seal each exposed head with ASTM D4586 asphalt roof cement or a compatible polyurethane. Tool a tight cap to improve sealant durability and resist UV and thermal movement.
Water-Test the Repair and Recheck Tomorrow
Once the adhesive has skinned over per the sealant manufacturer’s cure time, run a controlled hose test to confirm the repair sheds water under realistic flow. Keep the nozzle on “shower,” start downslope, and work upslope to avoid driving water under laps. Maintain steady flow for 10–15 minutes while a helper checks the attic for drips, staining, or damp insulation. Document results; if you find intrusion, stop and correct fastener placement, shingle seating, or sealant coverage. For Water testing, don’t exceed typical rainfall intensity and never pressure-wash shingles. Tomorrow, perform a daylight recheck: verify tabs remain bonded, nail heads stay sealed, and granule loss is minimal. Follow with a brief structural inspection for lifted decking, soft sheathing, or displaced flashing.
Frequently Asked Questions
Will My Homeowner’s Insurance Cover Wind-Damaged Shingles and Repairs?
Your homeowner’s insurance may cover wind-damaged shingles if your policy includes Insurance coverage for wind peril. You’ll file Repair claims, document loss, mitigate further damage, and meet deductibles, exclusions, and code-upgrade endorsement requirements.
How Can I Temporarily Tarp the Roof if More Storms Are Coming?
Like a telegraph operator, you’ll tarp by anchoring a heavy-duty sheet over the ridge, lapping downslope, securing with 2×4 battens and screws into rafters. Follow Tarp installation specs, apply Emergency precautions: fall protection, avoid wet decking.
What Wind Speeds Typically Lift Asphalt Shingles in the First Place?
You’ll typically see shingle lift around 45–60 mph gusts, increasing rapidly above 70 mph, depending on sealing, exposure, and roof pitch. Installed per manufacturer specs, asphalt shingles’ wind resistance ratings commonly range 60–130 mph.
Should I Notify My HOA or City Before Doing Roof Repairs?
Yes—better safe than sorry: you should notify your HOA and check city rules first. Verify roof repair permits, post neighborhood notification if required. Follow fall protection, ladder safety, and manufacturer fastening specs to stay code-compliant.
How Often Should I Schedule Professional Roof Inspections After Major Storms?
Schedule a professional inspection after each major storm, then annually; adjust Roof inspection frequency per local hazard zone. You’ll need a Storm damage assessment within 48 hours if leaks, lifted shingles, or flashing failure appears.
Conclusion
You’ve steadied your roof like Odysseus lashing to the mast—calm, methodical, and code-minded. If you stayed off steep or wet slopes, protected fall hazards, and verified deck integrity from the attic, you’ve already reduced risk. When you replaced torn tabs, resecured courses at flashing, sealed exposed fasteners with roofing cement, and matched shingle type, you restored the water-shedding system. Water-test, document, and recheck tomorrow; call a roofer if damage spreads.
About the Author



