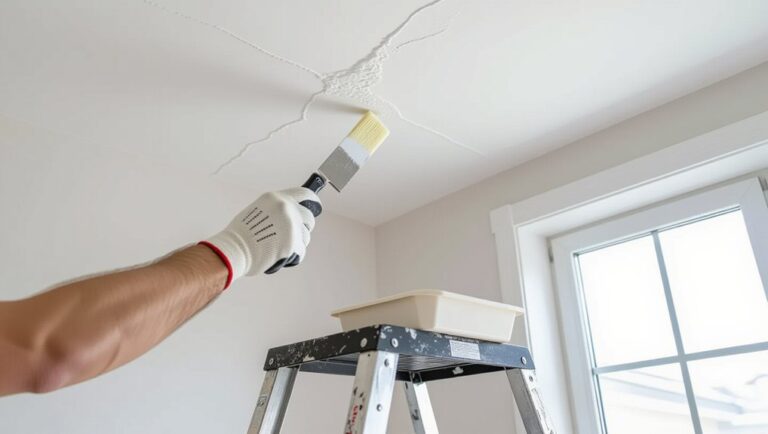
First, test each tread by loading the front edge and midspan; mark any that squeak, deflect, or open gaps at the stringers. Inspect for pulled nails, rot, or cracked stringer notches, and restrict use if structure’s compromised. If the tread’s sound, lock it to solid framing with construction adhesive plus two predrilled, countersunk #9/#10 structural screws per stringer (2-1/2 to 3 in.). Shim and glue any remaining flex, and you’ll find additional options below.
Key Takeaways
- Test each tread for deflection, joint separation, and squeaks; mark problem steps and inspect stringers, risers, and bearing points for damage or rot.
- Choose a repair method based on access: top-side screws and patching, or underside reinforcement with cleats/brackets to avoid surface damage.
- Refasten loose treads using structural wood screws (#9/#10, 2-3 inches), pre-drilling and countersinking; drive two staggered screws into each stringer.
- Add wood-to-wood construction adhesive in controlled beads and use tapered shims where needed to eliminate flex; clamp or brace until fully cured.
- Replace any tread with through-cracks, delamination, severe cupping, or decay, and confirm repairs maintain safe tread depth and nosing profile.
Test for Loose Stair Treads (Fast Check)
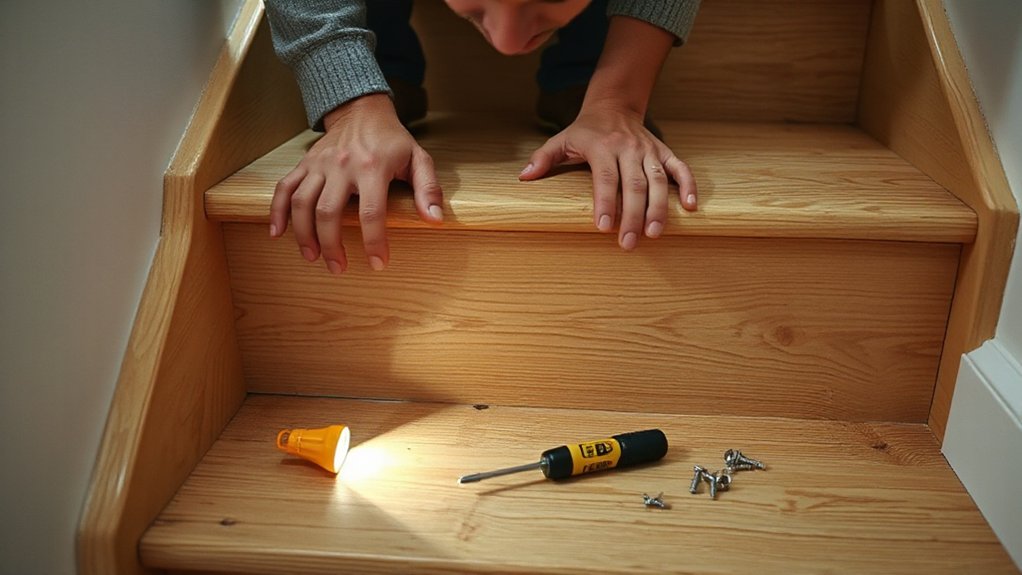
Before you start any repair, test each tread for movement: stand to the side, place one foot near the front edge, and shift your weight to load the tread while watching the tread-to-riser joint and listening for squeaks or clicks. Repeat at midspan and near both stringers. Don’t bounce; apply steady pressure so you can detect looseness without overstressing fasteners.
Mark any tread that deflects, separates at joints, or produces sound. Check for uneven riser gaps, lifted nosing, or visible nail heads that indicate pullout. Use a flashlight to confirm cracks, split ends, or rot at bearing points. Keep Step safety in mind: maintain three points of contact and use a handrail. Record locations to prioritize tread stability issues.
Decide: Fix From Above or Underneath
Now that you’ve marked which treads move or squeak, decide whether you’ll tighten and reinforce them from above (the walking surface) or from underneath (the underside of the stair). Choose above access when you can control fastener placement, clamp surfaces tightly, and then patch or refinish; it’s direct but has stronger aesthetic considerations because you’ll disturb visible finishes. Choose underside access when the stair is open below or has a removable soffit; you can add blocking, screws, or adhesive without altering the nosing or tread face. In either approach, maintain code-required tread depth, nosing profile, and uniformity, and keep edges splinter-free to meet safety regulations. Confirm you’ve got stable footing, adequate lighting, and a clear work zone.
Common Causes of Loose Stair Treads
Before you tighten anything, you need to identify why the tread moves so your repair meets basic safety expectations. You’ll often find worn fasteners or nails that have backed out, or seasonal wood shrinkage and expansion that breaks the original grip. You should also inspect the stringers for damage or gaps, because a tread that isn’t fully bearing on sound framing won’t stay secure.
Worn Fasteners And Nails
Why do stair treads start shifting underfoot even when the wood looks sound? Often, the problem is worn fasteners and nails that have loosened from years of vibration and repeated loading. When nails back out or shear, the tread no longer clamps tightly to the stringer, so you feel a squeak or a slight tilt with each step. You’ll sometimes see polished nail heads, elongated holes, or rust staining that signals reduced holding power. If prior repairs relied on finish nails hidden by decorative trim or aesthetic upgrades, the connection may never have met structural needs. Treat movement as a safety defect: loose treads can violate stair stability expectations and increase fall risk, especially at nosings and landings. Inspect promptly before use.
Wood Shrinkage And Expansion
Loose fasteners aren’t the only reason a tread starts to move; seasonal wood shrinkage and expansion can loosen a once-tight assembly even when the hardware stays intact. As humidity drops, the tread dries and contracts, reducing bearing and creating squeaks; when humidity rises, it swells and can push joints out of alignment. This wood movement is normal, but repeated cycles can open small gaps that turn into noticeable deflection under foot traffic.
You’ll see the biggest climate effects near exterior doors, basements, and HVAC registers. To stay safe and code-conscious, treat any tread that shifts as a fall hazard: limit use, improve indoor humidity control, and re-secure with construction adhesive plus proper screws set into sound framing. Recheck after the season changes.
Stringer Damage Or Gaps
Even if the tread itself looks sound, damaged stringers or gaps at the tread-to-stringer bearing can let the step flex, squeak, or shift under load. You’ll often see a stair gap at the end grain, cracked notches, split stringer plies, or crushed bearing where fasteners have loosened. Treat stringer damage as structural: don’t just add longer screws and hope it holds. Verify the stringer is intact, properly supported, and securely anchored at top and bottom. If a notch is cracked, sister the stringer with matching lumber and construction adhesive, then through-bolt or structural-screw per manufacturer spacing. Close any stair gap by shimming tight, then re-fastening the tread into solid framing. Replace compromised members.
Inspect Stringers, Risers, and Tread Supports
Before you tighten a single fastener, inspect the framing beneath the tread to confirm the problem isn’t structural. Start with Stringer inspection: look for splits, rot, crushed fibers, or pulled-out notches where the tread bears. Check that each stringer sits fully on its supports and hasn’t separated from the wall or skirt. Verify tread supports—cleats, blocks, or housed pockets—are intact, flush, and not loose or missing. Move to riser stability by pressing the riser at its joints; it shouldn’t flex, gap, or rack. Confirm the tread’s nosing isn’t cantilevered beyond what the framing can carry. If you find decay, major cracking, or movement at connections, restrict use and plan structural repair to keep the stair safe and compliant.
Tools, Screws, and Adhesive for Stair Treads
Before you tighten anything up, you’ll stage an essential tool checklist—PPE, a bright work light, drill/driver with bits, clamps, a pry bar, and a square—so you can work safely and maintain consistent tread bearing. You’ll choose structural-rated wood screws of the right length and head style to bite solidly into stringers without splitting, and you won’t substitute finish screws where load transfer matters. You’ll also pick a construction adhesive rated for wood-to-wood bonds and stair vibration, then apply it in controlled beads to reduce squeaks while keeping fasteners as the primary mechanical connection.
Essential Tools Checklist
While you can tighten a loose tread with basic hand tools, you’ll get a safer, code-worthy repair if you stage the right checklist first. Start with eye protection, hearing protection, a dust mask, and cut-resistant gloves, then set a drop cloth and work light.
Bring a drill/driver with a depth stop, bits, and a countersink; a pry bar, hammer, and nail set; a tape measure, square, pencil, and level; and clamps to hold the tread tight to the stringers. Keep a shop vacuum and rags for clean bonding surfaces. For fastening, stage corrosion-resistant screws, pilot-bit sizes, and a driver that won’t cam out. For bonding, use a construction adhesive rated for wood-to-wood stair assemblies. Add shims for tight bearing, plus decorative accents and lighting enhancements only after everything’s solid.
Best Screw Options
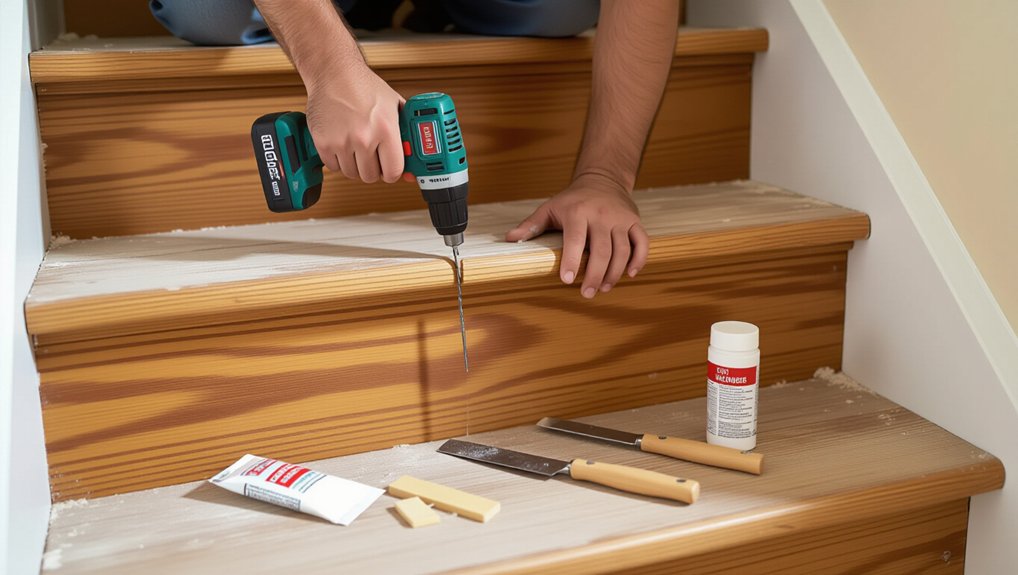
With your tools staged and the tread clamped tight to the stringers, the fasteners you choose determine whether the repair stays quiet and code-worthy. Use #9 or #10 structural wood screws, 2-1/2 to 3 inches long, so you’ll reach solid framing without breaking through the tread face. Pick star-drive or square-drive heads to prevent cam-out and stripped recesses.
Choose corrosion-resistant coated or stainless screws for damp basements and exterior stairs. Pre-drill and countersink to reduce splitting, then set the head slightly below the surface to protect Decorative stair finishes and prevent trip edges. If you’re adding Non slip tread options, place screws where the overlay won’t hump or telegraph fastener heads. Drive two screws per stringer, staggered, and keep consistent edge distance.
Adhesive Selection Tips
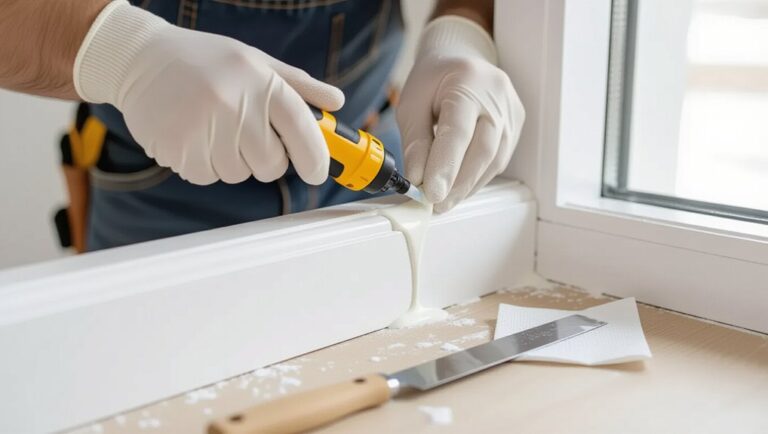
Because screws clamp the tread but don’t stop micro-movement, you’ll get a quieter, longer-lasting fix if you pair them with a construction adhesive rated for wood-to-wood bonding and stair loads. Choose an ASTM-compliant polyurethane or solvent-free subfloor adhesive with high adhesive durability and a service temperature suited to your home. Avoid brittle glues and low-strength latex caulks. Verify compatibility with treated lumber and any existing finish, and don’t use adhesive where removal access is required for code-mandated inspection or stringer repair.
Use disciplined application techniques: vacuum dust, scrape old residue, and dry-fit the tread. Run two continuous 3/8-inch beads on each stringer, keep beads 1 inch from edges, then seat the tread and screw within the adhesive’s open time. Wear gloves and ventilate.
Screw Down Loose Stair Treads (Best First Fix)
If your stair tread shifts or squeaks underfoot, screwing it down is usually the safest first fix you can do without opening up the entire staircase. Locate the stringers and drive fasteners into solid framing, not just finish flooring or riser material. Use 2-1/2 in. to 3 in. structural wood screws; avoid drywall screws. Pre-drill and countersink to reduce splitting and to keep trip edges flush. Set at least two screws per stringer, spaced evenly, and keep them back from tread noses. Verify the tread sits tight and level before loading it. For Stair tread aesthetics and Decorative stair repairs, plug countersinks with matching wood plugs or color-matched filler, then sand smooth and touch up finish.
Shim and Glue Loose Stair Treads That Flex
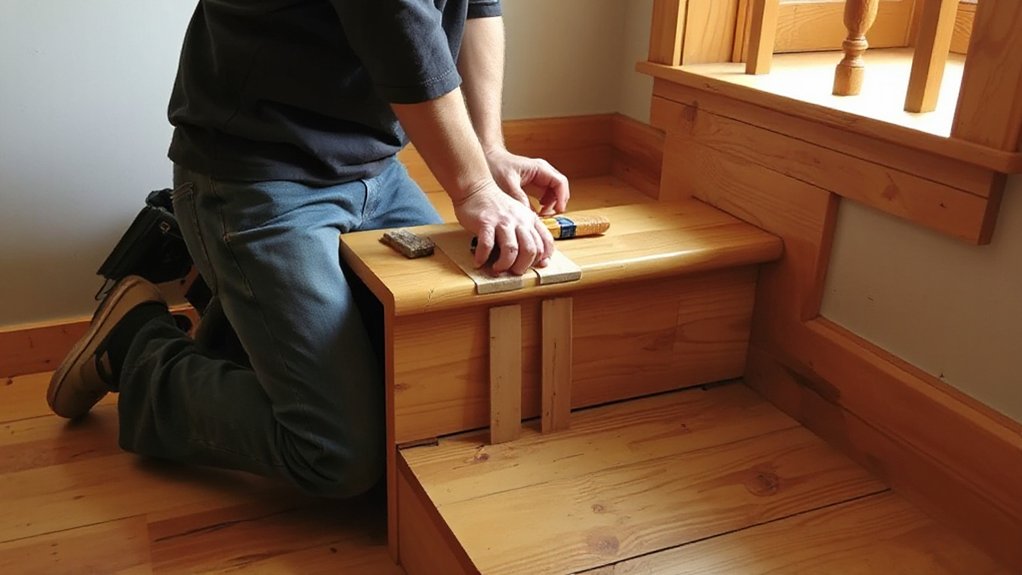
Screws usually stop tread movement, but a tread that still flexes needs its bearing tightened, not just its surface fastened. Verify the tread is sound and not cracked; if it is, replace it, don’t attempt non structural repairs. With the stair closed to traffic, lift the tread slightly and dry-fit tapered wood shims between the tread and its support until the flex disappears and the nosing stays level. Mark locations, then remove each shim and apply construction adhesive rated for wood-to-wood. Reinsert shims, tap snug, and wipe squeeze-out to avoid slip hazards. Clamp or brace the tread per adhesive instructions, maintaining required tread depth and uniform riser height. Reinstall Decorative trim after curing.
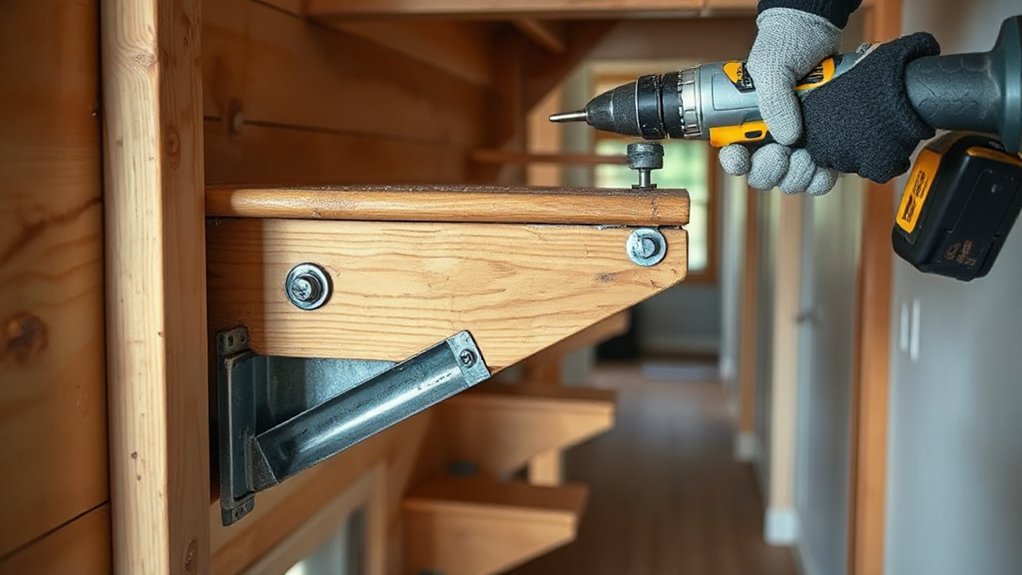
Stop Loose Stair Tread Squeaks From Below
When you can access the underside of the stairs, you can eliminate most tread squeaks by locking the tread and riser together at their bearing points rather than fastening only the finished surface. Start by securing the area, providing lighting, and confirming you’re not drilling into wiring or plumbing. Drive 2-1/2 in. structural wood screws through the riser into the tread, and add screws through the tread into each stringer, keeping fasteners back from tread nosings to preserve staircase design. Pre-drill to prevent splitting, and pull joints tight without stripping. For persistent movement, install metal angle brackets or wood cleats at the tread/riser joint with construction adhesive plus screws. Don’t rely on decorative trim to hide noise; fix the structure. Recheck for squeaks.
Patch Cracks, Replace Treads, or Call a Pro
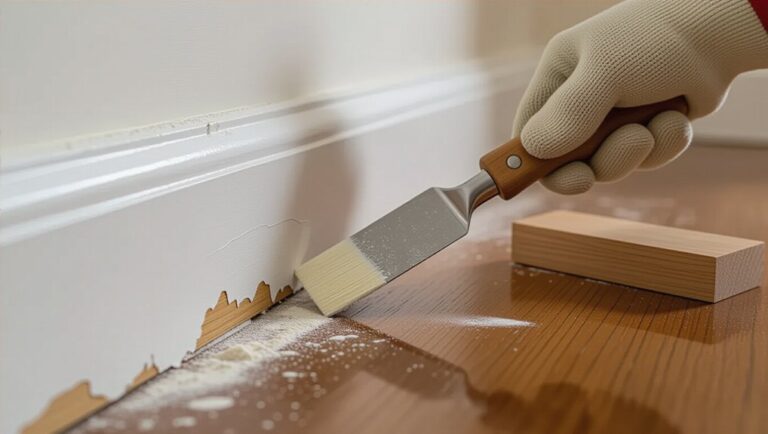
Although tightening the structure cures most movement, some loose stair treads still need a different fix. If you see hairline cracks without deflection, patch them with a structural epoxy or wood filler rated for load-bearing repairs, then sand flush. Don’t hide damage under Decorative finishes until you’ve confirmed solid support and full adhesive cure.
Replace the tread when cracks run through the nosing, the board is split, delaminated, or cupped, or fasteners no longer bite. Install a new tread of equal thickness, maintain consistent riser height, and secure it to stringers with construction adhesive plus screws or nails per local code. Call a pro if you find rot, stringer damage, or ongoing movement; aesthetic considerations can’t trump safety.
Frequently Asked Questions
How Much Does It Cost to Fix a Loose Stair Tread?
You’ll typically pay $100–$300 to fix a loose tread; stair tread replacement runs $200–$600. You must secure fasteners, address stringer damage, and follow stair safety tips: verify rise/run consistency, sound anchorage.
How Long Should I Stay off the Stairs After Repairing?
You should stay off 24 hours minimum; wait 48 hours for full cure—like a telegram’s delay. Follow Safety precautions, ventilate, and barricade. Use proper Repair tools, verify fasteners tight, and test gently before normal traffic.
Do I Need a Permit or Code Compliance Check for Stair Repairs?
You usually don’t need a permit for minor tread re-fastening, but permit requirements vary by city. If you alter structure, riser/tread dimensions, or railings, you’ll need code compliance review and inspection. Call your building department.
Can Loose Stair Treads Indicate Wider Structural Problems in the Staircase?
Yes—loose treads can signal wider staircase issues. Falls cause about 1 million ER visits yearly. You should inspect stringers, fasteners, and rot; compromised structural integrity creates potential hazards. If movement persists, you’ll need a qualified evaluation.
What’s the Best Way to Match Stain or Paint After a Tread Repair?
You’ll get the best match by testing stain/paint on scrap, then adjusting for color matching under your lighting. Seal consistently and use light coats for finish blending. Follow manufacturer cure times and maintain slip-resistant coatings.
Conclusion
You’ve checked each tread, chosen access from above or below, and tightened the structure with screws, shims, and adhesive. Don’t ignore movement: the NFSI reports falls cause over 8 million ER visits each year, and stairs are a common trigger. Re-test every tread for flex, squeaks, and fastener bite, then confirm uniform riser height and solid stringer support. If you find split wood or failed framing, replace the tread or hire a licensed pro.