Put on ANSI-rated eye protection, cut-resistant gloves, and a harness, then start in the attic with a headlamp and stay on framing. Trace stains, rusted fasteners, or swollen OSB to the highest wet point and match it to the chimney or vent location above. On the roof, inspect step flashing, counterflashing, crowns, storm collars, and vent boots for cracks, lifted laps, and nail pops. Confirm with a low-pressure hose test in 5–10 minute zones. Next, you’ll see how to separate leaks from condensation and chimney-side faults.
Key Takeaways
- Start in the attic: trace stains, rusted fasteners, and swollen sheathing upslope to the highest damp point near a penetration.
- Inspect chimney step flashing and counterflashing for lifted edges, rust pinholes, gaps, and failed sealant at laps and corners.
- Check vent boots for UV cracks, collar misalignment, loose fasteners, and underlayment not turned up under the flange.
- Perform a low-pressure hose test in 5–10 minute zones, starting downslope and moving upslope until water appears.
- Rule out condensation and chimney issues by checking airflow, duct terminations outdoors, and chimney cap/crown/storm collar water-shedding.
Chimney and Vent Roof Leak Clues
Where do roof leaks most often start around penetrations? You’ll usually find them at failed flashing laps, cracked sealant, or fasteners that back out around the chimney and vent stacks. Inspect step flashing and counterflashing for continuous overlap and proper embedment; gaps, rust, or lifted edges signal water entry. Check the cricket on wide chimneys for debris dams and split membrane. At the top, verify the chimney cap sheds water and isn’t loose, corroded, or missing drip edges. For plumbing vents, examine the boot for UV splits and confirm the collar sits flat under shingles. If you’ve got a vent damper, look for condensate staining and verify its housing stays dry during a controlled hose test.
Gear Up: Attic and Roof Safety Tools
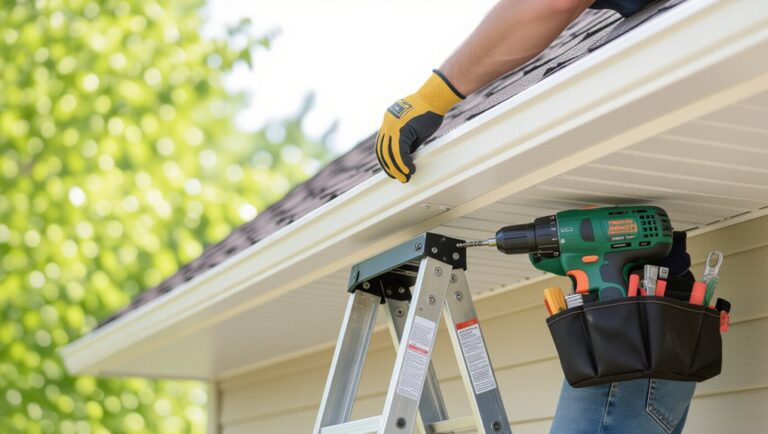
Before you climb into the attic or step onto the roof, gear up with the same basic PPE and access equipment required by OSHA-style fall and eye/respiratory safety practices. Wear ANSI-rated safety glasses, cut-resistant gloves, and a NIOSH-approved respirator if insulation or dust is present. Use a hard hat in low-clearance attic framing and non-slip, soft-soled boots for roof traction. Verify ladder stability: set the ladder at a 4:1 angle, extend it 3 feet above the eave, secure it at top, and keep three points of contact. On slopes or near edges, use Safety harnesses with an inspected full-body harness, shock-absorbing lanyard, and properly rated anchor point. Keep a headlamp, tape measure, chalk, and camera to document conditions.
In the Attic, Trace Stains to a Penetration
Once you’re in the attic with adequate lighting and stable footing on joists or a walk board (not the drywall), start at the most obvious water staining and work upslope to the first roof penetration that could feed it—plumbing vent stacks, bath fan ducts, chimneys, skylights, and attic-mounted HVAC penetrations. Follow darkened sheathing, rusted fasteners, and nail-tip drips; water often runs along rafters before dropping. Gently pull back Attic insulation without compressing it, and mark stain edges with painter’s tape for reference. Check around each penetration for daylight gaps, deteriorated flashing lines, or wet framing. Note whether staining aligns with valleys or gutter lines, since Roof drainage defects can concentrate flow above a penetration. Keep clear of electrical splices, and don’t disturb vent ducts or chimney clearances.
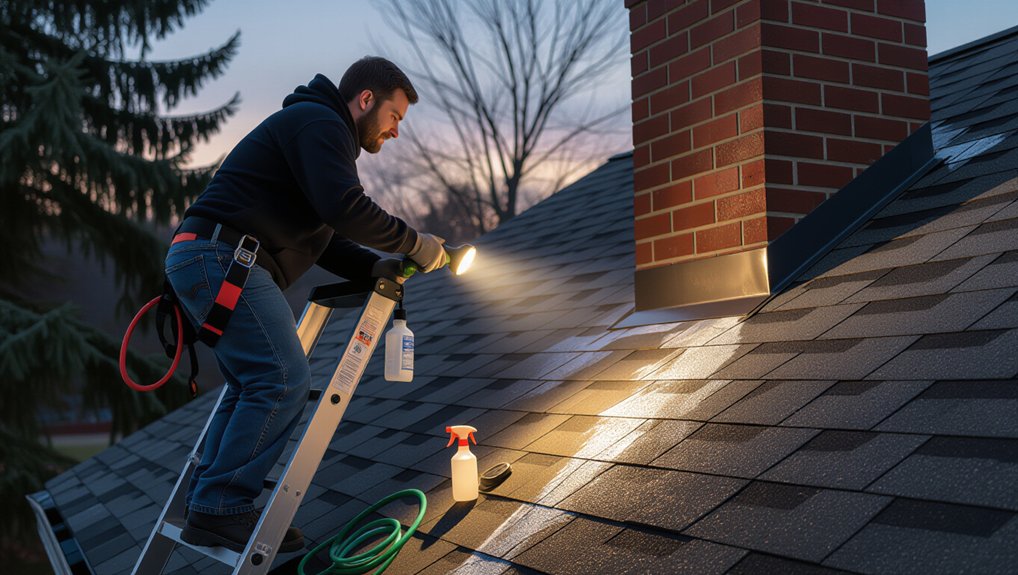
Confirm the Roof Leak With a Hose Test
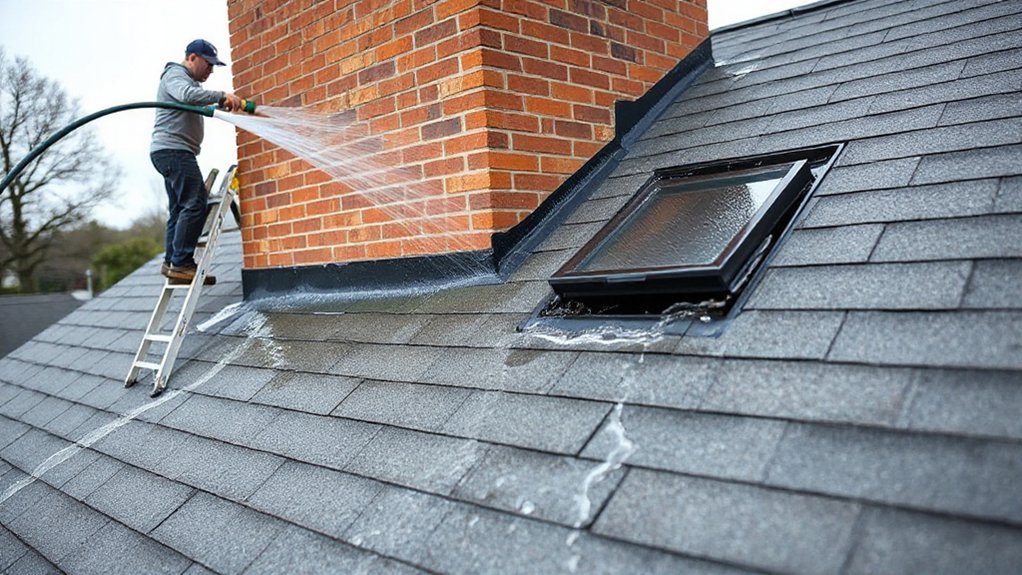
If your attic tracing points to a specific penetration but you still need proof, confirm it with a controlled hose test that mimics rainfall without flooding the roof. Work with a spotter inside, and use fall protection and stable ladder setup per OSHA guidance. Keep the hose at low pressure; you’re simulating wind-driven rain, not power-washing.
Start downslope of the suspect area and wet one small zone at a time for 5–10 minutes, then pause while your spotter checks for drips, darkening, or active tracking. Move upslope in increments until water appears. Document timing and exact location to support leak confirmation. Stop immediately if water backs up, enters vents, or approaches electrical components. This hose test isolates the entry point without masking it.
Check Chimney Flashing and Mortar Joints
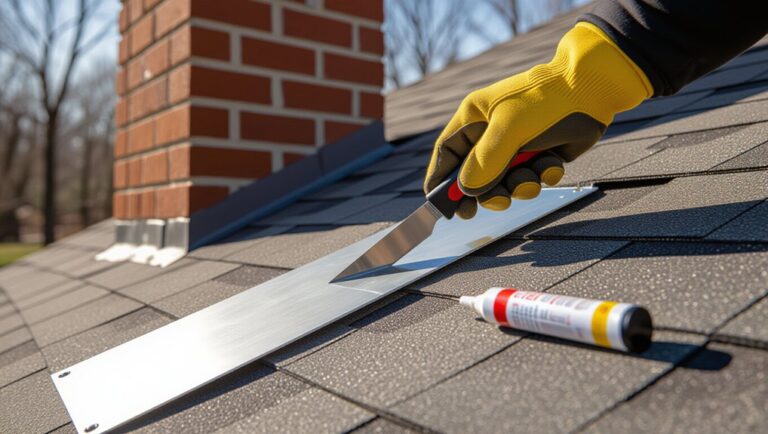
Although chimneys look solid, most roof leaks around them start at the flashing system or at failed mortar joints, so inspect both with a close, methodical check from a stable ladder or properly tied-off roof position. Check step flashing for rust, pinholes, and lifted shingle edges; confirm each piece overlaps correctly and isn’t face-nailed. Inspect counterflashing: it should be embedded in a reglet cut and sealed, not just surface-caulked. Probe mortar joints for cracks, gaps, or spalling, and note any loose bricks. Look at the Chimney cap for missing drip edge, fractured crown, or open seams. Trace staining below flashing lines. If a Vent pipe runs nearby, confirm runoff isn’t channeling toward the chimney by damaged shingles.
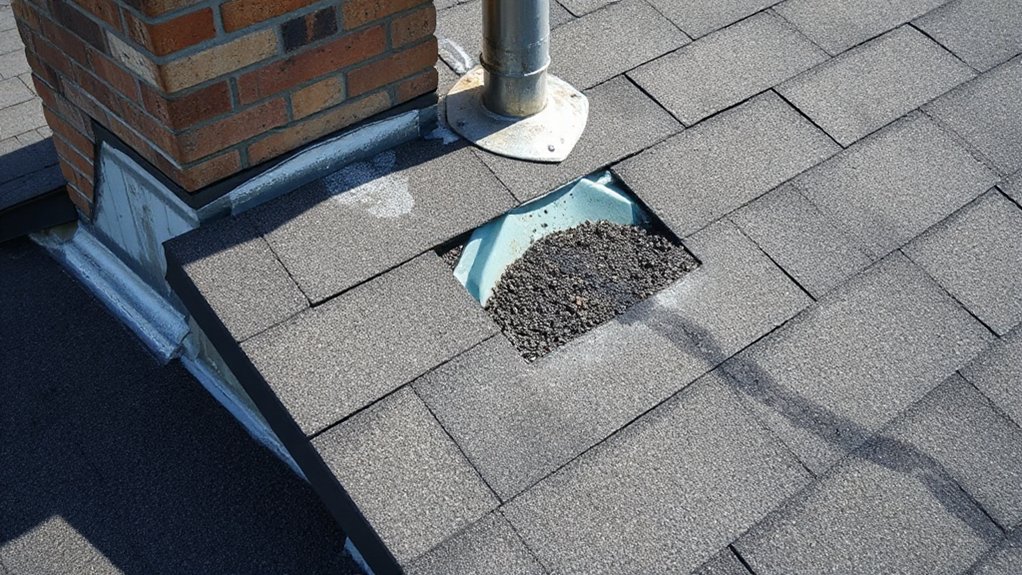
Inspect the Vent Boot and Pipe Seal
Next, you’ll inspect the plumbing vent boot and pipe seal, since code-compliant penetrations must stay watertight through the roof assembly. Check the rubber boot for cracks or UV splitting and verify the pipe seal sits tight with no visible gaps around the stack. Look for rust stains on the flashing or shingles below, and use proper fall protection while you work.
Check Rubber Boot Cracks
Where do sneaky roof leaks often start? Right at the Rubber boot around a plumbing vent, where UV and heat harden the material. For Crack inspection, work only on a dry roof, wear fall protection, and use a stable ladder that extends 3 feet above the eave per OSHA guidance. From the upslope side, look for radial splits, surface checking, brittleness, or missing chunks where the boot flexes at the pipe. Gently press the boot; if it doesn’t rebound or it crumbles, it’s compromised. Check the boot’s base for tears at corners and along molded ribs. Don’t pry or cut shingles. If cracks reach through the boot, plan a code-approved replacement.
Inspect Pipe Seal Gaps
How often does a “mystery” roof leak trace back to a tiny gap at the vent pipe seal? Climb only with fall protection, dry shoes, and stable ladder setup, then inspect the annular space where the pipe passes through the boot collar. You’re looking for separation, shrinkage, or a lifted edge that can wick water under shingles.
Confirm the boot sits flat and is properly integrated with surrounding courses; don’t pry shingles loose. If you find a gap, clean and dry the surfaces, then perform sealant application using a roof-rated, UV-stable sealant compatible with the boot material. Tool the bead continuously with no voids. Keep the vent pipe clear and plumb; a distorted pipe can compromise the seal and reduce ventilation improvement.
Look For Rust Stains
Even if the boot collar looks tight, rust streaks on the vent pipe or staining around the flashing usually signals chronic moisture entry at the seal. Treat Rust stains as evidence the pipe-to-boot interface is wicking water under wind-driven rain. From a stable ladder and with fall protection, inspect the pipe above the roofline and the metal flange for corrosion signs, blistered paint, or pitting. Check for fasteners with rust halos, which can indicate failed neoprene washers and improper nail placement. Verify the boot material matches the pipe temperature rating and that the storm collar (if present) is sealed with approved exterior-grade sealant, not roofing tar. Document locations, then plan repair before rot spreads into sheathing.
Inspect Shingles and Underlayment Nearby
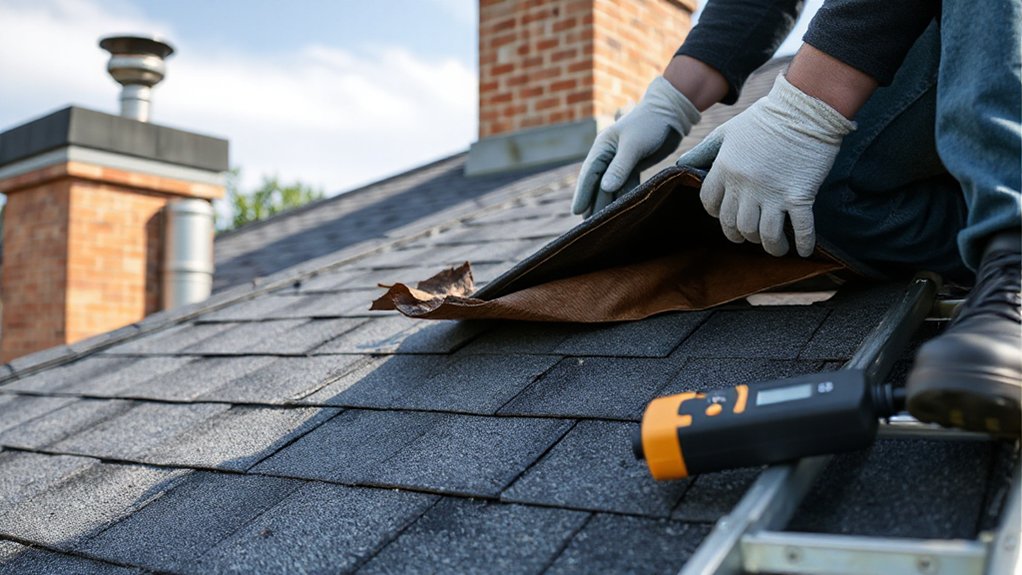
With fall protection in place and stable footing per OSHA/IRC best practices, you’ll inspect the shingles adjacent to the suspected leak for cracks, missing tabs, lifted fasteners, or granule loss. You’ll then check the underlayment edges at eaves, valleys, and penetrations for gaps, tears, or improper laps that could violate manufacturer and code requirements. Finally, you’ll look for water stains, darkened sheathing, or damp backing that tracks upslope from the interior leak point.
Check Shingle Damage
Where do you start once you’ve traced moisture toward the roof plane? Begin by checking shingle damage within 3–6 feet of the chimney or vent. Work from a stable ladder, wear fall protection, and avoid stepping on wet or brittle tabs. Look for Shingle wear: cupping, cracking, torn sealant strips, or lifted corners that can violate wind-uplift requirements. Note Granule loss by comparing color bands, spotting bald patches, or finding granules in gutters; exposed asphalt accelerates UV breakdown and leaks. Gently lift a tab to confirm the self-seal hasn’t failed, then press it back without breaking it. Inspect for nail pops, overdriven fasteners, and punctures from foot traffic. Mark defects with tape for repair planning later.
Examine Underlayment Edges
After you’ve flagged suspect shingles, how can you verify the roof system beneath them hasn’t failed? Work from a stable ladder, wear a harness, and avoid lifting more shingles than necessary. At the shingle edge near the vent or chimney, gently break the seal strip with a flat bar and lift just enough to view the underlayment lap. You’re checking that courses overlap shingle-style, fasteners aren’t exposed, and the membrane hasn’t torn, puckered, or pulled back from the flashing line. Around Roof ventilation penetrations, confirm the underlayment turns up the pipe boot flange, not away from it. At the chimney, check underlayment termination under step flashing and that it doesn’t stop short of the Chimney cap line. Re-seal tabs with compatible asphalt cement.
Look For Water Stains
Once the laps and terminations look correct, verify performance by hunting for water staining in the roof field around the suspect area. From the attic, use a headlamp and stay on framing; don’t step on gypsum. Trace darkened sheathing, rusted fasteners, or swollen OSB back to the highest point, since water travels. Note whether stains align with a vent boot, chimney cricket, or nail line.
On the roof, inspect adjacent shingles for lifted tabs, fractured sealant strips, exposed nails, and granule loss that can defeat Waterproof membranes below. Lift only what you must and re-seal per manufacturer instructions to remain code-compliant. Confirm Roof ventilation paths aren’t blocked; condensation can mimic leaks. Photograph findings, mark locations, and stop work in wet or windy conditions.
Rule Out Condensation and Chimney-Side Leaks
Although a water stain might look like a classic roof leak, you should first rule out condensation and chimney-side leaks because both can mimic roof failure and require different code-compliant fixes. Check the attic during cold weather: if the underside of the roof deck feels damp and the nails show beads, you’re seeing Condensation buildup from inadequate ventilation or missing insulation at the penetration. Verify soffit-to-ridge airflow isn’t blocked and that exhaust ducts terminate outdoors, not in the attic.
Next, inspect the chimney chase and flue path. If staining appears after using the fireplace, suspect Chimney creosote accumulation and acidic condensate leaking from joints or a damaged liner. Confirm the cap, crown, and storm collar shed water and that metal components are corrosion-resistant and securely fastened.
When to Call a Roofer for Repairs
If your DIY checks point to an active roof-system failure, you should stop troubleshooting and call a licensed roofer before the leak compromises structural members or creates an electrical hazard. Call immediately if you see wet decking, sagging sheathing, rusted fasteners, or staining that reappears after dry weather.
You should also bring in a pro when leaks occur at flashing connections (chimney cricket, step flashing, vent boots) or when sealants have failed beyond spot repair. A roofer can verify code-compliant underlayment laps, shingle integration, and correct fastener placement. Don’t disturb Roof insulation that’s wet or moldy; it can hide energized wiring and needs safe removal. If overflow marks suggest clogged valleys, schedule gutter maintenance and have drainage evaluated to prevent ice dams and backflow.
Frequently Asked Questions
Will Homeowners Insurance Cover Chimney or Vent Leak Damage and Repairs?
Homeowners insurance might cover chimney or vent leak damage if you prove a sudden, accidental peril caused it; it usually won’t cover wear, poor flashing, or deferred maintenance. Document conditions, mitigate water, and get code-compliant leak repairs.
How Much Does Professional Chimney Flashing Repair Typically Cost?
You’ll pay an arm and a leg: professional Chimney flashing repair typically costs $300–$1,500, depending on roof pitch, access, and material. You’ll want code-compliant step/counterflashing, proper sealants, and bundled Vent repair if needed.
Can I Fix a Vent Boot Leak From Inside the Attic Only?
You can’t reliably fix a vent boot leak from inside the attic only; you must repair from the roof. Use attic inspection for leak detection, but follow code: replace boot, seal, reflash, maintain proper clearances.
What Permits or Codes Apply When Replacing Roof Vents or Chimney Flashing?
You’ll typically need building permits if you alter roof penetrations, framing, or fire-rated assemblies; otherwise repairs may be exempt. Follow local codes, manufacturer instructions, and NRCA details, and maintain required clearances and proper flashing.
How Can I Prevent Future Chimney and Vent Leaks Long-Term?
Sure, ignore it and you’ll get leaks—so schedule annual roof inspection, reseal code-approved flashing, and replace cracked boots. You’ll keep clearances, use compatible sealants, and document work. Prioritize vent maintenance, fastener torque, and safe ladder practices.
Conclusion
You’ve now got a safe, code-aware process to pinpoint leaks at chimneys and vents before you repair anything. Roofing leaks aren’t rare—NRCA notes flashing failures are among the most common sources, and studies often cite flashing in roughly 80–90% of roof-leak investigations. If your hose test and attic tracing confirm a penetration, don’t guess: restore compliant step/counterflashing, sealed vent boots, and underlayment laps. If you see rot, cracked mortar, or steep-slope hazards, call a licensed roofer.