Build a 4-ft-wide raised bed (6–8 ft long) in a spot that gets 6–8+ hours of sun and drains fast; avoid low, puddling areas. Mark, square, and level the site, remove sod, and loosen native soil 4–6 inches. Frame it with cedar or pine using exterior deck screws, then line the bottom with cardboard. Fill with a 40/40/20 mix of topsoil, compost, and aeration material, and install drip or soaker lines under mulch. Keep going for setup details.
Key Takeaways
- Choose a 4×6–8 ft bed, 10–12 in tall; increase to 18–24 in for quicker warming and deeper-rooted crops.
- Site the bed in 6–8+ hours of sun on well-draining ground; avoid low spots and confirm 1–3 in/hr percolation.
- Level the footprint, remove sod, and loosen native soil 4–6 inches to improve drainage and prevent compaction.
- Build with rot-resistant wood and exterior deck screws; line the bottom with cardboard and add hardware cloth if pests are an issue.
- Fill with a uniform 40% topsoil, 40% compost, 20% aeration mix; avoid layers, and mulch to reduce crusting and runoff.
Choose a Raised Bed Size (Best Standard Dimensions)
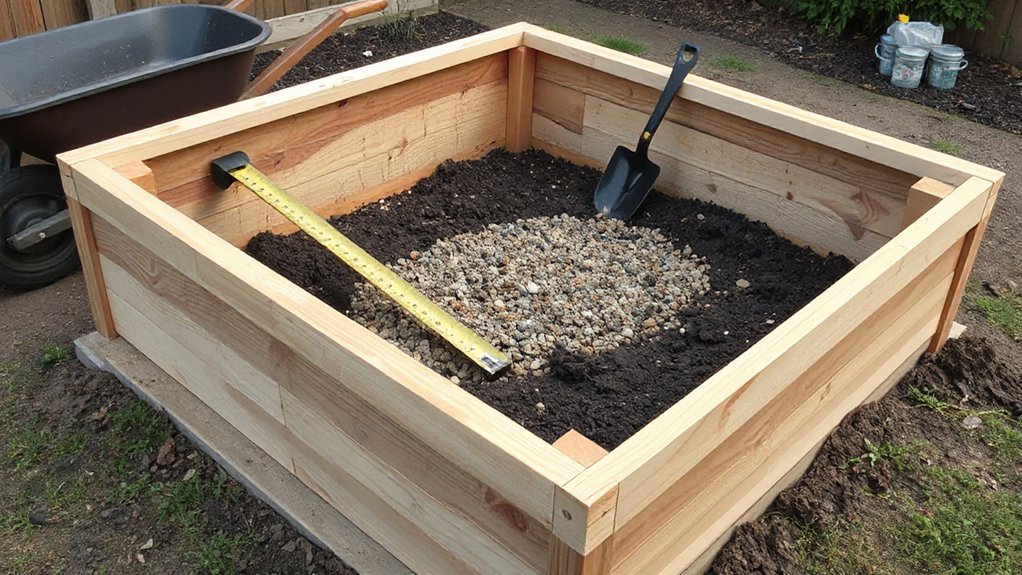
Before you buy lumber or pick a site, lock in your raised bed’s dimensions because width, length, and height determine how easily you can reach the soil, how much it costs to build, and how well it drains. Keep width at 4 ft if you’ll access from both sides, or 2–3 ft if it’s against a wall; this lets you reach the center without stepping on soil and compacting roots. Limit length to 6–8 ft so boards stay straight and joints don’t rack; longer beds need cross-bracing. Choose 10–12 in height for most crops; go 18–24 in if you need faster warming or deeper rooting. Proper sizing supports Soil fertility by preventing compaction and improves Pest control by simplifying covers and inspection.
Pick a Sunny Spot With Good Drainage
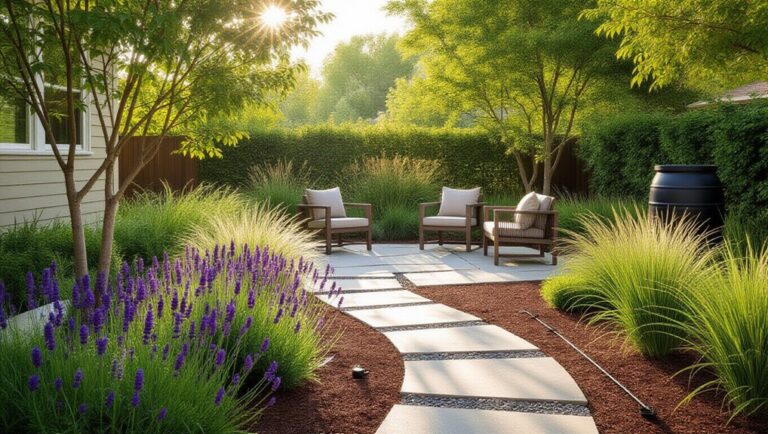
Where you place your raised bed largely determines how productive it’ll be, so choose a site that gets 6–8+ hours of direct sun and drains quickly after rain. Track Sunlight exposure for a day in spring or summer: note shade from trees, fences, and buildings at 9 a.m., noon, and 3 p.m. Avoid low spots where water puddles longer than 2–4 hours; roots need oxygen, and saturated soil promotes disease. Do a quick percolation check by digging a 12-inch hole, filling it with water, and timing the drop; 1–3 inches per hour is a solid range. If drainage is slow, relocate or plan to elevate the bed further. Also keep it near a hose, and away from aggressive roots that rob soil fertility.
Choose Raised Bed Materials: Cedar, Pine, or Blocks
Once you’ve picked a sunny, well-drained site, choose a bed material that matches your budget, climate, and how long you want it to last. Cedar resists rot and insects naturally, so you’ll replace boards less often; it’s a strong option in wet climates and supports Garden pest control by limiting wood-boring damage. Pine costs less but decays faster, especially where soil stays damp; extend its life by keeping boards above grade and avoiding constant splash zones. Concrete blocks last decades, don’t warp, and add thermal mass that moderates soil temperature, but they’re heavier and can raise pH slightly in very alkaline mixes. Whatever you pick, line the bed bottom with cardboard and follow Composting tips: add finished compost, not raw scraps.
Grab the Tools, Screws, and Brackets
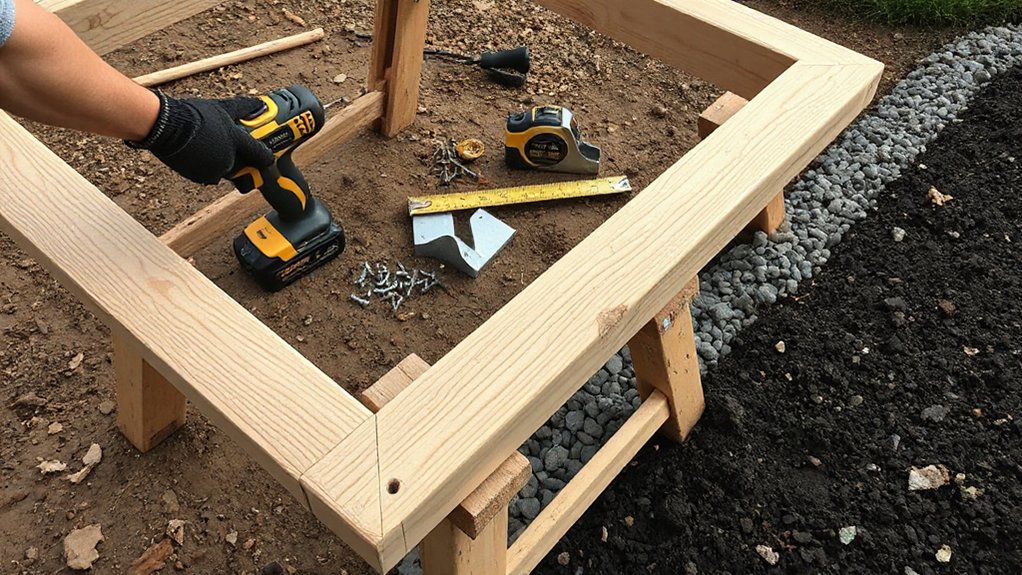
Even if you keep the design simple, you’ll get a straighter, longer-lasting raised bed by using the right fasteners and a short, deliberate tool list. Choose exterior-rated, corrosion-resistant deck screws (2 1/2–3 in.) over nails; they resist loosening as boards swell and shrink. Add two galvanized corner brackets per corner or 4×4 corner posts if you want extra rigidity.
Bring a drill/driver with a bit set, tape measure, speed square, clamps, and a pencil. Pre-drill near board ends to prevent splitting, especially with dry cedar or pine. Keep a level on hand for checking board alignment while fastening. Use hardware cloth staples and snips if you’ll later block burrowing garden pests. Accurate cuts and square corners preserve consistent plant spacing inside the bed.
Mark and Level the Ground for the Raised Bed
Measure and mark the bed’s perimeter with stakes and string, then confirm the layout is square by checking diagonal measurements match. Use a level and a straight board to find high and low spots, and adjust until the footprint is flat and consistent. Strip the turf and remove rocks, roots, and debris so the frame sits tight to the soil and won’t shift.
Measure And Mark Perimeter
Before you cut lumber or move soil, define the bed’s exact footprint and confirm the site is level enough to build on. Choose dimensions based on reach (typically 3–4 feet wide) and lay out the rectangle with stakes at each corner. Run mason’s line tightly between stakes to mark edges, then measure each side to match your plan. Mark the perimeter on turf with spray paint or a flat spade so you can remove grass cleanly without widening the bed. Check for obvious dips by laying a straight 2×4 on the ground and sliding it across the footprint; flag low spots for later adjustment. Clear surface debris to reduce pest habitat and improve later soil amendments placement. This layout also guides edging for pest control barriers later.
Check Square And Level
How do you know your layout won’t rack or rock once you stack boards and fill soil? You verify square and level before you build. Measure both diagonals between opposite corner stakes; when they match, your rectangle is square. If they don’t, nudge one stake in or out and recheck until the numbers agree within 1/8 inch. Then check level across the full length and width using a 4-foot level on a straight board or a laser level. Mark high and low spots with paint or flags and record the difference; more than 1 inch of slope across the bed will cause uneven drainage. While you’re at it, note soil testing locations and plan pest prevention barriers on the true perimeter line.
Remove Turf And Debris
With your layout confirmed square and level, clear the footprint so the bed sits on firm, uniform ground. Start turf removal by slicing along the outline with a flat spade. Cut 2–3 inches deep, roll the sod, and remove it completely; grass left in place can regrow through seams and compete for moisture. If you’re working over compacted soil, loosen the top inch after sod removal so the base settles evenly.
Finish with debris clearance: rake out roots, sticks, rocks, and construction scraps that could create voids and uneven settling. Check for high spots and shave them down; fill low spots with native soil, not compost, which decomposes and sinks. Recheck level across the footprint before you set the frame in place.
Build the Raised Bed Frame (Fast, Square, Strong)
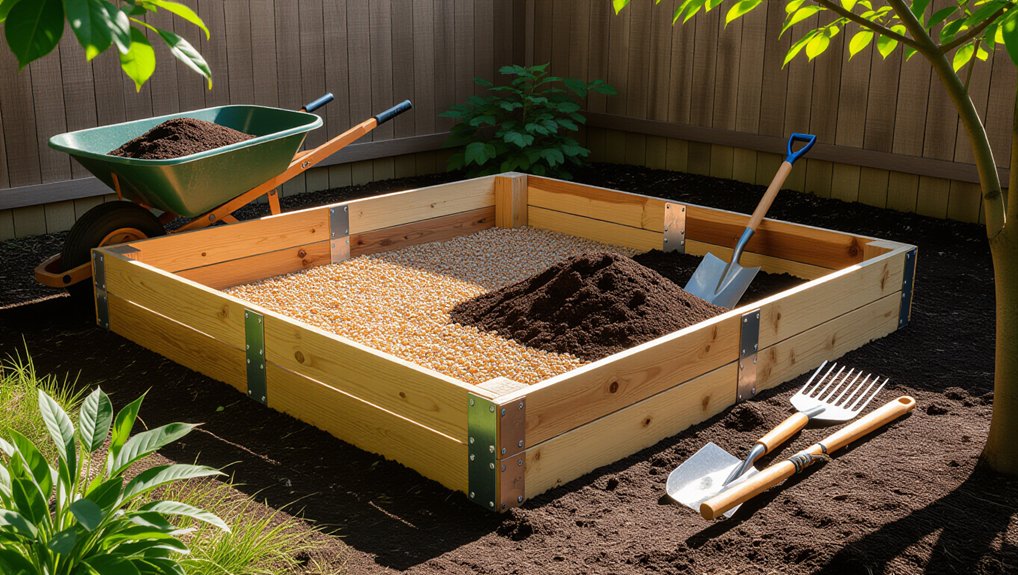
Once you’ve cut and staged your lumber, assemble the frame on a flat, hard surface so it stays square. Clamp corners, then drive two exterior-grade screws per joint, predrilling to prevent splitting. Measure both diagonals; adjust until they match, confirming a true rectangle. Add corner brackets or 2×2 cleats if you want extra racking resistance. If your bed runs longer than 6 feet, install a midspan brace to reduce bowing under moist soil loads. Set the frame in place and check for level in both directions; shim with gravel, not soil, so it won’t settle unevenly. A tight frame reduces gaps where garden pests hide and keeps soil amendments from leaking out.
Add Cardboard, Weed Barrier, and Rodent Mesh
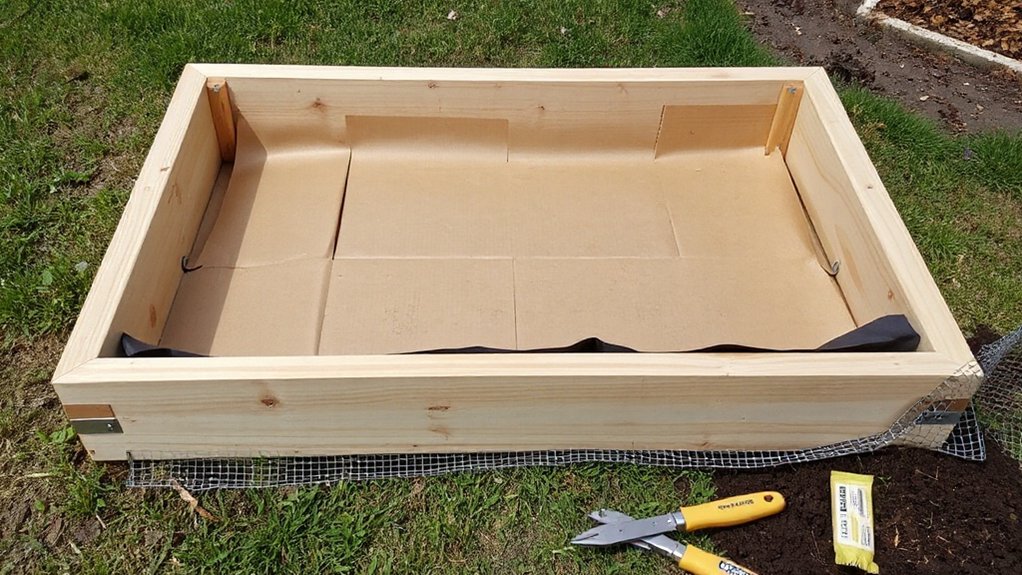
Before you add soil, lay down a layered base that blocks weeds and burrowing pests while still letting water drain. Start with Cardboard layering: overlap plain, tape-free sheets 6–8 inches, wet them to conform, and cover all seams to smother existing growth. Avoid glossy or heavily inked cardboard to reduce contaminants. Next, do Weed barrier installation only if your site has aggressive perennial weeds; choose permeable landscape fabric, not plastic, and pin it flat so gaps don’t invite shoots. Finally, stop gophers and voles with 1/4-inch galvanized hardware cloth. Lay it across the entire footprint, bend edges up the inside walls 3–4 inches, and staple or screw it to the frame for a continuous, chew-resistant liner.
How Deep Should a Raised Bed Be for Vegetables?
To set your raised-bed depth, start with your vegetables’ root depth needs: shallow crops can work in 6–8 inches, while most vegetables perform best with 12–18 inches and deep-rooted types may need 18–24 inches. You’ll choose a depth range that matches your crop plan and the soil beneath the bed, since hardpan or compacted subsoil effectively reduces usable rooting volume. Build the soil profile in layers that support drainage—coarse material only where needed, then a deep, well-structured growing mix—so water moves through without starving roots of oxygen.
Vegetable Root Depth Needs
How deep should your raised bed be for vegetables? Start by matching bed depth to the crop’s root depth, because roots must access water, oxygen, and nutrients without hitting a hard barrier. Shallow-rooted crops concentrate feeder roots near the surface, so they’re more sensitive to rapid drying and temperature swings. Medium-rooted vegetables explore deeper layers, improving drought buffering if the profile stays loose. Deep-rooted plants need continuous, unobstructed soil to anchor and scavenge moisture; compacted layers or rocky subsoil will stunt growth even if the top looks fine. You’ll also need strong soil aeration: oxygen diffusion drops sharply in saturated or compacted mixes, reducing root respiration and nutrient uptake. Check expected rooting habits and your native soil constraints before you build.
Recommended Bed Depth Ranges
Root depth gives you the target; bed depth gives those roots usable, uncompacted growing space. For most vegetables, you’ll get reliable performance with 10–12 inches of finished soil, especially for lettuce, spinach, radishes, and bush beans. Choose 12–18 inches when you want broader flexibility for carrots, beets, peppers, and determinate tomatoes, because these crops benefit from deeper moisture buffering and steadier temperatures. Build 18–24 inches if you plan on long-rooted crops (parsnips), large fruiting plants (indeterminate tomatoes), or heavy feeders you’ll push hard with soil amendments. If you can’t build deep, adjust planting techniques: grow compact varieties, space wider, and irrigate more consistently. Aim deeper when beds sit over compacted ground.
Soil Layers And Drainage
Because water movement matters as much as depth, you’ll get the best results when you treat a raised bed as a soil profile with drainage built in. Start by loosening native soil 4–6 inches to break compaction and create a percolation path. If you’re on heavy clay, add a thin layer of coarse composted bark or sharp sand only after loosening; layering without mixing can form a perched water table.
Build upward with a uniform blend: about 40% topsoil, 40% compost, and 20% aeration material (aged pine fines, perlite, or coarse sand). This Soil composition supports roots, microbial activity, and stable structure. For drainage improvement, keep fines moderate, avoid plastic liners, and cap with 1–2 inches of mulch to reduce crusting and runoff.
Fill Your Raised Bed: The Best Soil Mix Ratio
Once your frame is level and secured, you’ll get the best growth by filling it with a balanced soil blend that drains well, holds moisture, and supplies steady nutrients. Aim for a 40/40/20 ratio: 40% screened topsoil for minerals and structure, 40% finished compost for biology and fertility, and 20% aeration material (coarse sand, perlite, or pine fines) to prevent compaction. Mix thoroughly outside the bed, then fill in 6-inch lifts and lightly tamp to reduce settling without crushing pore space. Add organic amendments only after a soil test; typical needs include lime for pH, and rock phosphate or greensand for slow-release minerals. This consistent base supports predictable results when you plan companion planting layouts and rotation. Avoid fresh manure or woody chips.
Set Up Watering: Soaker Hoses or Drip Lines
After you fill the bed, set up irrigation before planting so you can deliver water directly to the soil with minimal evaporation and leaf wetness. Lay soaker hoses in parallel runs 6–12 inches apart for dense plantings, or use drip lines with 0.5–1 gph emitters spaced 6–12 inches for row crops. Keep lines 2–3 inches from stems to reduce rot risk. Connect tubing to a pressure regulator (about 10–25 psi for drip) and an inline filter to prevent clogging. Add a timer for Automatic irrigation and consistent scheduling; start with 20–40 minutes, then adjust based on soil moisture 2–3 inches down. Mulch over lines to improve Water conservation and stabilize moisture.
Troubleshoot Raised Bed Problems (Weeds, Bowing, Drainage)
Even if you build the frame square and fill it with quality soil, raised beds can still develop predictable issues—weed pressure, sidewall bowing, and poor drainage—that you can diagnose quickly by looking at where the problem shows up and under what conditions. If weeds cluster at edges, light is hitting bare soil; lay cardboard under mulch, then keep a 2–3 inch mulch cap and tighten compost management so you’re not spreading viable seeds. If sidewalls bow midspan after rain, hydrostatic pressure is pushing outward; add mid-bed stakes, use thicker boards, and avoid overfilling above the top rail. If water pools after irrigation, test with a 1-inch soak: standing water past 60 minutes signals compaction; fork in aeration, add coarse compost, and verify your base drains. Combine fixes with targeted pest control.
Frequently Asked Questions
What Vegetables Grow Best in a Raised Bed Versus In-Ground?
You’ll grow carrots, radishes, lettuce, and onions best in raised beds; you’ll do potatoes, corn, and sprawling squash better in-ground. Use composting techniques to boost tilth, and install watering systems for steady moisture.
How Much Does It Cost to Build a Simple Raised Bed?
You’ll spend $50–$250 to build a simple raised bed; expenses can be “a gentle surprise.” Cost considerations include size and soil. Material options like untreated lumber, cedar, or blocks shift totals and longevity.
Do Raised Beds Need to Be Rotated or Moved Each Season?
No, you don’t need Season rotation or Bed relocation each season. You should rotate crops within the bed to reduce pests and nutrient depletion. You’ll move beds only for site issues like shade, drainage, or soil contamination.
How Do I Protect Raised Beds From Pests Like Rabbits and Deer?
Sure, invite rabbits and deer—then block them: install 8-foot deer fencing and 2-foot rabbit mesh, bury 6 inches, and add a tight gate. Pest deterrent strategies plus Wildlife exclusion tips reduce browsing consistently.
Can I Build a Raised Bed on a Rooftop or Balcony Safely?
Yes, you can, if you confirm load limits with your building engineer. For Balcony gardening, use lightweight media and waterproof trays. Prioritize Rooftop safety: distribute weight, guarantee drainage, add wind bracing, and rail clearance.
Conclusion
Now you’ve built a raised bed that improves drainage, warms faster, and keeps roots in healthier soil. Stay consistent: top up with compost, check for bowing, and adjust watering as plants grow. One telling statistic: typical garden soil can lose about 50% of its organic matter in 25–50 years under intensive use, reducing structure and water-holding capacity. Your controlled soil mix helps slow that decline and keeps harvests reliable season after season.
About the Author