

Set a properly rated ladder on firm, level ground at a 4:1 angle, keep three points of contact, and don’t work in wind or rain. Protect the fascia with a drop cloth or cardboard taped with exterior painter’s tape, and keep cleaners off painted trim. Scoop debris out in small lifts with a plastic scoop or gloved hand, bag it securely, then flush from the far end using low-pressure water. Next, check downspouts, seams, and brackets for leaks and issues.
Key Takeaways
- Set a stable, load-rated ladder using the 4:1 rule, wear PPE, and avoid cleaning in wind, rain, or lightning.
- Protect fascia with drop cloths or cardboard and exterior painter’s tape; keep cleaners off painted trim and wipe spills immediately.
- Remove debris with a plastic scoop or gloved hands in small loads, lifting straight up, and bag debris to prevent spills on fascia.
- Flush gutters gently from the far end using low-pressure water, watching for leaks and confirming steady discharge through downspouts.
- Test downspouts for blockages and clear them carefully with gentle drain rods, then recheck pitch, hangers, seams, and drips.
How to Unblock Gutters: Quick Step-by-Step
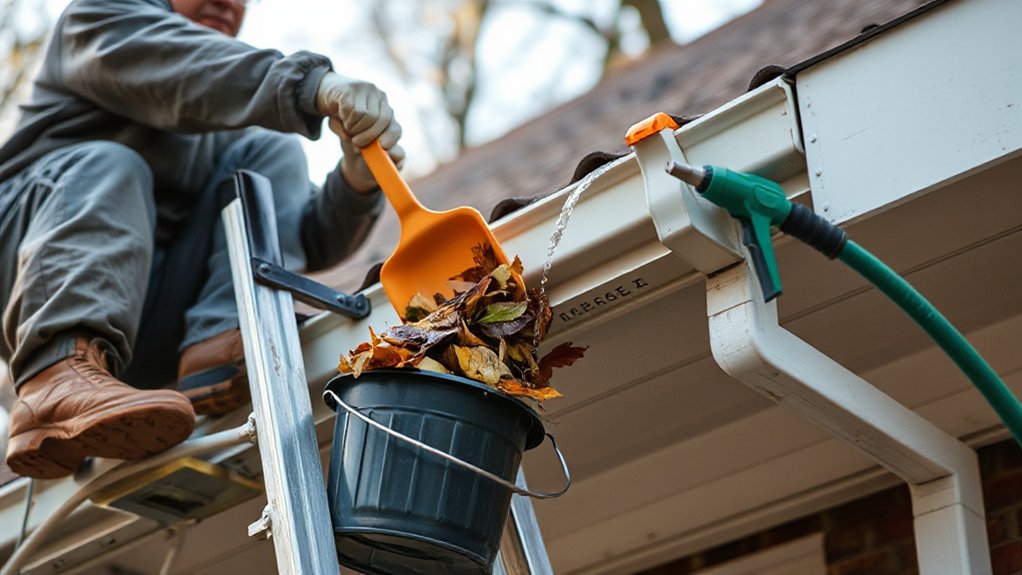
Before you start clearing a blockage, set up safely and verify you can work without overreaching. Keep the work zone controlled and don’t work in wind, rain, or lightning. Confirm the ladder footing is stable, and maintain three points of contact while you reposition.
Start at a downspout outlet and clear debris upstream in short sections so water can drain. Remove compacted material by hand, place it in a container, and don’t lever against the fascia or gutter edge. Flush the cleared section with a gentle, controlled flow and watch for leaks at joints and end caps. If drainage still backs up, check the downspout entry for a clog and clear it. Finish by confirming continuous flow to discharge. This Gutter maintenance follows Safety precautions.
Tools and PPE for Cleaning Blocked Gutters
Although clearing debris can look like a simple scoop-and-flush job, you’ll stay safer and avoid denting gutters or stressing the fascia if you use the right tools and PPE and match them to the access method you’re using (ladder or roofline), in line with the manufacturer’s instructions and any site safety requirements.
For Gutter maintenance, use a plastic gutter scoop, a soft-bristle brush, and a bucket or debris bag on a lanyard; avoid metal tools that can gouge coatings. Use a garden hose with a trigger nozzle or a low-pressure wand to confirm flow without blasting joints. Wear Safety precautions: cut-resistant, water-resistant gloves; safety glasses; long sleeves; and non-slip, closed-toe footwear. If you’re near overhead conductors, use non-conductive tools. If you handle moldy debris, add an N95/P2 respirator. Inspect PPE before each use.
Ladder Setup for Safe Gutter Cleaning
When you set your ladder correctly, you reduce fall risk and keep your weight off the gutter and fascia. Pick a ladder rated for your load, and inspect rails, rungs, and feet for damage. Set it on firm, level ground; use a stabilizer if available. Follow the 4:1 rule: for every 4 feet of height, place the base 1 foot out. Extend the rails at least 3 feet above the roof edge when accessing the roofline. Lock spreaders, face the ladder, and keep three points of contact. Don’t overreach; climb down and move the ladder instead. Tie off when feasible and keep the area clear. Good ladder safety prevents slips and avoids avoidable gutter repair.
Protect Fascia and Paint Before You Start

Since gutter debris often hides sharp grit that can scour trim, take a minute to shield the fascia and paint before you touch the trough. Lay a clean drop cloth or cardboard strip along the fascia face to prevent abrasion, then tape it lightly with painter’s tape rated for exterior use. Check the fascia for soft spots, popped nails, or peeling paint; postpone work if you find rot that could fail under contact. For paint preparation, rinse loose dust with a gentle mist and let it dry so tape adheres without lifting finish. Keep cleaners off painted trim; if you must wet the area, use plain water and wipe promptly. Wear gloves and eye protection, and follow ladder clearances for fascia maintenance.
Lift Out Debris Without Bending Guttering
With the fascia masked and inspected, you can start clearing the trough, but treat the gutter as a thin, easily deformed channel. Keep three points of contact on the ladder and work within your belt-buckle zone to avoid overreach, per basic fall-safety guidance.
Use a plastic gutter scoop or gloved hand, not a metal trowel. Start at the downspout end and lift material straight up, keeping the tool’s edge flat to the gutter floor so you don’t pry against the front lip. Support long sections with your free hand if they flex, and never lean your forearm on the outer bead. For packed silt, loosen it with short, shallow strokes, then lift. This controlled debris removal protects hangers, seams, and slope during routine gutter maintenance.
Bag the Muck so It Won’t Clog Drains
Use heavy-duty trash bags rated for wet yard waste so you don’t risk tears and spills near ladders or walkways. Scoop the muck straight into the bag (not onto the ground) to keep it out of downspouts and storm drains. Seal each bag tightly and stage it on level ground away from drains and exits until you can dispose of it per local rules.
Choose Heavy-Duty Trash Bags
Before you start scooping, set up heavy-duty trash bags so every handful of wet sludge, leaves, and grit goes straight into containment instead of onto the ground or into a storm drain. Choose contractor-grade bags (3–6 mil) with a puncture-resistant blend, since twigs and granules can slice thin liners and create slip hazards. Use bags with drawstrings or tie-offs, and stage them in a stable bin or bucket so they won’t tip on ladders or walkways. For code-compliant debris disposal, keep organics separate from roofing grit if your municipality requires it. Don’t overfill; keep loads lift-safe and sealed to prevent leaks. This simple step supports gutter maintenance by keeping runoff clean and your work area controlled.
Scoop Debris Into Bags
Heavy-duty bags staged and open, start removing gutter debris in controlled, small scoops so nothing drops into landscaping or a storm drain. Use a plastic gutter scoop or trowel, keeping your other hand on the ladder for three points of contact. Work away from downspout outlets first, then toward them, so you don’t pack sludge into the throat. If you hit compacted leaves, break them up and lift them out; don’t flush them with a hose yet. Keep each scoop low and inside the bag opening to prevent windblown spread and slip hazards. For code-conscious gutter maintenance, treat organic muck as contaminated runoff control. Good debris disposal means bagging everything, including shingle grit and nesting material, before anything reaches drains.
Seal And Stage Bags
Once you’ve scooped a bag to a manageable weight, cinch it shut immediately and stage it away from roof edges, walkways, and any storm-drain path. Use Stage bag selection: choose contractor-grade bags, double-bag wet sludge, and don’t exceed your safe lifting limit. Set bags on a tarp or in a rigid tote to prevent leaks and trips, and keep them clear of ladders and egress routes. Perform a Seal inspection before moving on: check the drawstring or tie, compress the top, and confirm no seepage. If you see drips, re-bag and wipe exterior residue. Label yard-waste vs. trash per local code, then transport sealed bags directly to disposal, never dumping into gutters, downspouts, or streets.
Flush Gutters and Test Flow With Low Pressure
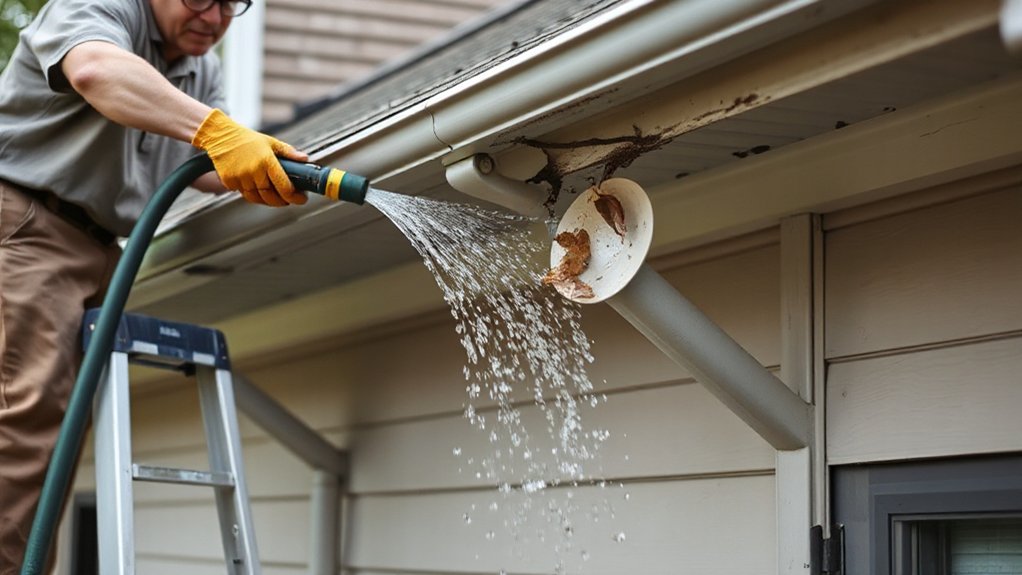
A controlled, low-pressure flush clears the remaining grit and confirms your downspouts can carry water without backing up under the fascia. Set your ladder on firm ground, maintain three points of contact, and keep the hose routed so you won’t trip. Use a garden hose with a spray nozzle set to “shower” or “fan,” never a pressure washer, to avoid blowing seams or lifting hangers.
Start at the end farthest from the outlet and work toward it in short passes. Watch for uniform sheet flow along the gutter floor and steady discharge at the bottom. Pause for Gutter inspection at corners, joints, and behind hangers; look for leaks at the fascia line. Finish by rinsing splash guards and checking screens for debris prevention.
Clear a Blocked Downpipe (No Forcing)
You’ll first confirm the downpipe is blocked by checking for slow discharge and backing up at the outlet, then you’ll work from ground level to stay ladder-safe and code-compliant. Run a steady, low-pressure hose feed from the top (or at an accessible joint) to flush loose debris and identify where flow stops. If it still won’t clear, you’ll use drain rods with gentle, controlled turns—no forcing—to avoid cracking fittings or dislodging brackets.
Diagnose Downpipe Blockage
Where’s the blockage—at the outlet, a bend, or the underground run? Start by suiting up: gloves, eye protection, and stable footing on a rated ladder; don’t overreach. Check the downpipe inlet at the gutter dropper for packed debris, then inspect each visible elbow and offset for dents, screws, or misalignment that violates manufacturer clearances. If you’ve got gutter insulation, confirm it hasn’t shifted and choked the outlet. Tap the pipe lightly and listen for dull “thuds” that suggest a plug; avoid stabbing tools that can split PVC or dislodge joints. At ground level, remove the shoe or leaf diverter if fitted and look for buildup. If water staining suggests overflow, plan fascia repair after clearing.
Flush With Water Hose
Once you’ve confirmed the downpipe is obstructed, flush it with a garden hose to move the plug gently rather than forcing it. Set your ladder on firm, level ground and maintain three points of contact; keep the work area clear to meet basic site-safety expectations. Fit a spray nozzle Hose attachment so you can control Water pressure precisely. Start with low pressure, aiming down the gutter outlet into the downpipe, and pulse the flow for a few seconds at a time. Listen for gurgling and watch the lower discharge point for movement. If water backs up, stop and let it drain before repeating. Don’t seal the opening with the nozzle; maintain an air gap to prevent blowback and splash into the fascia line.
Use Drain Rod Gently
If flushing with a hose doesn’t restore flow, switch to drain rods and clear the downpipe with controlled, gentle passes rather than brute force. Lock your ladder, wear gloves and eye protection, and keep your footing clear to meet basic work-at-height safety practice. Feed the rod from the top outlet, rotate clockwise, and advance in short increments; these Drain rod techniques reduce joint unscrewing and minimise pipe damage. If you hit resistance, withdraw, rinse the head, and reinsert—don’t ram, as you can crack fittings or dislodge brackets. Confirm the downpipe is secured to the wall before pushing. Finish by flushing again and checking the gully for free discharge. Apply gutter extension tips only after flow returns.
Check Joints, Brackets, and Leaks After Cleaning
After you’ve cleared the debris and flushed the run, inspect every seam, end cap, and downspout connection for gaps or fresh drip lines. This joint inspection supports leak prevention and helps you spot failures before water reaches the fascia or soffit. Keep your ladder tied off, maintain three points of contact, and don’t lean past the rails.
Next, check brackets and hangers: confirm they’re fastened into solid framing, spaced per manufacturer instructions, and not pulling away. Tighten loose fasteners, replace corroded hardware, and verify the gutter pitch still runs to the outlet. Run water again and watch for seepage at seams and corners. If you seal, dry the area first and use gutter-rated sealant only. Stop if you find rot or unstable fixings.
Frequently Asked Questions
How Often Should Gutters Be Cleaned to Prevent Fascia Water Damage?
Clean gutters at least twice yearly—spring and late fall—and quarterly if trees shed heavily. You’ll reduce gutter debris buildup and schedule a fascia inspection each visit. Follow ladder-safety and local code requirements to prevent overflow damage.
What Are Signs the Fascia Is Already Rotting Behind the Guttering?
Even if you think it’s fine, you’ll spot rot by sagging gutters, soft or crumbling boards, peeling paint, dark stains, musty smell, and fasteners pulling out. Use ladder safety; perform Fascia inspection and Rotten wood detection promptly.
Can Blocked Gutters Cause Damp or Mould Inside the House?
Yes, blocked gutters can cause indoor damp or mould by forcing water into walls and roof spaces. Remove Gutter debris promptly, check for Roof pests, and guarantee downpipes discharge correctly. If staining persists, hire compliant professionals.
Should I Replace Gutter Guards After Cleaning, and Which Type Suits Best?
Absolutely—you should replace damaged guards after cleaning; it’s the difference between paradise and disaster. Follow Gutter guard maintenance: refit securely, check local code, fasten per manufacturer specs. Choose aluminum micro-mesh. Use DIY safety tips: gloves, ladder stabilizer.
When Is It Safer to Hire a Professional Instead of DIY Gutter Cleaning?
Hire a professional when you can’t safely access ladders, your roofline’s steep, you see damaged hangers, or Gutter debris causes overflow. Pros perform Roof inspection, follow fall-protection rules, and meet local code requirements.
Conclusion
Once you’ve cleared debris, flushed the run, and checked the downpipe, you’re not done until you inspect every bracket, joint, and drip line. You’ll want to confirm water flows freely to an approved discharge point and nothing’s pulling on the fascia or peeling paint. Keep pressure low, avoid prying, and clean up bagged waste so it can’t reblock drains. Follow ladder safety and local code requirements—better safe than sorry.
About the Author



