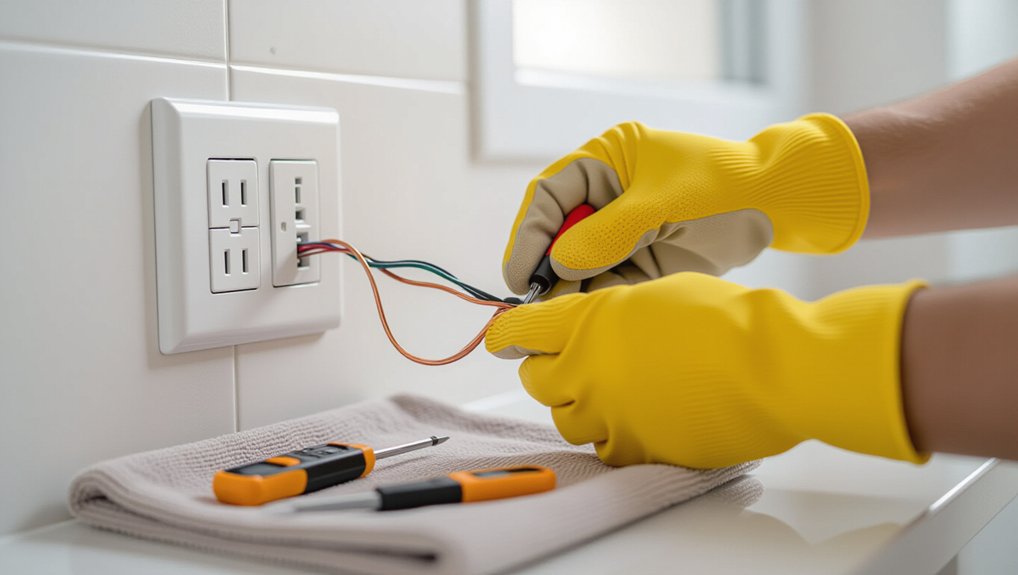
Shut off the correct breaker, lock it out, and prove the outlet’s dead with a known-working tester (hot‑neutral and hot‑ground), then recheck on a live source. Remove the cover plate and pull the receptacle out straight. Find why it’s loose: stripped box threads, recessed box, rocking yoke, or worn contacts. Fix with proper screws, spacers or a listed box extender, and move any backstabs to screw terminals. Plug-test it afterward, and there’s more to cover next.
Key Takeaways
- Shut off and lock out the correct breaker, then verify zero voltage hot-to-neutral and hot-to-ground with a known-working tester.
- Remove the cover and receptacle carefully, then inspect for scorch marks, melted plastic, or damaged insulation before tightening anything.
- Identify the looseness source—worn receptacle contacts, loose mounting screws, or a recessed/loose box—and fix the actual cause.
- Stabilize neatly by squaring the yoke, alternating screw tightening, and using listed spacers or box extenders so the outlet sits flush.
- If wiring is loose or backstabbed, move conductors to screw terminals, torque properly, reassemble, restore power, and test outlet function.
Turn Off Power and Confirm It’s Off
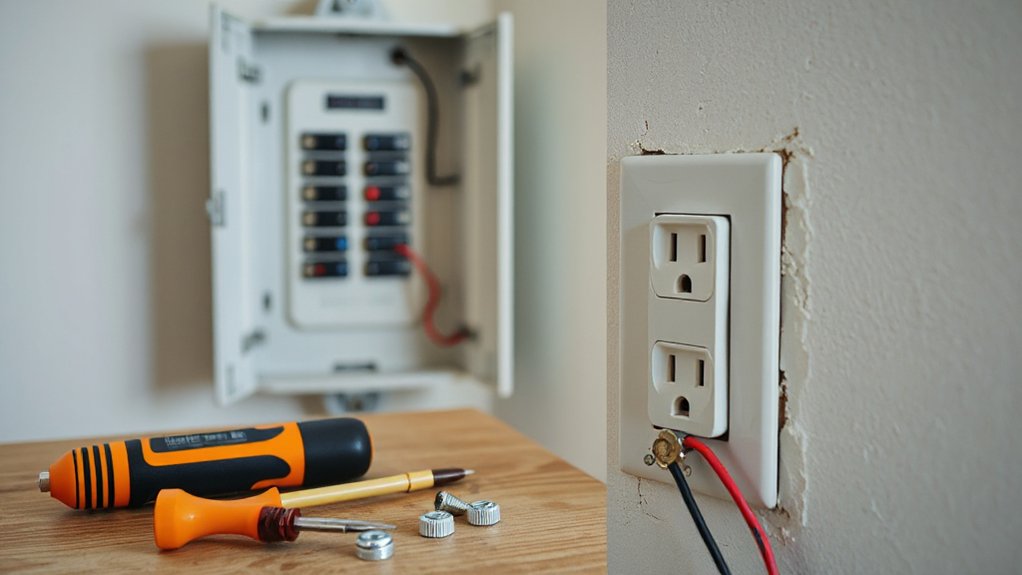
Before you touch the outlet, shut off the correct circuit at the service panel and make sure it’s truly de-energized. Identify the breaker by labeling, a circuit map, or switching one at a time, then lock it out if you can. Post a note so no one restores power while you’re working.
Put on safety gloves and stand on a dry surface. At the receptacle, use a Voltage tester you know works: prove it on a live source first, then test hot-to-neutral and hot-to-ground for zero voltage, and retest on the live source. If any reading indicates power, stop and find the right breaker or a backfeed. Don’t rely on a lamp or switch position. Treat conductors as energized until verified.
Remove the Faceplate and Pull the Outlet Out
With power confirmed off, you’re ready to access the device safely. Use an insulated screwdriver to unscrew and remove the faceplate, then remove the mounting screws. Gently pull the outlet straight out of the box, keeping conductors undisturbed and your hands clear of any bare metal.
Turn Off Power
Why guess when you can verify? Before you touch anything, shut off the correct breaker for that receptacle. If the panel isn’t labeled, plug in a lamp or tester, then flip breakers one at a time until it goes dark. Lock out the breaker if you can, and tape a note on the panel so nobody restores power.
Next, confirm it’s de-energized with Voltage testing: check hot-to-neutral and hot-to-ground at the receptacle slots, then recheck your tester on a known live source. Don’t rely on the switch or the lamp alone. Keep your hands off bare conductors, and treat damaged Wire insulation as a stop-work condition. If you can’t positively identify the circuit, call a licensed electrician.
Unscrew And Remove Faceplate
Once you’ve verified the circuit is de-energized, remove the cover plate by backing out the center screw with an insulated screwdriver and set the plate aside so it won’t crack. Use steady pressure so you don’t slip and mar the device yoke or wall finish. Choose the right removal tools: a #2 Phillips fits most plate screws, while a flat blade may suit older hardware. Don’t overtighten or pry against drywall. Note the faceplate material before handling—thermoplastic flexes, nylon can bow, and metal can conduct if it contacts energized parts, so keep it controlled and away from the box opening. If the screw is painted in, score paint lightly and try again. Store the screw with the plate.
Gently Pull Outlet Out
After you’ve removed the faceplate, back out the two mounting screws (top and bottom) and pull the receptacle straight out just far enough to access the terminals. Keep the breaker off and confirm de-energized with a two‑pole tester before you touch anything. Use gentle removal: grip the yoke, not the wires, and wiggle slightly if paint or drywall mud binds the device. Don’t pry against the box edge; you can crack the box or nick insulation. For delicate extraction, guide the conductors so they fold neatly into the box without sharp bends or tension on the terminals. If you feel resistance, stop and inspect for a snagged ground, back‑stabbed wire, or cable clamp interference. Maintain conductor insulation integrity throughout.
Find Why the Outlet Feels Loose
Sometimes the “loose outlet” problem isn’t the receptacle at all, so start by identifying what’s actually moving and why: does the plug wiggle in the slots, does the entire device shift in the box, or does the cover plate flex? With power off, test each condition separately. If only the plug feels sloppy, the contact springs inside the receptacle may be worn, and you’ll need Outlet replacement options that match the circuit rating and configuration. If the device rocks, check whether the mounting ears sit flush to the box and whether the box itself is secured to framing. If the plate flexes, verify the plate isn’t cracked and the screws aren’t bottoming out. As you plan repairs, review Electrical code updates for tamper-resistant and AFCI/GFCI requirements in your area.
Look for Heat Damage or Burn Marks
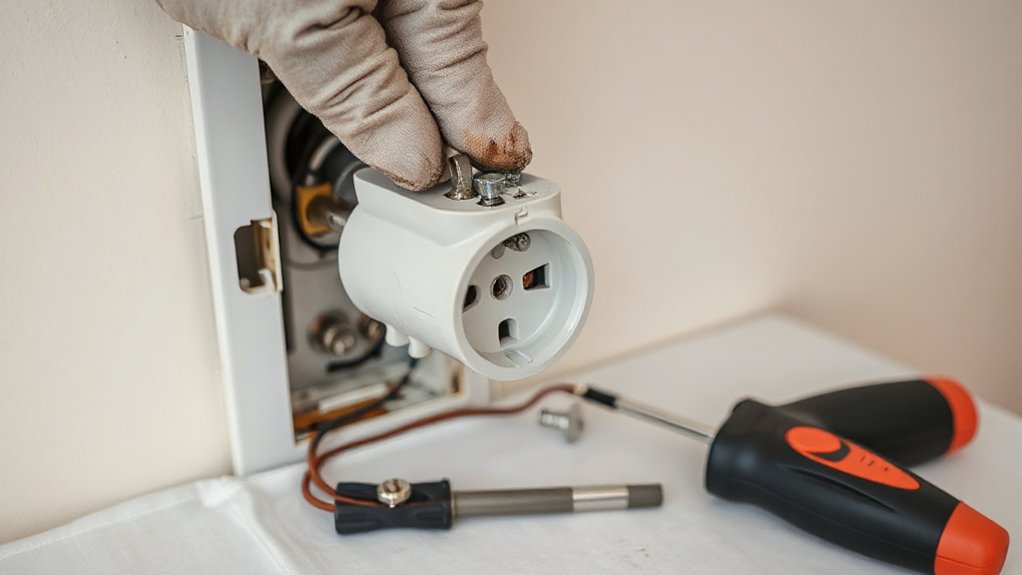
With power off at the breaker and the outlet verified dead, inspect the receptacle face and surrounding cover plate for scorch marks or discoloration. Remove the plate and look closely for melted or warped plastic on the receptacle body or insulation. If you find any heat damage, stop and replace the affected parts and correct the overheating cause before restoring power.
Identify Scorch Marks
Where should you look first for a dangerous outlet? Start at the receptacle face and surrounding cover plate under bright light. Put on Safety gloves, then scan for dark streaks, brown halos, or soot-like smudges around the slot openings and mounting yoke. Use color contrast: compare the suspect outlet to a nearby known-good device or the wall paint to spot subtle discoloration. Next, remove the cover plate with power off at the breaker and verify de-energized with a tester. Inspect the device ears, screw heads, and conductor insulation at the terminals for char, blistered varnish, or powdery residue. If you see scorch marks, stop and replace the receptacle and any damaged conductors per code, and torque terminations properly.
Check Melted Plastic
Before you reset a tripped breaker or keep using the receptacle, check the outlet and cover plate for melted or warped plastic that signals overheating. Plastic melting is a red flag that a loose connection, overloaded circuit, or failing device has generated excessive heat. Turn off the breaker, verify power is off with a non-contact tester, and remove the cover plate. Inspect the yoke, face, and surrounding drywall for heat damage, bubbling, discoloration, or a burnt odor. If you see deformation, don’t tighten screws and reuse it; replace the receptacle and cover with listed parts. Cut back any charred insulation, reterminate conductors on screw terminals to torque specs, and confirm proper box fill and grounding. Restore power and recheck for warming under load.
Tighten the Outlet Mounting Screws
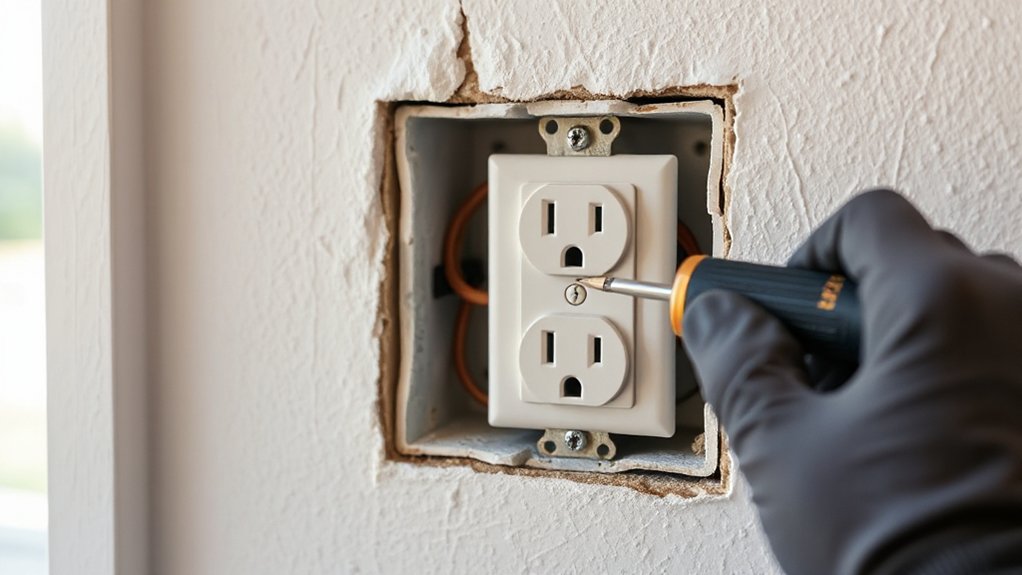
Once you’ve confirmed the circuit is de-energized, tighten the outlet’s top and bottom mounting screws so the device sits firmly against the electrical box. Practice Electrical safety by using a noncontact tester and verifying with a meter before you touch conductors. For tool selection, use an insulated #2 Phillips or a flathead that fits the screw head to prevent cam-out and stripped hardware. Turn each screw a few rotations, alternating top and bottom to keep the yoke square. Stop when the receptacle feels solid and the yoke lies flat; don’t over-torque and crack the device or deform the box. If the box threads are damaged, replace the screws with the correct 6-32 machine type, matching length to box depth. Reinstall the cover plate straight.
Shim a Loose Outlet With Spacers
If tightening the mounting screws still leaves the receptacle rocking, the electrical box is likely set back from the finished wall, so you’ll need spacers to bring the outlet flush and stable. Turn off the breaker, verify power is off with a tester, and remove the cover plate. Loosen the two mounting screws and gently pull the receptacle forward without stressing the conductors. For Spacer installation, stack listed plastic outlet spacers (or a listed box-extender system) on each screw between the yoke and the wall surface. Add just enough thickness so the yoke sits flat and the device face ends up even with the finished wall. Retighten evenly to prevent cracking. Confirm outlet stabilization by checking for zero movement, then reinstall the cover plate snugly. Restore power.
Secure a Loose Electrical Box in the Wall
Turn off the breaker, verify power is off, then pull the receptacle to inspect the electrical box and its fasteners for looseness or damage. Tighten mounting screws or replace missing clamps so the box is solidly secured to framing and won’t shift when you plug in a cord. If the box sits behind the finished wall surface, install a listed box extender to bring it flush and maintain required conductor protection.
Check Box Fasteners
Before you tighten a loose receptacle, verify the electrical box itself is firmly fastened to the framing or a listed old-work clamp system. Turn off the breaker, confirm power is off with a tester, then remove the cover plate and gently pull the device forward without stressing conductors. Inspect the box’s mounting ears, nails, or screws for looseness, corrosion, or stripped threads. Tighten mounting screws to the manufacturer’s torque guidance; don’t overtighten and crack plastic boxes. If you’ve got an old-work box, tighten the clamp screws so the wings bite the drywall evenly. Replace missing or damaged checkbox fasteners with listed parts only. A box that doesn’t move gives you lasting outlet stability and reduces arcing risk. Reinstall securely.
Add Box Extenders
When the wall surface sits proud of the electrical box and leaves the receptacle floating, add a listed box extender to bring the box face flush with the finished wall. Shut off the breaker, verify dead with a tester, and keep electrical safety your first step. Remove the cover plate, then back out the device screws and pull the receptacle forward without stressing conductors. Match the extender material and size to the existing box, and choose the correct depth so the extender aligns with the wall finish. Slide it over the box, confirm it seats square, and reinstall the device using longer 6-32 screws if needed. Tighten until snug, not warped, and guarantee the yoke sits firm and even. Reinstall the plate, restore power, and test.
Move Wires to Screw Terminals (Not Backstabs)
Although backstabbed connections save time during installation, they’re a common source of loose, overheating outlets, so move each conductor to the device’s screw terminals instead. With power verified off, pull the receptacle out and note each wire’s location. Release backstabs by inserting a small screwdriver into the release slot while pulling the conductor straight out. Inspect copper for nicks, heat damage, or corrosion; cut back and restrip to the manufacturer’s strip length if needed. Confirm wire gauge matches the device rating (typically 14 AWG on 15A, 12 AWG on 20A). Form a clockwise hook, land it under the correct brass or silver screw, and tighten to listed screw torque. Reinstall ground last and verify it’s secure.
Level the Outlet and Make the Plate Sit Flush
If the receptacle sits crooked or recessed, you can end up with a stressed device, a cracked cover plate, or exposed gaps that invite contact. With power off, align the yoke so it’s square to the box, then snug the mounting screws evenly—don’t over-torque and strip the ears. If the box is set back behind drywall, bring the device forward with listed outlet spacers or a box extender so the yoke lands firm and the finished edge meets code. Use shims to fine-tune tilt until the receptacle face is plumb and centered. Before installing the plate, confirm there’s no rocking; adjust again if needed. These Socket replacement techniques improve Outlet aesthetics and reduce strain on plugs and terminations. Tighten the cover plate screws gently to avoid cracking.
Test the Outlet With a Plug Tester
After you’ve leveled the receptacle and installed the cover plate, verify correct wiring with a listed three-light plug-in outlet tester. Plug it in fully and read the legend printed on the tester body; you’re checking hot/neutral polarity, open ground, and other common faults. If the lights indicate “correct,” you’ve improved Outlet safety and can proceed to use the receptacle.
If you see any fault pattern, don’t ignore it. Turn the breaker off, lock it out if possible, and recheck terminations, grounding, and conductor placement. Confirm the device rating matches the circuit and intended load for Electrical compatibility (15A vs 20A, standard vs GFCI/AFCI requirements). Retest after corrections, and document the result. Replace the tester’s batteries if it has any.
Frequently Asked Questions
What Outlet Types Are Best for Kitchens, Bathrooms, or Outdoor Locations?
You’ll use GFCI outlets for kitchens and bathrooms, and GFCI-protected, outdoor-rated receptacles with Weatherproof covers outside. Choose tamper-resistant types where required, match amperage to circuit, and follow local code for placement.
Can I Replace a Two-Prong Outlet With a Three-Prong One Legally?
Yes, you can, but only if you meet Grounding requirements and Outlet compatibility. About 40% of U.S. homes still have ungrounded outlets. You’ll need a grounded circuit, or install a GFCI and label it “No Equipment Ground.”
When Should I Call an Electrician Instead of Fixing It Myself?
Call an electrician when you lack electrical knowledge, can’t verify grounding, see scorched wiring, aluminum conductors, repeated tripping, or loose connections inside the box. You’ll protect DIY safety and stay code-compliant by stopping work.
How Much Does It Cost to Repair or Replace a Loose Outlet?
You’ll typically pay $75–$200 to repair a loose outlet, or $125–$300 to replace it; Cost estimates vary by labor and parts. Follow Repair tips: shut off breaker, verify de-energized, secure box, test.
Do I Need a Permit or Inspection to Replace an Electrical Outlet?
Maybe…you do: many areas don’t require a permit for like-for-like outlet swaps, but some do. Check local electrical codes first. For DIY safety, you’ll still need inspection if you alter wiring.
Conclusion
You’ve shut off power, pulled the plate, pinpointed the problem, and fixed the fit. Now make it final: check for scorching, cinch mounting screws, and secure the box so it can’t shift. Choose screw terminals over backstabs, then straighten the outlet so the plate sits snug and square. Restore power and verify with a plug tester. Slow, steady steps keep everything safe, solid, and satisfyingly seamless.
About the Author