Start by staying safe: barricade the area, use OSHA-rated fall protection, and keep ladders on firm, level ground. Inside, you’ll often notice musty odors, bubbling paint, or damp closet and attic-hatch areas before stains show. In the attic, use a headlamp and moisture meter to check sheathing for dark halos, glossy patches, rusted fasteners, and wet insulation traced upslope. Outside, scan with binoculars for lifted shingles, flashing gaps, clogged gutters, and damaged vent boots—next you’ll see how to confirm it.
Key Takeaways
- Check for musty odors, peeling paint, bubbling drywall, or faint dripping sounds near attics, closets, and HVAC returns.
- Inspect the attic for dark stains, wet sheen, swollen seams, rusted fasteners, or damp insulation; trace moisture upslope to the highest wet point.
- Use a moisture meter to scan rafters, sheathing, and ceiling edges for elevated readings before visible staining occurs.
- From the ground with binoculars, look for lifted or missing shingles, cracked flashing, open sealant joints, and storm damage around vents and chimneys.
- Examine gutters and fascia for clogs, sagging, overflow stains, and missing kickout flashing where roof planes meet walls.
Roof Leak Check: Safety Steps and Tools
Before you start a roof leak check, set up a safe, code-compliant work zone and gather the right tools so you don’t turn a minor leak into a fall or electrical hazard. Barricade the area, post warnings, and keep ladders on firm, level ground with 3-point contact. Use OSHA-rated fall protection, wear non-slip footwear, and avoid wet or icy surfaces. If you suspect wiring contact, shut off affected circuits at the panel and verify with a non-contact voltage tester. Bring a headlamp, moisture meter, binoculars, chalk, camera, and tape measure; document conditions for Roof maintenance logs and Insurance claims. Use a stable extension ladder that extends 3 feet past the eave, and inspect from the ground when possible.
Why Roof Leaks Show Up Before Ceiling Stains
Once you’ve secured the work area and verified you’re not working around energized circuits, it helps to know why the roof can leak long before you see a ceiling stain. Water rarely drops straight down; it follows framing, underlayment laps, and fasteners, traveling laterally before it finds an opening. Many Roof material systems shed water only when layers stay sealed and properly lapped; a lifted shingle, cracked flashing, or failed sealant can route moisture into the assembly without immediate interior evidence. If insulation absorbs moisture, it can buffer small leaks and delay visible damage. Roof ventilation also affects timing: poor airflow drives condensation and keeps sheathing damp, while good ventilation can dry minor intrusions before they reach drywall. You’ll spot risk earlier by understanding these pathways.
Fast Indoor Signs of a Roof Leak
You can often catch a roof leak indoors before stains form by noticing musty odors, peeling paint, or bubbling drywall that indicates elevated moisture. Treat these as a safety and code concern—wet assemblies can compromise electrical components and promote mold growth—so you should isolate the area and document conditions promptly. If you hear intermittent dripping sounds in the attic, don’t enter without proper lighting and stable footing; inspect from a safe access point and schedule a qualified evaluation.
Musty Odors Indoors
Because trapped moisture feeds mold and mildew quickly, a persistent musty odor indoors often signals a roof leak even before stains appear. Track when it’s strongest after rain or thaw events, and map it to upper rooms, attic hatches, closets, or HVAC returns where Water intrusion vapors concentrate. Use a flashlight and moisture meter to check rafters, insulation, and penetrations from a safe, stable platform; avoid stepping on drywall ceilings. If you smell odor near electrical fixtures, shut off the circuit and treat it as a potential shock/fire hazard. Maintain code-compliant ventilation and keep bathroom and kitchen exhausts ducted outdoors, not into the attic. Don’t disturb suspected Indoor mold; isolate the area, wear PPE, and document conditions for a qualified roofer.
Peeling Paint Or Bubbling
Musty odors often show up first, but finish materials frequently provide the fastest visual confirmation of moisture intrusion. When you see peeling paint along ceiling-to-wall joints, window headers, or exterior-facing corners, you’re likely dealing with elevated substrate moisture, not simple aging. Bubbling walls or blisters in drywall paper indicate water behind the paint film; it can also signal compromised vapor control layers. Treat these as a safety issue: moisture can energize hidden electrical faults and support microbial growth. Turn off power to affected circuits if the area is damp, and don’t disturb suspect materials without PPE. For code-aligned action, document locations, measure moisture with a noninvasive meter, and schedule roof and flashing inspection before repairs.
Dripping Sounds In Attic
If the attic goes quiet and you still hear intermittent dripping or ticking, treat it as an active leak indicator, not “settling” or HVAC noise. Dripping sounds often mean water is bypassing flashing, a vent boot, or a nail hole and striking framing or ductwork before pooling. Enter only with a rated flashlight, stable walk boards, and PPE; don’t step on attic insulation, and keep clear of wiring to maintain NEC and fire-safety clearances. Trace the sound uphill to the roof deck, then check for darkened sheathing, wet insulation, or fastener tips beading water. Mark the suspect bay, photograph conditions, and schedule prompt roof repair. If water contacts electrical, shut power off and call a licensed electrician immediately.
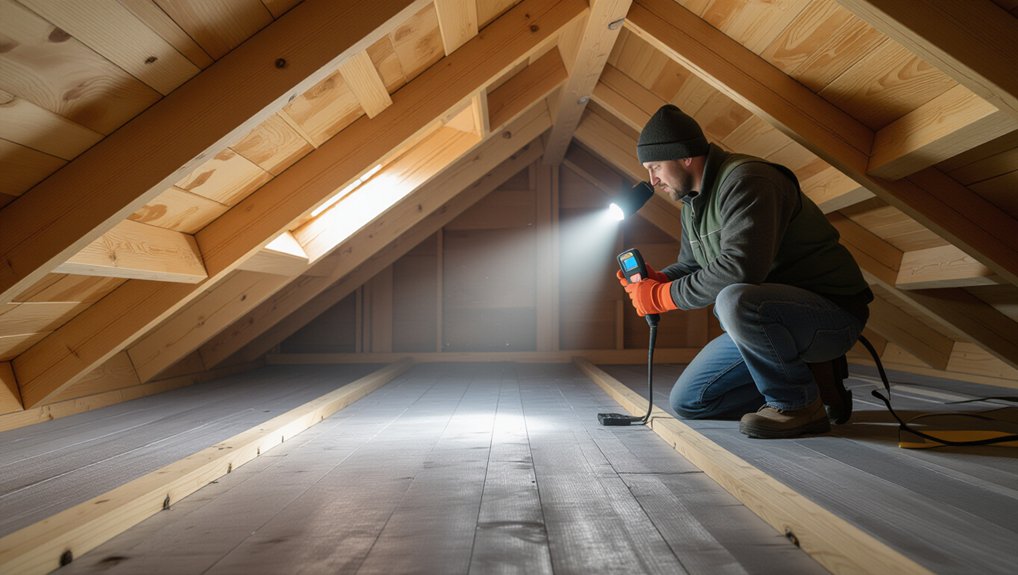
Check the Attic First for Wet Spots
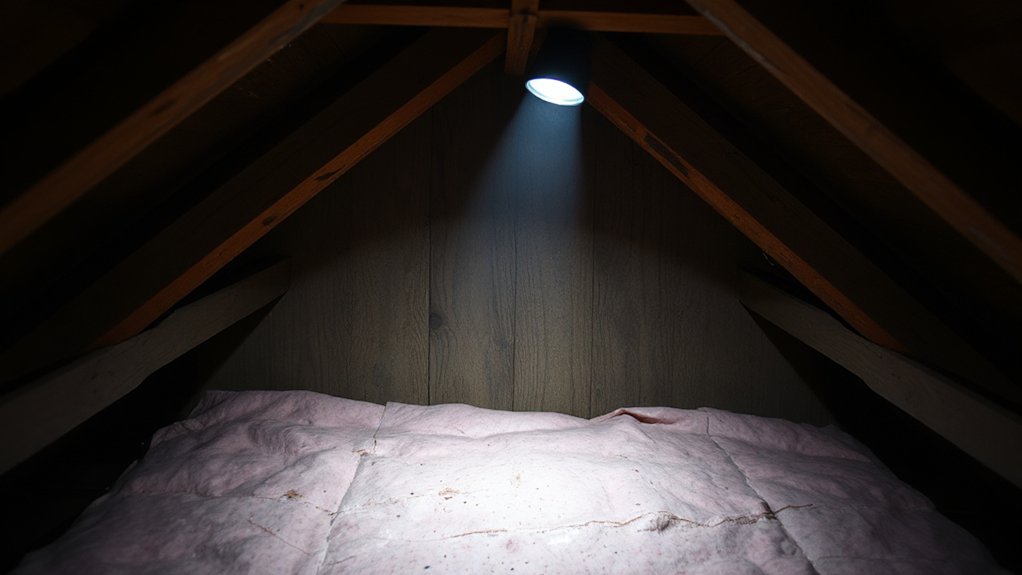
Start in the attic and inspect the roof decking for dark staining, wet sheen, or soft spots, and keep your footing on framing members while using a rated light and PPE. Then trace any damp or compressed insulation upslope to the highest wet point, since water typically travels along rafters and nail penetrations before it drips. If you find active moisture, don’t disturb electrical wiring or recessed fixtures, and document the location for prompt, code-compliant repair.
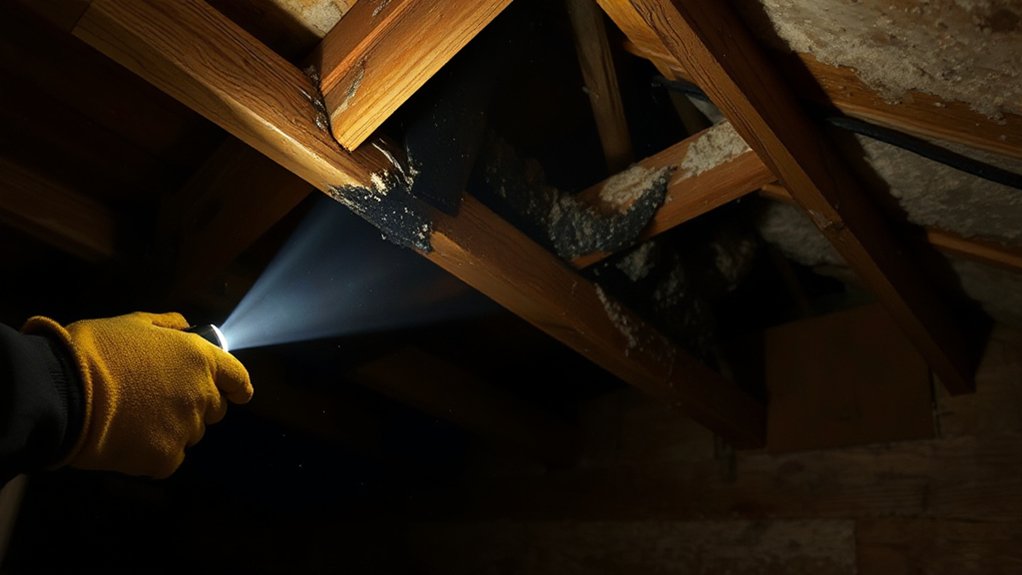
Inspect Attic Decking
Before you inspect shingles or flashing, head into the attic and examine the roof decking for moisture intrusion. Wear a respirator, gloves, and eye protection, and use a rated work light; don’t step on drywall—walk joists or a secured plank. Scan the underside of sheathing for dark halos, glossy patches, swollen seams, or fastener rust. Probe suspect areas with a moisture meter and confirm readings against dry reference points. Check around penetrations, valleys, and ridge lines where water tracks along rafters. Verify Attic ventilation pathways are unobstructed and that Roof insulation isn’t packed tight to the eaves, per code-required airflow clearances. If you find active dripping, mark the location, photograph it, and schedule repair promptly.
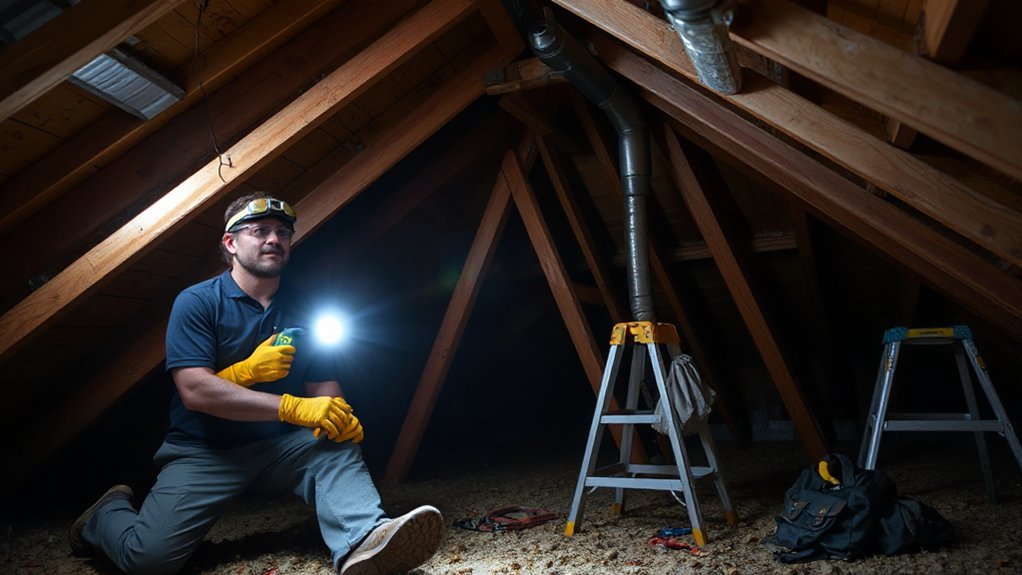
Trace Damp Insulation
Although shingles and flashing often take the blame, damp or matted attic insulation usually flags a leak path sooner than any exterior clue. Enter the attic only on a stable walkway, wear a respirator, gloves, and eye protection, and keep clearance from energized wiring per code. Start Damp detection at the eaves and valleys, then follow discoloration, clumping, or a heavier feel in batts. Use a flashlight at a low angle to reveal sheen; confirm Insulation moisture with a pin meter on the facing or nearby framing, not on live conductors. Pull back small sections to check the vapor retarder for staining. Mark wet zones, photograph them, and trace upslope to the roof penetration above.
Musty Smells That Signal Hidden Leaks
When moisture seeps through a compromised roof assembly and can’t dry to the exterior, it often triggers a persistent musty odor from microbial growth in insulation, decking, or concealed cavities. If you notice that smell after rain or HVAC cycling, treat it as a leak indicator, not “stale air.” Investigate safely: wear an N95 or better, gloves, and eye protection, and avoid disturbing suspect materials that could aerosolize spores. Check attic access points, mechanical chases, and top plates for dampness, darkened wood, or wet fasteners. Prolonged odors often correlate with Mold growth and can precede Structural damage such as delaminated sheathing or corroded connectors. Maintain code-required ventilation and promptly dry and replace waterlogged insulation to restore assembly performance.
Spot Roof Trouble From the Ground
If you can’t access the roof safely, you can still catch early leak conditions from the ground by scanning for visible defects that compromise water shedding. During a Ground level inspection, use binoculars and keep clear of eaves to avoid falling debris. Check ridge and hip lines for waviness that can indicate deck deflection or fastener failure. Look for sagging gutters, separated downspouts, and overflow stains that suggest backwater risk at the fascia. Verify kickout flashing exists where roof planes meet walls; missing or bent flashing can drive water behind cladding. Note chimney and vent penetrations for deteriorated counterflashing or open sealant joints. After storms, document Tree impact: broken branches, dented metal, displaced caps, or punctures.
Shingle Damage That Leads to Leaks
Because asphalt shingles rely on overlapping courses and intact seal strips to shed water, even small defects can redirect runoff under the field of the roof and into the underlayment system. You should check for lifted tabs, missing shingles, and creased “fishmouths” after wind events; these break the water-shedding plane and can violate manufacturer fastening and seal requirements. Watch for shingle deterioration such as brittleness, edge cracking, and exposed fiberglass mat, which accelerates leakage. Granule loss in gutters or at downspout outlets signals UV aging and reduced impact resistance; hail can then fracture tabs and open nail lines. If you access the roof, follow OSHA fall protection, use soft-soled shoes, and avoid walking on hot, fragile shingles. Document defects for prompt repair.
Flashing Gaps That Cause Roof Leaks
You’ll often find flashing gaps where step flashing meets shingles, at chimney and wall counterflashing laps, around vent boots, and along valleys where fasteners or sealant have failed. You should watch for lifted edges, open seams, missing kick-out flashing, rust, or staining on adjacent sheathing and siding, since these are early leak pathways. Keep your inspection fall-safe and avoid temporary caulk-only fixes—repairs should maintain continuous, properly lapped flashing per manufacturer instructions and local code.
Common Flashing Separation Points
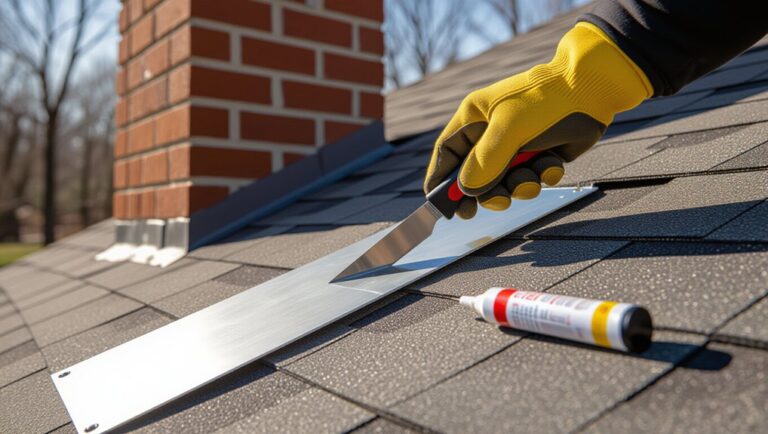
Where do roof leaks most often start when the shingles still look intact? They begin at separation points where flashing should stay continuous and mechanically secured. Check step flashing at sidewalls: nails can back out, and siding movement can lift laps. At chimneys, counterflashing reglets can loosen, letting water track behind masonry. Valleys fail where metal edges aren’t hemmed or where underlayment laps open at seams. Around skylights, head flashing can separate if fasteners miss framing. Plumbing-vent boots leak when collars split or when flange seals pull from the deck. Maintain code-compliant overlaps, corrosion-resistant fasteners, and sealants rated for UV exposure. For any Flashing repair, use proper PPE and verify roof ventilation so heat cycling doesn’t accelerate joint movement.
Warning Signs Around Flashing
Even when flashing is installed in the right location, small gaps at laps, terminations, or fastener points can open up and route water under otherwise intact shingles. During a flashing inspection, look for lifted edges, missing sealant, popped nails, or exposed nail heads. Check step flashing at sidewalls for shingle overhang that’s too short, and confirm counterflashing is tight, properly regleted, and not bent away from masonry. On metal Roof material, watch for corrosion at seams and dissimilar-metal contact that can accelerate failure. At penetrations, verify boot collars aren’t split and that storm collars sit tight above pipe flashing. Use fall protection, keep clear of skylight openings, and follow local code for fastening and overlap requirements. Document gaps and schedule repair promptly.
Chimney Leak Warning Signs to Check
Although chimneys are built to penetrate the roof safely, failed flashing, cracked crowns, and deteriorated mortar joints can create direct water pathways that trigger leaks and hidden wood decay. Check the uphill side for rusted, lifted, or gapped chimney flashing, and look for sealant that’s missing or over-applied (a temporary, non-code fix). Inspect step flashing and counterflashing for proper overlap and secure fastening, not face-nailed patches.
Next, examine the crown for hairline cracks, spalling, or ponding that can drive water into the flue chase. Watch for chimney cap issues: a loose cap, missing storm collar, or damaged mesh can admit wind-driven rain. Inside the attic, trace darkened sheathing or wet insulation around the chimney framing and keep clearances intact.
Vents and Pipe Boots: Common Leak Points
Because roof penetrations interrupt the shingle and underlayment system, plumbing vents, attic fans, and other pipe boots often become the first leak points when UV exposure hardens rubber, fasteners back out, or flashing laps get installed wrong. From the attic, look for damp sheathing rings around vent pipes, rusty nail tips, or darkened insulation below a pipe boot. On the roof, you should only inspect when it’s dry, use fall protection, and keep to the ladder’s safe working angle. Check that the boot’s rubber collar stays flexible, seals tight to the pipe, and sits flat under the shingle course above. Replace cracked collars or lifted flanges; don’t rely on surface caulk. Confirm vent flashing follows manufacturer instructions and local code requirements.
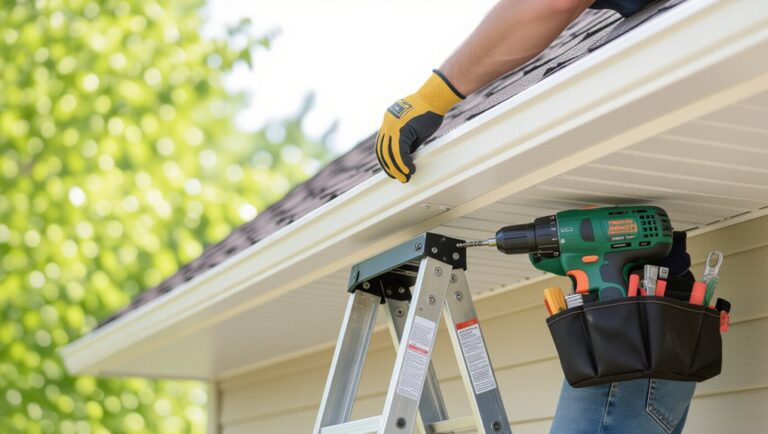
Gutter Clogs That Push Water Under Shingles
Roof penetrations aren’t the only places leaks start—your gutter system can also force water back under the first shingle courses when it can’t drain fast enough. When leaves and granules dam the trough, water rises above the drip edge, wets the fascia, and can slip beneath starter strips and underlayment at the eave. You’ll often notice overflow lines, shingle-edge discoloration, or damp soffit vents before interior staining shows up. Prioritize Gutter maintenance: clear debris, verify hangers keep proper slope, and confirm the drip edge laps into the gutter per code. Check for Downspout blockages by running a hose and watching discharge; slow flow indicates plugs or crushed elbows. Use a stable ladder, tie-off, and gloves. Inspect after heavy rain.
Roof Leaks After Wind: What to Inspect
After a wind event, you should inspect for uplift and impact damage that can turn into leaks long before you see ceiling stains. From the ground, look for missing tabs, creased shingles, lifted flashing, and displaced ridge caps. Verify your Roof material matches manufacturer fastening patterns and local wind-load requirements; loose nails and overdriven fasteners are common failure points. Check valleys, pipe boots, and wall step flashing for gaps, buckling, or sealant separation. Inspect soffit and ridge vents for dislodged baffles, crushed screens, or blocked openings, since Ventilation issues can raise attic pressure and worsen uplift. Don’t climb without fall protection and stable ladders; follow OSHA practices. If you see deck exposure or torn underlayment, tarp immediately and call a licensed roofer.
Roof Leaks After Rain or Ice Buildup
When rainwater ponds or ice dams force water to move sideways, it can bypass shingles and enter at flashing seams, fastener penetrations, and underlayment laps. After a storm or thaw, you should inspect the attic first, using stable access, a headlamp, and dry footing; don’t step on ceiling drywall. Look for wet roof decking, darkened nail points, swollen sheathing edges, and drips along rafters near valleys, chimneys, skylights, and vent stacks. Confirm roof ventilation isn’t blocked; poor airflow accelerates melt-freeze cycles that worsen ice dams. Check attic insulation coverage and air-sealing at top plates and penetrations; heat loss drives refreezing at eaves. Make certain exhaust ducts terminate outdoors per code to limit condensation. Document locations and timing.
Hose Test and When to Call a Roofer
If you can’t reproduce a leak pattern during natural weather, you can use a controlled hose test to isolate the entry point without saturating the assembly. Work with a helper inside, and start low on the roof, wetting one small area for 3–5 minutes while they watch for drips. Move upward in measured sections: shingle laps, step flashing, penetrations, then ridge details. Keep spray pressure moderate to mimic wind-driven rain; don’t force water under courses. Follow ladder and fall-protection best practices and avoid energized service masts. If you see deteriorated flashing, soft decking, widespread granule loss, or multiple intrusion points, stop and schedule a licensed roofer. A professional roof inspection supports code-compliant repairs and long-term leak prevention.
Frequently Asked Questions
Does Homeowners Insurance Cover Slow Roof Leaks Without Visible Interior Damage?
Homeowners insurance usually won’t cover slow roof leaks without interior damage; Insurance coverage typically requires sudden, accidental loss. You should start Leak documentation, mitigate per code, and get a licensed roofer’s report to support claims.
How Can I Document Suspected Leaks for an Insurance Claim Effectively?
Start leak documentation now: time-stamp photos, video, and moisture-meter readings; log dates, weather, and locations. Schedule a licensed roof inspection, retain invoices, and preserve materials. Don’t access steep roofs; follow OSHA and local code.
What Roof Leak Detection Devices Can Monitor Moisture Remotely?
You can install Moisture sensors with Remote monitoring—wireless leak probes, roof-deck capacitive sensors, or HVAC-pan relay modules—watching like silent sentries under shingles. You’ll get app alerts; mount per manufacturer, follow NEC, seal penetrations.
How Often Should a Roof Be Professionally Inspected to Prevent Hidden Leaks?
Schedule a professional Roof inspection at least annually, and after major storms. For leak prevention, you’ll comply with manufacturer warranties and local code by documenting findings, repairing flashing, sealing penetrations, and correcting drainage issues promptly.
Can Solar Panels or Roof-Mounted Equipment Increase the Risk of Leaks?
Yes, solar panels and roof mounted equipment can raise leak risk if you skip flashing, sealing, or code-compliant penetrations. You’ll reduce failures with proper standoffs, torque specs, and routine solar panel maintenance and safety inspections.
Conclusion
You catch a roof leak long before a ceiling blooms with stains: quiet attic dampness versus sudden drywall failure. You’ll inspect safely—stable ladder, fall protection where required, and proper PPE—then trace moisture at penetrations, flashing, and decking. You’ll clear gutters and verify drainage, because a small clog can drive big backflow. After wind, rain, or ice, you’ll document damage and avoid energized wiring. When tests confirm intrusion, you’ll call a licensed roofer.