Start by choosing how you’ll use the basement so you can set a permit-ready layout, electrical loads, and ventilation. Map code-compliant egress first, including window size, sill height, wells, and clear escape paths. Fix water issues before finishing: regrade, extend downspouts, seal penetrations, and confirm slab moisture. Air-seal rim joists and gaps, then insulate with the right vapor control for your zone. Keep junction boxes accessible, protect headroom, and use moisture-tough flooring. Next, you’ll see how to sequence inspections and assemblies.
Key Takeaways
- Define the basement’s purpose early to guide layout, electrical loads, plumbing/HVAC needs, permits, and budget.
- Plan egress first: compliant window/door sizing, sill heights, wells, and clear escape paths from bedrooms and living areas.
- Control moisture before finishing by fixing drainage, sealing penetrations, testing slab vapor, and keeping wood off concrete.
- Air-seal and insulate with basement-safe assemblies, using correct vapor control, fire-blocking, and code-required smoke/CO alarms.
- Design around mechanicals and headroom by locating stairs, ducts, and soffits strategically, while keeping junction boxes and equipment accessible.
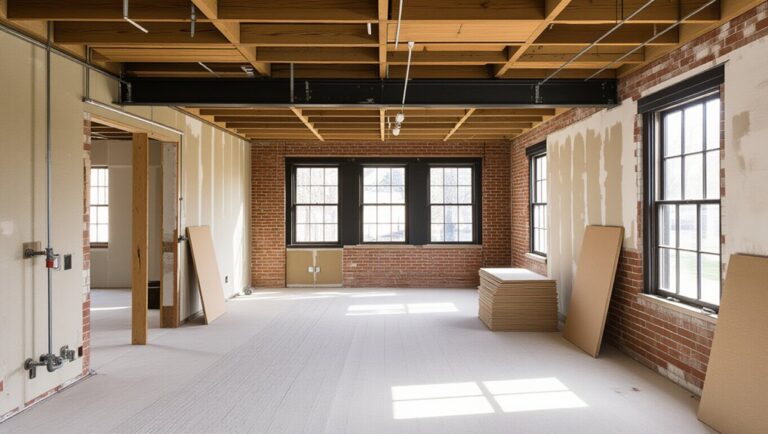
Choose a Basement Conversion Use, Layout, and Budget
Before you pick up a hammer, lock in what your basement will *do*—guest suite, home office, gym, media room, or legal ADU—because that single decision drives the layout, permits, and cost ceiling. Map egress paths first: required window/door sizes, sill heights, and unobstructed clearance. Place stairs, bedrooms, and mechanical rooms to maintain code-mandated access, combustion air, and service clearances. Plan electrical loads by circuit, add AFCI/GFCI where required, and size ventilation for occupancy. Choose wall assemblies and ceiling heights that preserve headroom and fire separation at the stair and furnace room. Build a line-item budget: framing, MEP, insulation, drywall, flooring, and inspections. Reserve funds for Basement furniture and decorative accents after safety-critical items.
Fix Moisture and Drainage Before a Basement Conversion
Before you finish plans, you’ve got to pinpoint every moisture source—hydrostatic pressure, seepage at cracks/joints, condensation, or plumbing leaks—so your build meets code and won’t trap water behind finished walls. You’ll document stains, efflorescence, humidity, and active leaks, then fix them at the root with sealed penetrations and proper vapor control where required. Next, you’ll upgrade drainage with correct grading, gutters/downspouts, perimeter drains or an interior drain tile system, and a code-compliant sump/pump setup to keep bulk water out.
Identify Moisture Sources
Where is the water actually coming from? Treat it like debugging: isolate inputs, reproduce conditions, log results. Start with a flashlight and moisture meter; map readings on walls, slab edges, and around penetrations. Look for efflorescence, peeling paint, rusted fasteners, and musty odor—each flags chronic wetting and mold prevention gaps. Run a 24-hour plastic-sheet test on the slab; condensation on top suggests humid air, underneath suggests vapor drive. Check rim joists, pipe chases, and window wells for air leaks that carry moisture. Verify bath/laundry exhausts vent outdoors; poor ventilation strategies violate code intent and spike indoor RH. Don’t enclose anything until you’ve confirmed the source and frequency of wetting.
Upgrade Drainage Systems
Once you’ve confirmed the wetting pattern, upgrade the drainage system so bulk water never reaches your slab or foundation wall in the first place. Regrade soil to slope away 6 inches over 10 feet, extend downspouts 6–10 feet, and keep splash blocks off walkways. Add or repair footing drains where codes allow, using filter fabric and washed stone to prevent fines migration.
Inside, prioritize Drainage pipe maintenance: camera-scope lines, jet obstructions, and replace crushed sections with approved perforated pipe and cleanouts. If hydrostatic pressure persists, plan sump pump installation with a sealed lid, GFCI receptacle, and dedicated circuit per code. Discharge to daylight or a storm line—never sanitary. Add a battery backup and high-water alarm. Test quarterly.
Basement Conversion Permits, Egress, and Fire Safety
Before you finish your basement, you’ll pull the required permits and schedule inspections so framing, electrical, plumbing, and HVAC all pass code. You’ll also verify egress: bedrooms need a compliant egress window or door with proper opening size, sill height, and a clear well/ladder path where required. You’ll meet fire-safety rules by keeping escape routes unobstructed and installing code-required alarms, separations, and rated assemblies where applicable.
Permit Requirements And Inspections
Although a basement conversion can feel like “just finishing space,” you still need permits and inspections that verify structural changes, electrical and plumbing rough-ins, insulation and vapor control, and—most critically—egress and fire safety. Start by confirming your scope triggers permits: framing, new bedrooms, added plumbing fixtures, HVAC extensions, or altering beams, posts, or foundation walls. Apply with stamped plans when required, and keep specs on insulation R-values, vapor retarder class, and smoke/CO alarm locations. Expect the inspection process in stages—foundation/under-slab, rough framing, rough MEP, insulation, and final—so don’t cover work early. Maintain legal compliance by using listed materials, GFCI/AFCI protection where required, proper bonding/grounding, and documented fireblocking/draftstopping before drywall.
Egress Windows And Fire Codes
Inspections often hinge on one make-or-break item: safe emergency escape and rescue openings and a code-compliant path out of the basement. You’ll need an egress window in each sleeping room, sized to meet minimum net clear opening, height, and sill limits. Plan Egress window placement so a person can reach it without passing through a locked room, and confirm exterior grade allows full opening.
You must provide a code-compliant window well where required, with proper drainage and a ladder or steps when depth triggers it. Don’t box in openings with built-ins or bars unless they release from the inside without tools. For Fire code compliance, maintain required smoke and CO alarms, protect penetrations with rated materials, and keep the stairway and door hardware unobstructed.
Air-Seal and Insulate for a Warmer Basement
Once you’ve mapped the moisture sources and mechanical runs, you can lock in comfort by air-sealing every gap and then insulating in the correct order. Use proven Air sealing techniques: polyurethane foam at rim joists, acoustic sealant at sill plates, gasketed electrical boxes, and taped/caulked seams on rigid foam. Fire-block penetrations with approved materials, and keep clearances to chimneys, flues, and recessed fixtures per code. Don’t bury junction boxes; maintain access.
Then choose Insulation materials based on assembly: closed-cell spray foam or rigid foam against concrete, then a framed wall with batt or mineral wool. Add a continuous vapor retarder only where required by your climate zone. Verify combustion appliances have make-up air and sealed returns to prevent backdrafting.
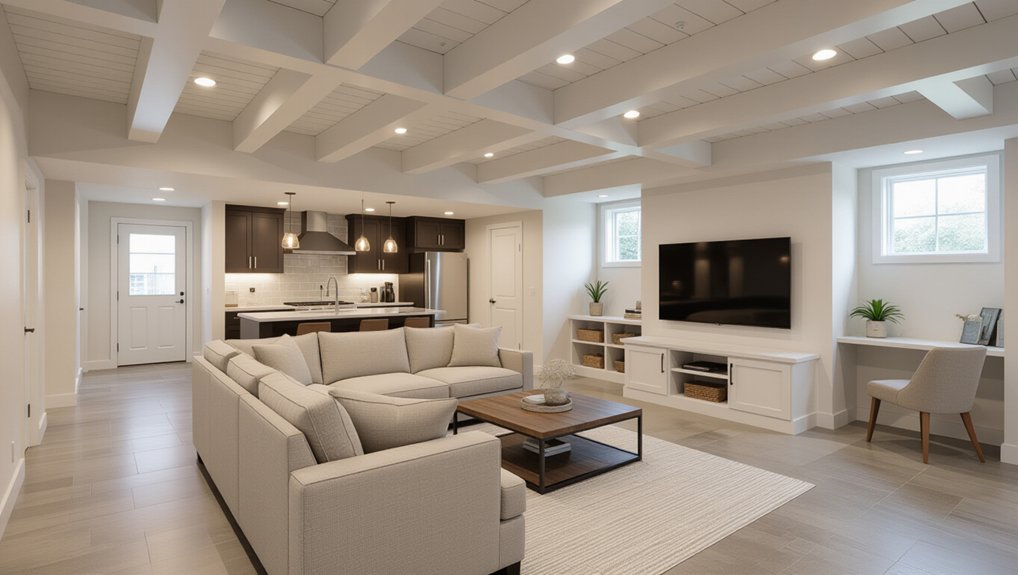
Plan Basement Lighting and Ceiling Height Workarounds
After you’ve air-sealed and insulated, map your lighting plan and any ceiling-height workarounds before you close in walls, because electrical layouts, soffits, and dropped ceilings can lock you into clearance and access issues. Verify ceiling height against local habitable-space minimums, then locate beams, ducts, and drains so you can choose tight soffits or a partial drop only where required. Keep junction boxes accessible and don’t bury splices. Size and place recessed fixtures only where the assembly is IC-rated and clearance-compliant; otherwise use surface-mount LEDs to preserve headroom. Plan switched zones for egress paths, stairs, and task areas, and add required smoke/CO alarms on code-approved circuits. Run dedicated circuits where loads demand and label everything at the panel.
Pick Basement Conversion Walls and Flooring for Moisture
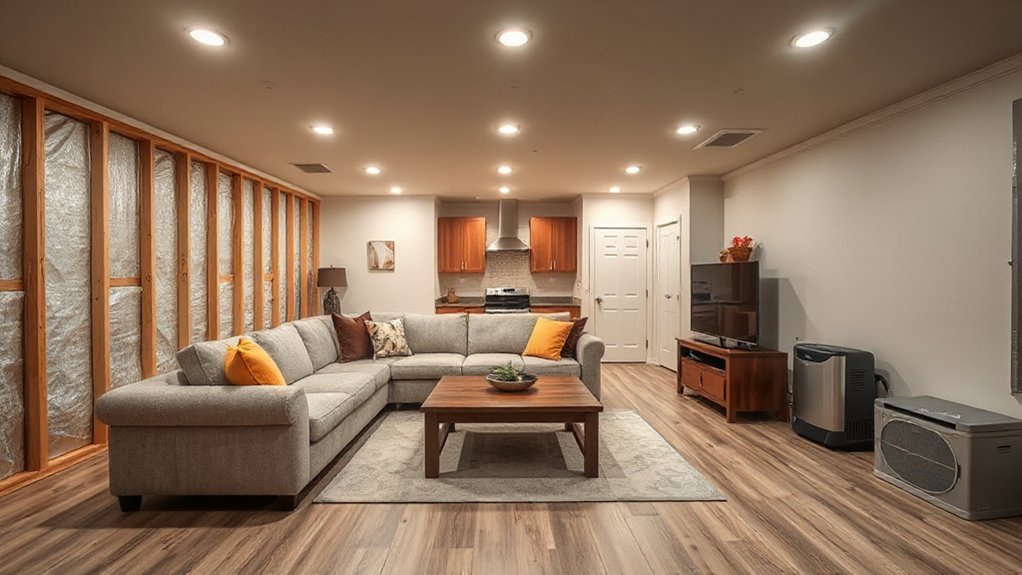
Because basements stay cooler and can wick moisture through slabs and foundation walls, you need wall and floor assemblies that manage vapor, resist mold, and still meet fire and egress requirements. Start with Basement wall treatments that follow code: damp-proof first, then rigid foam or closed-cell spray foam against concrete, taped seams, and a fire-rated thermal barrier where required. Frame a 1-inch gap, use pressure-treated bottom plates, and install mold-resistant gypsum. Don’t add interior poly unless your climate/code allows it; you’ll trap moisture. For floors, install a capillary break (dimple mat or foam underlayment) before subfloor panels, then choose Moisture resistant flooring like LVP, tile, or sealed concrete. Keep wood off slabs, protect floor penetrations, and maintain required clearances.
Frequently Asked Questions
How Long Does a Typical Basement Conversion Project Take?
You’ll typically spend 6–12 weeks, depending on permits, Basement waterproofing scope, and structural reinforcement needs. You’ll sequence demo, inspections, framing, MEP rough-ins, and finishes, and you’ll add buffers for safety checks.
What Return on Investment Can a Finished Basement Add at Resale?
You’ll typically recoup about 50–70% at resale, higher if you implement Basement waterproofing and permit everything. You’ll boost appraiser value by adding safe egress, compliant wiring, and family entertainment space.
Can I Convert a Basement Into a Legal Rental Apartment or ADU?
Yes, you can, but it’s not a slam dunk: you’ll need Legal permits and verify Zoning regulations. Build to code—egress, ceiling height, fire separation, ventilation, and electrical/plumbing inspections—so you pass safely.
How Do I Reduce Basement Noise Between Floors and Adjacent Rooms?
You’ll reduce basement noise by decoupling ceilings/walls, sealing gaps, and adding Soundproofing materials plus Floor insulation. Use resilient channel, mineral wool, mass-loaded vinyl, and acoustic caulk. Maintain fire-rated assemblies, avoid compressing insulation.
What HVAC Options Work Best for Heating and Cooling a Finished Basement?
Like a thermostat’s steady compass, you’ll get best results with a ductless mini-split or zoned duct extension plus dedicated return. Validate Basement insulation, balance Ventilation systems, add dehumidification, and follow code clearances, condensate drainage.
Conclusion
You’ve mapped your basement’s best use, balanced the budget, and battled dampness before you build. You’ll pull permits, prove proper egress, and prioritize fire-safe finishes. You’ll air-seal and insulate, then plan practical lighting and clever ceiling-height compromises. You’ll choose moisture-minded walls and flood‑fighting flooring. Keep it code-clean: test, tape, fasten, and flash every joint. With careful checks and consistent caution, you’ll turn a dark, dank box into a bright, breathable zone.