First, confirm loose hangers cause the sag: sight the run, press up on the gutter, and check for pulled or spinning screws and rotten fascia. Set your ladder with a standoff, wear gloves and eye protection, then snap a chalk line for about 1/4 inch slope per 10 feet toward the downspout. Tighten sound brackets, replace stripped screws with longer corrosion-resistant ones, and add hangers at dips, joints, and downspouts. Next, run a hose test to verify flow and catch leaks.
Key Takeaways
- Identify sag start/end by sighting the run, then press up; easy lift with solid fascia usually means loose hangers.
- Inspect each bracket and fastener for gaps, pulled heads, rotation, or fascia rot; clean debris so drainage issues don’t mimic sag.
- Tighten sound fasteners with the correct bit; if a screw spins, replace it with a longer exterior corrosion-resistant screw.
- Re-space or add hangers at dips, seams, corners, and near downspouts, fastening into solid wood for better load support.
- Recheck pitch about 1/4 inch per 10 feet toward the downspout, then hose-test for standing water, leaks, or overflow.
Confirm Brackets Are Causing Your Sagging Gutters
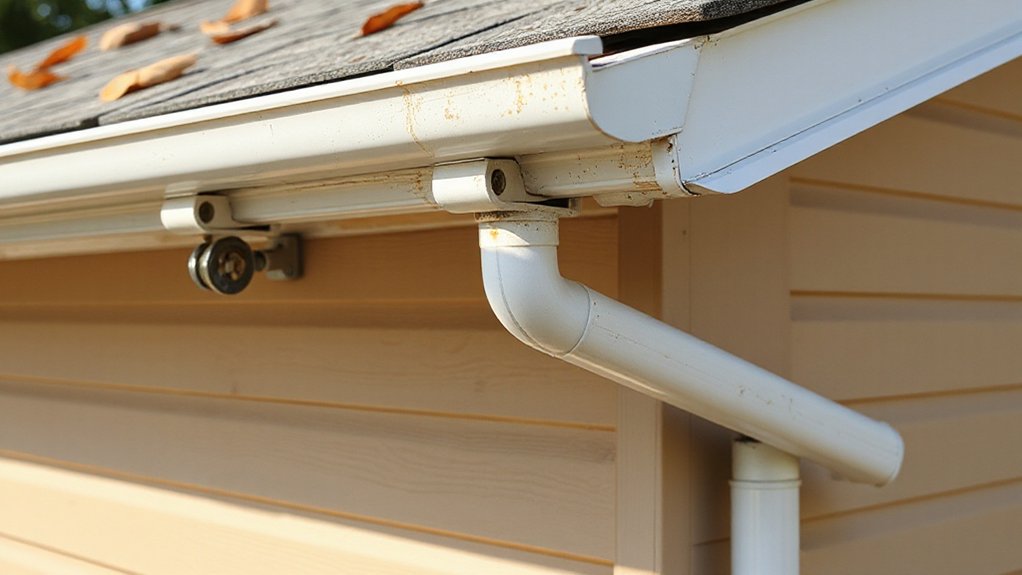
Before you start tightening or rehanging anything, verify that the gutter brackets (hangers) are the actual failure point. Set your ladder on firm ground, maintain three points of contact, and wear cut-resistant gloves. Sight along the gutter run and note where the sag starts and ends. Press up on the gutter: if it lifts easily while the fascia stays solid, you’re likely seeing loose hangers. Check for bracket spacing gaps, pulled fastener heads, or hangers rotated away from the gutter material. Inspect the fascia behind each suspect point for rot or delamination; sound wood should resist an awl. Consider weather impact: ice loads, heavy rain, and thermal cycling often loosen brackets at joints and corners. Mark each failing location for repair later.
Grab the Right Tools, Screws, and Hangers
Before you start repairs, you’ll stage the essential tools: stable ladder, gloves and eye protection, tape measure, level, drill/driver, nut driver, snips, and a chalk line. You’ll then match fasteners to the job—use exterior-rated screws long enough to bite solid fascia (or rafter tails) and choose hidden hangers or strap hangers sized to your gutter profile. You’ll verify compatibility and corrosion resistance (galvanized or stainless) before you climb, so the new hardware holds load safely and won’t fail early.
Essential Tools Checklist
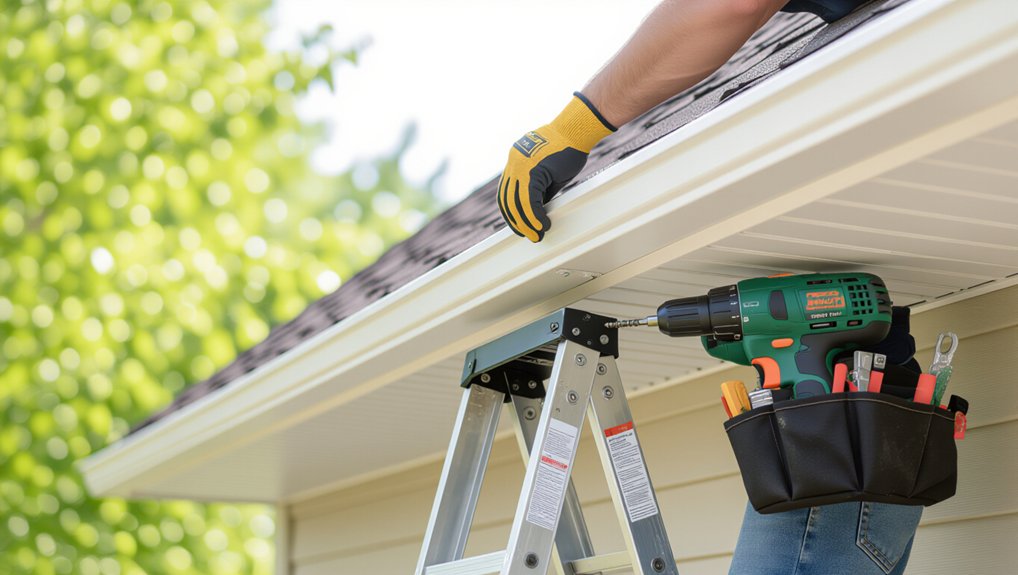
Although you can patch a gutter with basic hand tools, you’ll get a safer, longer-lasting repair if you stage the right gear first: a stable ladder with a standoff, cut-resistant gloves, safety glasses, a tape measure, level, chalk line, tin snips, a drill/driver with nut-driver bits, and a caulk gun loaded with gutter sealant. Next, add a bucket for debris, a stiff brush, and a garden hose for a controlled flow test. Bring a putty knife to lift old sealant and a wire brush to prep metal before resealing for material durability and weather resistance. Use a magnetic parts tray to prevent dropped hardware, and keep a headlamp for shadowed eaves. Finally, stage a spotter, extend your ladder 3 feet past the roof edge, and tie it off.
Proper Screws And Hangers
Once you’ve staged your safety gear, match your fasteners and hangers to your gutter material and fascia so the repair won’t loosen, leak, or tear out under load. Choose hidden hangers with a full-width strap for aluminum gutters; use heavy-duty brackets for steel. Pick screw types by substrate: #10 or #12 stainless or coated deck screws for wood fascia, and self-tapping screws for metal fascia. Avoid plain drywall screws; they snap and corrode.
For proper installation, predrill near ends to prevent splitting, then drive screws straight into solid rafter tails when possible. Use 1-1/2 in. to 2 in. length to get full bite. Add neoprene washer screws where you penetrate the gutter body, and seal with gutter-grade sealant. Tighten snug, don’t crush.
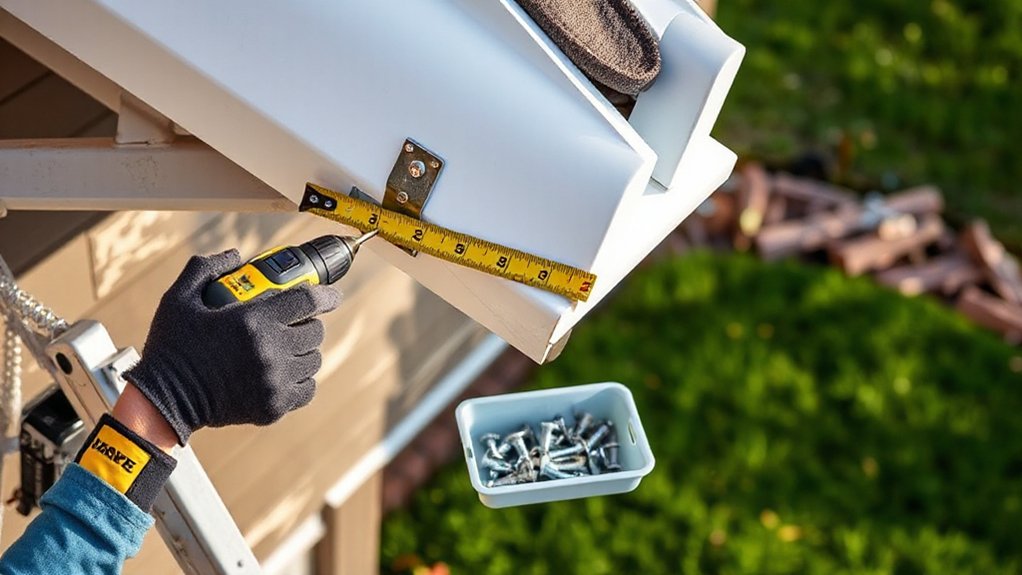
Mark the Proper Gutter Slope With a Chalk Line
Because even a small low spot can trap water and speed up corrosion, you’ll want to lay out the gutter’s pitch with a chalk line before you rehang anything. Set your ladder on firm ground, wear eye protection, and keep three points of contact. After Gutter cleaning, find the high point at the end farthest from the outlet and mark it on the fascia. Measure along the run and calculate slope at about 1/4 inch per 10 feet toward the downspout. Mark the low-point height at the outlet end, confirming Downspout maintenance has the exit clear. Hook your chalk line at the high mark, pull it tight to the low mark, level-check your marks, then snap a straight reference line. Use it to verify consistent pitch.
Tighten Loose Brackets and Swap Stripped Screws
With your ladder set on stable ground and gloves on, inspect each hanger and fascia bracket along the chalk line and flag any that wiggle or pull away. Tighten the bracket fasteners with the correct driver bit until the gutter seats firmly without deforming the metal. If a screw spins or won’t bite, back it out and replace it with a slightly larger, corrosion-resistant screw anchored into solid wood.
Identify Loose Brackets
Before you seal leaks or reset slope, inspect the gutter hangers/brackets for movement and fastener failure. Set your ladder on firm ground, wear gloves and eye protection, and keep three points of contact. After Gutter cleaning, run your hand along the gutter and gently push down at each hanger; any bounce, clicking, or shifting marks a loose bracket. Look for gaps between the bracket and fascia, sagging between attachment points, or a pulled-out screw head. Check the bracket material for cracks, corrosion, or distortion that prevents tight seating. Probe each fastener with a driver to confirm it’s not free-spinning, and note any enlarged holes or stripped heads. Mark suspect locations with tape so you can address them methodically later.
Tighten Bracket Fasteners
Once you’ve flagged the loose hangers, snug each bracket fastener with the correct driver bit while keeping your body centered between the ladder rails and your non-driving hand off the gutter edge. Set the drill/driver to a low clutch and drive until the bracket seats tight to fascia, then stop to avoid crushing vinyl or stripping threads. If a fastener spins, back it out and swap in a same-diameter, slightly longer exterior-grade screw to bite solid wood; don’t oversize yet. During gutter cleaning, clear packed debris around each hanger so the bracket sits flat. Inspect for bracket corrosion, cracking, or wallowed holes; tighten only if the metal’s sound. Recheck alignment by sighting the gutter line before moving your ladder.
Replace Stripped Screws
Although a loose bracket often just needs a snug-up, a screw that spins without tightening has stripped the wood or its own threads, so you’ll need to replace it immediately to restore holding power. Set your ladder on firm ground, wear gloves and eye protection, and keep three points of contact. Back the failed screw out, then probe the hole; if it’s punky, shift the bracket 1–2 inches to sound fascia, or plan bracket replacement. For a solid hole, drive a longer, larger-diameter exterior-grade screw (stainless or coated) into the rafter tail or fascia board. Pre-drill to prevent splitting. Re-seat the bracket tight, confirm gutter slope, and recheck after Gutter cleaning when the system’s wet. Tighten until snug, not crushing metal.
Re-Space Hangers to Stop Gutter Dips and Bows
When hangers sit too far apart, the gutter can sag under water load and pull away from the fascia. Set your ladder on firm ground, wear gloves and eye protection, and keep three points of contact. Inspect the run and mark dips, bows, and seams. Identify bracket types already installed so you can match spacing and fastener requirements.
Snap a chalk line along the planned gutter edge, keeping proper slope toward the downspout. Starting at an end cap, measure and re-space hangers evenly, tightening to solid fascia, not rotted wood. Add hangers near corners, joints, and downspouts where loads concentrate. Recheck alignment with a level, then flush with a hose to confirm flow. Log changes for Gutter maintenance and future checks.
Switch to Hidden Hangers for Stronger Support
If your spike-and-ferrule or strap-style supports keep loosening, switch to hidden hangers to lock the gutter tight to the fascia and resist sagging under water and debris loads. Set a stable ladder, wear gloves and eye protection, and remove failed hardware one section at a time so the gutter stays supported. Mark rafter tails if visible, or locate solid fascia backing, then position hidden hangers every 24–36 inches and within 6 inches of corners and joints. Drive the included stainless screws through the hanger into sound wood, keeping the gutter’s slope consistent. Use hangers with a built-in strap for added rigidity. Hidden hanger benefits include improved load transfer and better Gutter aesthetics because fasteners disappear from view.
Run Water, Check Flow, and Prevent Future Sagging
Before you call the repair done, run a controlled water test to confirm the gutter holds its pitch, drains freely, and won’t sag under load. Set a stable ladder on firm ground, wear gloves and eye protection, and keep your hose under low pressure. Start at the end farthest from the downspout and fill the trough in 6–8 foot sections. Watch for standing water, bracket flex, seam drips, and overflow at corners. Move toward the downspout and verify a continuous sheet flow into it without backwash. If flow stalls, correct pitch or add a hanger at the low point. Finish with Gutter cleaning: remove granules and sludge so water doesn’t pond. Repeat Rainwater testing after the next storm, and re-tighten fasteners annually.
Frequently Asked Questions
How Much Does Professional Gutter Rehanging Typically Cost Compared to DIY?
You’ll typically pay $300–$1,500 for professional gutter rehanging; DIY runs $50–$200 in parts. First, schedule gutter cleaning, then inspect hangers. Next, perform bracket tightening. Finally, replace damaged fasteners, and test slope safely.
Can Sagging Gutters Indicate Fascia Board Rot or Structural Damage?
Yes, sagging gutters can signal fascia damage and structural concerns. You’ll inspect behind hangers, probe fascia for softness, check rafter tails, look for staining or mold, and stop if you find crumbling wood.
What Gutter Materials Are Most Prone to Sagging Over Time?
You’re right to suspect a pattern: vinyl and thin-gauge aluminum gutter material shows the highest sagging tendency. 1) Inspect spans for bowing. 2) Check hanger spacing. 3) Clear loads. 4) Replace deformed sections safely.
Do I Need a Permit or HOA Approval to Repair Gutters?
You usually don’t need building permits for gutter repairs, but you may need HOA regulations approval. Check city codes, call permitting, review HOA bylaws, submit plans if required, then schedule work and inspections.
When Should Gutters Be Fully Replaced Instead of Repaired?
When rust, cracks, separated seams, or chronic leaks persist, you should replace gutters; it’s time to bite the bullet. Step-by-step: inspect fascia rot, verify slope, match Gutter color, replace incompatible Gutter accessories, then test flow.
Conclusion
Now you’ve confirmed the brackets were the “architects” of that gutter slump, and you’ve replaced their bad decisions with solid hardware. Recheck your chalk-line slope, tighten each hanger, and upgrade to hidden hangers where needed. Work from a stable ladder, keep three points of contact, and don’t overtighten into fascia. Run a hose, watch for steady flow, and fix any slow spots. Congratulations: you’ve outsmarted gravity—again.