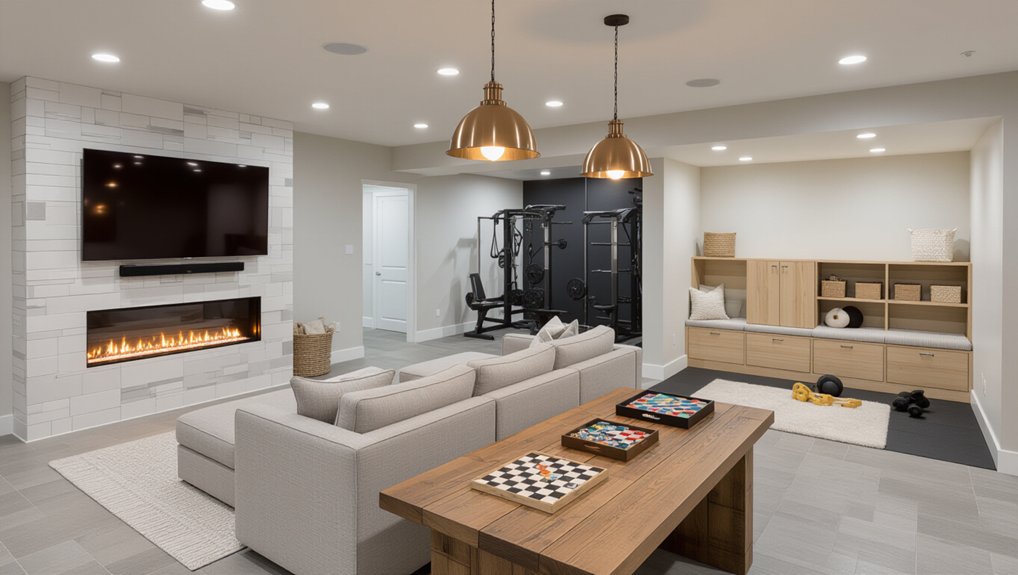
Start by confirming permits, egress windows/doors, and smoke/CO alarms, then measure finished ceiling height and plan around ducts and beams. Keep the basement dry with sealed leaks, graded soil, rim-joist insulation, and a dehumidifier plus fresh-air ventilation. Zone the space for media, play, gym, and work, using rugs and movable screens to keep sightlines. Choose waterproof LVP or tile, layer dimmable lighting, add hidden storage, and soundproof the “loud core.” Keep going to see smart layouts and kid-safe details.
Key Takeaways
- Verify permits, egress windows, and smoke/CO alarms early to ensure safety, code compliance, and future insurability.
- Plan ceiling height, soffits, and access panels around HVAC and utilities so mechanical systems remain serviceable and unobstructed.
- Divide the basement into flexible zones (media, play, gym, work) using rugs, half-height dividers, and mobile furniture to prevent conflicts.
- Control moisture and air quality with leak sealing, proper grading, insulation, balanced ventilation, and a dehumidifier to avoid musty conditions.
- Reduce noise transfer with mineral wool, resilient channels, sealed penetrations, solid-core doors, and impact-damping flooring in active areas.
Start With Basement Constraints (Codes, Height, HVAC)
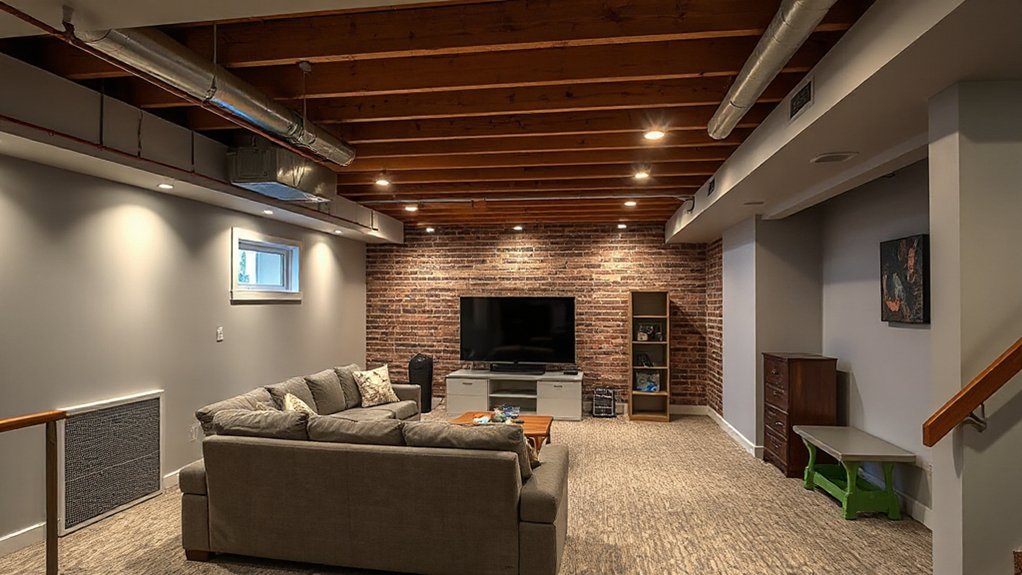
Before you pick paint colors or furniture, take a hard look at what your basement can legally and comfortably support—because codes, ceiling height, and mechanical systems will shape every “family room” idea you have. Verify egress requirements, smoke/CO alarms, and permits so your kids’ hangout stays safe and insurable. Measure finished ceiling height after drywall, subfloor, and duct soffits; if it’s tight, choose low-profile lighting and reroute services where allowed.
Next, audit HVAC capacity and moisture control. Seal rim joists, add Basement insulation with the right vapor approach for your climate, and protect pipes from freezing. Build smart Ventilation strategies: balanced exhaust, dehumidification, and fresh-air makeup so playtime doesn’t smell musty or trigger allergies. Keep access panels clear for service and future repairs.
Plan a Basement Layout With Clear Zones
Three clear zones—active play, quiet retreat, and service/storage—make a multi-purpose basement feel bigger, safer, and easier to live in. Start by mapping traffic from stairs to exits so you don’t force kids past utilities or low beams. Keep the service/storage zone tight to the mechanical room, sump, and panel, and preserve required clearances and access paths. Place the quiet retreat farthest from noise and vibration sources, then buffer it with closets or built-ins.
Use doors or half-walls to control sound without blocking egress sightlines. Plan Basement ventilation early: route returns, dehumidification, and fresh-air supply to each zone. If you change openings or remove posts, schedule Structural reinforcement and get permits and inspections.
Pick Flexible Zones: Media, Play, Gym, Work
Now you’ll assign flexible zones—media, play, gym, and work—so multiple activities can run without collisions or unsafe traffic paths. You’ll keep it convertible with fold-away desks, mobile seating, and labeled, closed storage that clears floor space fast. You’ll also control sound and privacy with doors, rugs, acoustic panels, and egress-safe partitions that don’t block required exits.
Zoning For Multiple Activities
Although a basement often has to do everything at once, you’ll get a calmer, more usable space by zoning it into flexible “rooms” without building full walls: a media zone (screen + seating), a play zone (open floor + toy storage), a gym zone (rubber flooring + mirror/wall mount), and a work zone (desk + task lighting). Use rugs, ceiling grid lines, or half-height elements to signal boundaries while keeping sightlines for supervising kids. Plan Basement lighting by layer: dimmable cans for media, bright uniform light for play, glare-free task light for work. Support comfort and sound with insulation strategies at rim joists and exterior walls, and seal gaps to limit drafts. Keep egress paths clear, protect outlets with GFCI where required, and route cords away from traffic.
Convertible Furnishings And Storage
Because your basement has to switch roles fast, you’ll get the most mileage from convertible furnishings and storage that let each zone (media, play, gym, work) pack up safely and reset in minutes. Start with Convertible furniture: a sleeper sofa for movie nights, nesting tables that tuck away, and wall-mounted drop-leaf desks for homework or WFH. For play, use rolling bins and a toy cabinet with tip-resistant anchoring; label bins so kids can reset quickly. For gym time, store mats, bands, and adjustable dumbbells in hidden storage under a bench, and park a folding rack against the wall. Keep egress windows, electrical panels, and required clearances unobstructed, and choose moisture-resistant materials for below-grade durability. Add lockable storage for chemicals and tools.
Sound And Privacy Control
Where will the noise go when the basement flips from movie night to homework, play, or a workout? You’ll keep peace by zoning sound first, then sight. Build a “loud core” for media/play: add Soundproofing materials like mineral wool in stud bays, resilient channel, solid-core doors, and sealed outlets. Lay rubber flooring in the gym zone to kill impact noise and protect slabs. For a quiet work nook, use acoustic panels, thick curtains, and a door sweep; treat HVAC returns so you don’t leak chatter upstairs. Keep it flexible: mount Privacy screens on ceiling tracks or use folding panels to split desks from games without permanent walls. Label zones like code—clear boundaries, clean progression, fewer conflicts, every day.
Plan Basement Walkways and Sightlines

Before you pick furniture or hang a TV, map the basement’s walkways and sightlines so everyone can move safely and still stay connected. Sketch main routes from stairs to seating, bath, and exits, then keep paths clear and wide enough for kids, guests, and moving bins. Aim for 36 inches minimum, and don’t block egress windows, doors, or mechanical panels required by code. Place the TV, play zone, and homework table so you can see multiple areas without craning your neck, and avoid glare by planning basement lighting in layers along travel lines. Use low-profile storage solutions at the perimeter so sightlines stay open and corners don’t become trip zones. Mark door swings and headroom under beams early.
Add Hidden Basement Storage for Daily Clutter
Even if your basement has a dedicated playroom or media zone, daily clutter still migrates to the nearest flat surface unless you build storage into the edges. Use toe-kick drawers under built-ins, lift-top benches along walls, and cabinet faces that look like trim for fast clutter concealment. Add Hidden compartments inside stair stringers, under risers, or behind a hinged wainscot panel to stash controllers, board games, and spare throws.
Keep storage shallow near walkways so you don’t pinch egress width, and avoid blocking required access to electrical panels, shutoffs, or cleanouts. Choose soft-close hardware, rounded pulls, and labeled bins so kids can reset the room quickly. Match finishes to walls so storage disappears, but stays easy to open.
Control Basement Moisture Before Finishes
Built-in storage keeps the mess out of sight, but moisture will still find its way into cabinets, cushions, and finished walls if you don’t manage it first. Start by sealing obvious leaks, extending downspouts, and grading soil away from the foundation so water can’t linger.
Then control Basement humidity: run a properly sized dehumidifier to keep relative humidity near 50%, and vent any bathroom or laundry area to the outdoors, not the joist bays. Check local code for required mechanical ventilation and combustion-air rules if you’ve got a furnace or water heater downstairs. Use a capillary break and vapor retarder where your jurisdiction requires it, and keep insulation details consistent to avoid condensation. You’ll cut odors, protect kids’ gear, and support long-term mold prevention.
Choose Durable Basement Flooring for Families

How do you pick a basement floor that can handle muddy boots, spilled juice, and the occasional puddle without failing inspection? Start with Durable materials rated for below-grade use and confirm the slab’s vapor barrier details match local code expectations. Then choose Flooring options that lock out moisture and clean fast: LVP with a waterproof core, porcelain tile with epoxy grout, or sealed concrete with a slip-resistant finish. Skip absorbent carpet and standard laminate unless you use removable carpet tiles over an approved underlayment. Add an impact-rated pad only where you need comfort for play, and keep transitions flush to reduce trip hazards. If you install a subfloor panel system, verify fire and egress clearance rules, and follow manufacturer specs exactly.
Layer Basement Lighting by Activity
Because one ceiling fixture can’t support homework, movie night, and safe stair traffic at the same time, you’ll get better results by layering basement lighting by activity. Start with even ambient Basement lighting: dimmable recessed LEDs or low-profile fixtures that meet clearance needs under ducts and soffits. Add task lights where hands work—desk lamps at the study table, under-shelf LEDs at crafts, and bright vanity-style lighting near a utility sink. Then set accent lighting for play and media: wall sconces, LED strips behind the TV, or toe-kick lights that reduce screen glare. Keep switches zoned and reachable at entrances; pair stairs with 3-way switching and code-compliant step or wall lighting. Use warm-to-neutral LEDs so faces look natural and bedtime changeover stay calm.
Reduce Basement Noise Between Zones
To keep movie night from bleeding into homework time, you’ll need real separation between basement zones, not just distance. You can spec soundproof wall assemblies, add acoustic doors with tight seals, and still meet egress and fire-rating requirements where they apply. For the biggest gains, you’ll also isolate the ceiling and floor so vibration doesn’t bypass your walls and carry noise through the structure.
Soundproof Wall Assemblies
Even if you’re not building a full home theater, you’ll hear every zone in a basement unless you plan the wall assembly for sound control. Use soundproof wall assemblies to keep play noise out of a study nook and workout thumps away from a guest bed. Frame staggered studs or a double-stud wall where space allows, or add resilient channel to one side when you need a thinner build. Fill cavities with acoustic insulation, then hang two layers of 5/8-inch Type X drywall with staggered seams and damping compound between layers. Seal all perimeter gaps with acoustical caulk before trim. Keep fireblocking and draftstopping continuous per code, and don’t bury junction boxes or violate required clearances. You’ll gain privacy without sacrificing usable floor area.
Acoustic Doors And Seals
A well-built soundproof wall won’t perform if sound slips through the door, so treat door openings as part of the assembly. Choose solid-core slabs or rated acoustic doors with heavy frames, and avoid hollow interiors. Set the jamb plumb so the latch pulls tight, then add seals and gasketing at the head and sides; even a 1/8-inch gap leaks voices and TV bass. Use an automatic door bottom or tight sweep at the threshold, but keep clearances code-legal for egress and accessible routes. If the door serves a bedroom, confirm required egress paths stay unobstructed. Add a closer if kids leave doors ajar, and place light switches to prevent night-time slams.
Ceiling And Floor Isolation
Once you’ve tightened up walls and doors, you still need to stop noise from traveling through the ceiling and floor structure between basement zones. Start with Ceiling insulation: fill joist bays with mineral wool, then add resilient channel or sound-isolation clips and a second drywall layer with damping compound. Seal every penetration—can lights, ducts, speakers—with rated boxes, fire caulk, and gaskets so you don’t break the assembly. Keep required clearances around flues and follow local fireblocking rules at soffits and chases.
For the slab or subfloor, prioritize Floor sealing at edges and joints, then add underlayment under hard flooring to cut footfall. Use carpet tiles in play zones for quick cleanup. Isolate the stairs with tread pads, too.
Make Basement Stairs and Egress Safer
If your basement’s going to double as a playroom, guest zone, or hangout, you can’t treat stairs and egress as afterthoughts. Start with Basement safety basics: consistent riser heights, deep treads, bright lighting at top and bottom, and non-slip nosings. Install a sturdy stair railing on both sides when possible, and choose child-safe balusters that meet local spacing limits. Add a light switch at each level, plus night lighting for late trips.
For egress, confirm you’ve got a code-compliant window or door from any sleeping area, with proper opening size and sill height. Keep the path clear, mark it, and store keys where everyone can reach them quickly.
Frequently Asked Questions
How Much Does a Multi‑Purpose Family Basement Remodel Typically Cost?
You’ll typically spend $30,000–$100,000+ on a multi‑purpose family basement remodel, depending on finishes and square footage. Budget for Basement insulation, Waterproofing solutions, permits, egress, HVAC, and safe electrical to meet code.
What Permits Do I Need Before Starting a Basement Renovation?
You’ll usually need a building permit, plus electrical, plumbing, HVAC permits, and sometimes egress or structural approvals. Check local building codes and zoning regulations; your inspector may require smoke/CO alarms, fire separation, and inspections.
How Long Does a Typical Basement Conversion Take From Start to Finish?
You’re in luck: a typical basement conversion takes 6–12 weeks, sometimes 3–6 months if surprises hit. You’ll speed things up by planning Basement lighting early and prioritizing Moisture control, inspections, and family-safe code.
Should I Hire an Architect, Designer, or Contractor for Basement Planning?
You should hire a contractor first if you’ve got a clear plan; add an architect/designer for structural changes, Lighting design, and Material selection. You’ll meet code, protect egress, and create safer, flexible family zones.
How Can I Increase Basement Resale Value Without Over‑Improving?
Want more resale without wasting money? You’ll boost value by keeping finishes midrange, adding code-compliant egress, and prioritizing Basement lighting plus Storage optimization; buyers notice safety and function. Don’t add luxury wet bars unless comps support.
Conclusion
When you design your basement for real family life, you’re not just adding space—you’re adding sanity. Keep code checks front and center: ceiling height, HVAC supply/return, and safe egress. Then let zones flex—movie nights, homework, workouts—while clear sightlines and wide walkways prevent traffic jams. Hide daily clutter in built-ins, choose tough flooring, and layer task and ambient lighting. With about 80% of U.S. homes having basements, done right, yours can stand out.
About the Author