
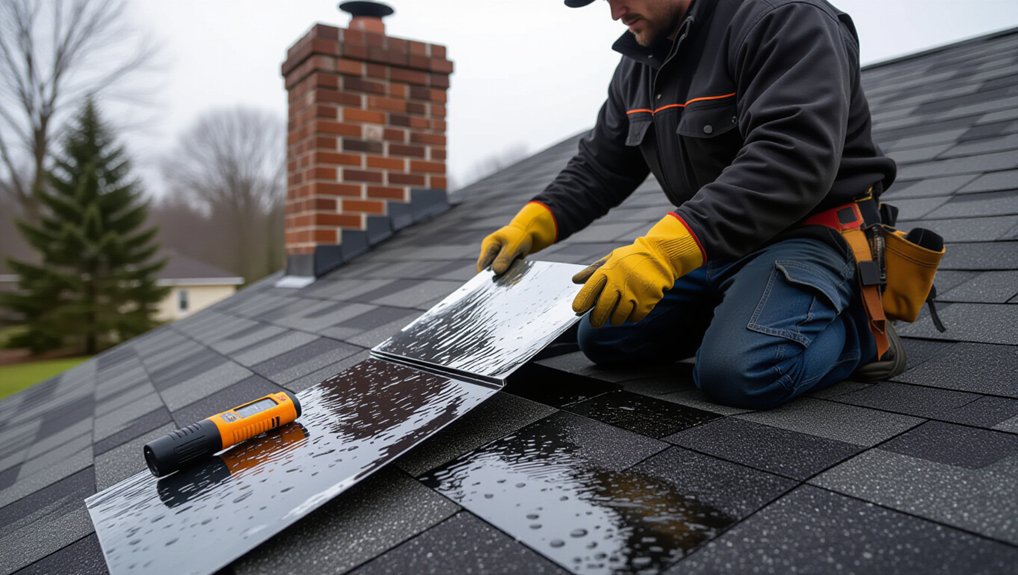
You’ll track flashing leaks fastest by mapping the ceiling stain to the roof: measure from fixed interior walls, transfer with a plumb bob or laser, and mark the zone on the deck. In the attic, follow wet sheathing and nail-tip drips uphill until stains stop at a seam, lap, or penetration. Inspect step flashing, counterflashing, valleys, and drip edge for lifted laps, corrosion, exposed fasteners, and failed sealant, then confirm with a controlled hose test, one 2–3 ft section at a time. Next, you’ll see how to verify and fix each flashing type.
Key Takeaways
- Confirm leak patterns near penetrations or roof-plane changes; staining along rafters often indicates flashing failure rather than field shingles.
- Rule out non-flashing causes first, including gutter overflow, damaged shingles, split vent boots, and underlayment termination errors at eaves/rakes.
- Map the leak by measuring from interior reference points and transferring to the roof deck with a plumb bob or laser.
- Inspect flashing laps for lifted edges, corrosion, pinholes, missing counterflashing, and exposed or misplaced fasteners that break water-shedding paths.
- Probe suspected joints with a thin putty knife and follow staining upslope to seams or flashing edges to pinpoint entry points.
Signs Your Roof Leak Is Flashing-Related
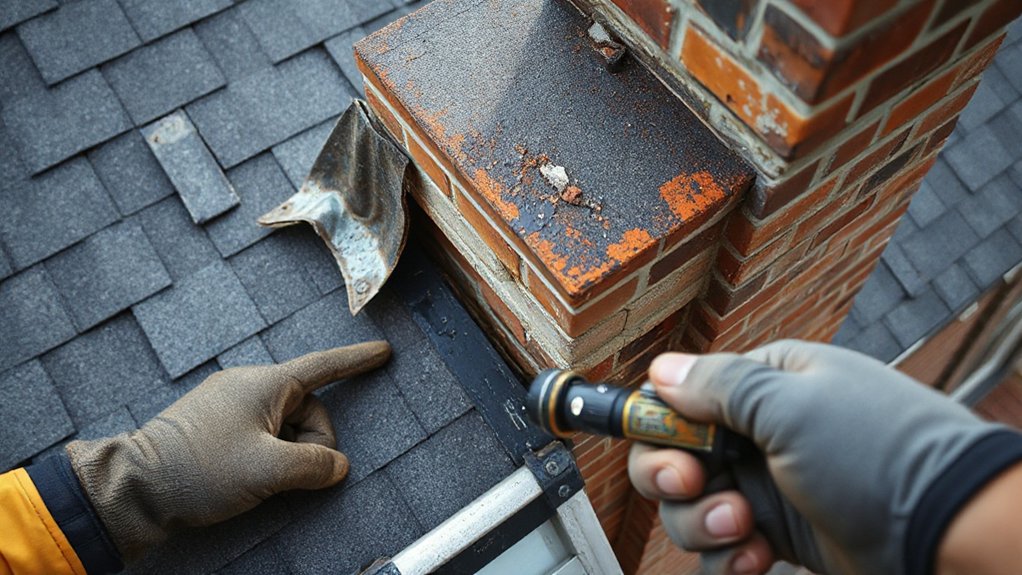
If a leak shows up around a roof penetration or a change in roof plane, you should suspect flashing before you blame the shingles. Check chimneys, skylights, vent stacks, dormer cheeks, and wall step transitions; these are code-required flashing locations with layered shingle-style laps. You’ll often see staining that tracks along rafters from a joint, not a random field leak.
Look for lifted edges, corrosion, pinholes, missing counterflashing, or sealant that’s cracked where it shouldn’t be relied on. After wind-driven rain, observe water entry at the uphill side of penetrations, indicating failed head flashing or improper kickout. During Roof maintenance, verify fasteners aren’t exposed in flashings and that underlayment integrates correctly. Effective Weatherproofing techniques include proper overlap, hemmed drip edges, and continuous water-shedding paths.
Rule Out Common Non-Flashing Leak Sources
Flashing failures explain many leaks, but you still need to eliminate the usual non-flashing culprits before you open up the roof. Start with the water-shedding system. Perform Gutter maintenance: clear debris, confirm proper slope to outlets, and verify downspouts discharge away from the foundation. Check for overflow stains at eaves that can mimic flashing leaks. Next, inspect roof coverings: look for cracked shingles, lifted tabs, exposed fasteners, and failed sealant at nail heads; repair per manufacturer instructions and local code. Verify underlayment terminations at eaves/rakes aren’t reversed or torn. Evaluate penetrations for non-flashing issues such as split plumbing boots or UV-damaged vent caps. Finally, confirm Landscaping adjustments maintain positive grade and keep sprinklers from wetting siding and roof edges.
Mark the Leak Indoors (Ceiling to Roof Map)
Although the stain shows up on the ceiling, the entry point usually sits upslope, so you need a reliable ceiling-to-roof map before you disturb any roofing. Measure from two fixed interior references (an exterior wall and a perpendicular partition). Mark the stain’s center, then transfer those offsets to the underside of the roof plane using a plumb bob or laser, keeping measurements perpendicular to framing. Note ceiling slope changes, soffit lines, and any penetrations shown on plans. On the roof, snap chalk lines from matching exterior references and plot the same offsets. Photograph the area and record roof color, course counts, and exposure to confirm you’re on the correct plane. Finally, flag likely flashing materials zones (step, apron, counterflashing) without removing components.
Start in the Attic: Wet Decking and Nail Drips
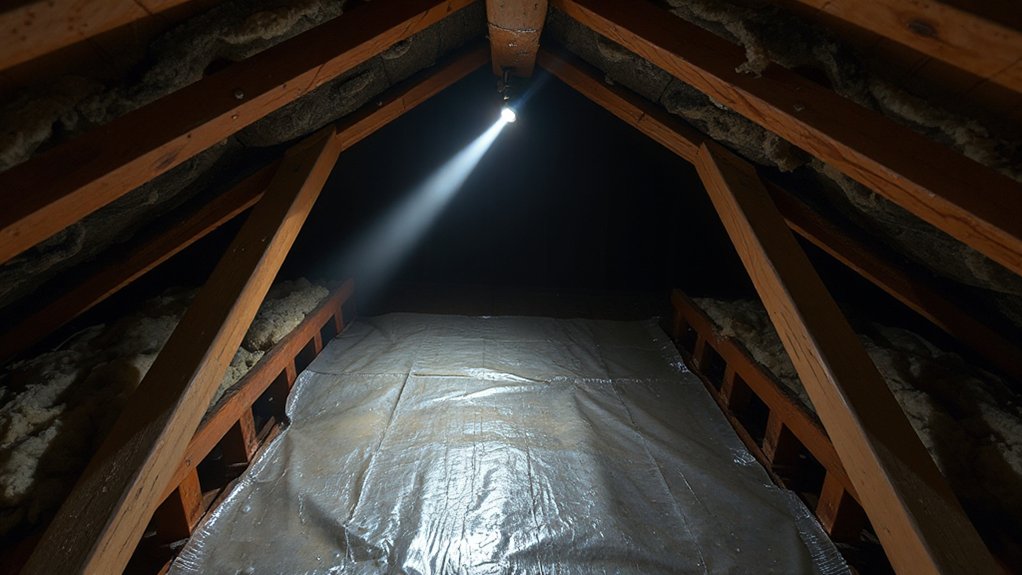
Once you’ve mapped the ceiling stain to the correct roof plane, move into the attic and inspect the underside of the sheathing for active moisture. Use a bright light and look for darkened plywood/OSB, sheen, or beads at panel joints. Check fasteners: nail points often “drip” when water tracks along shanks, so scan rows for uniform droplets. Probe suspect decking with an awl; sound wood resists and stays light-colored. Pull back Attic insulation only as needed, and replace it to maintain required R-value and vapor control. Verify Roof ventilation paths stay clear at eaves and ridge; blocked baffles can concentrate condensation and mimic leaks. Document conditions and time since rainfall for correlation and code-compliant reporting.
Follow Stains Uphill to the Entry Point
From the interior stain, you’ll trace the moisture trail upslope on the roof deck to identify the highest point of wetting. You’ll inspect roof penetrations first—vents, stacks, skylights, and fasteners—since they’re common code-sensitive leakage paths. Then you’ll confirm any nearby flashing gaps, loose laps, or failed sealant that could let water enter above the stain line.
Trace Stain Trail Upslope
Because gravity carries water downhill and capillary action can pull it sideways, you should trace the stain trail upslope on the underside of the roof deck to pinpoint the entry point. Start at the lowest visible Color staining, then move uphill bay by bay, following darkened sheathing, rust marks on fasteners, or mineral rings along joints. Use a bright light held at a low angle to reveal sheen and texture changes, and mark each boundary with painter’s tape for Upslope tracing. Probe suspect wood with an awl; sound, code-compliant sheathing resists, while wet or decayed fibers yield. Verify direction by checking framing members for drip lines on their uphill faces. Stop when staining ends at a seam, nail line, or flashing edge. Document measurements from fixed rafters.
Inspect Roof Penetrations First
Although leaks can originate anywhere along the covering, you should inspect roof penetrations first after you’ve traced stains uphill, since penetrations concentrate joints, fasteners, and flashing shifts that often fail. Start at plumbing vents, skylights, HVAC curbs, and chimneys. Verify the boot or curb is intact, seated, and compatible with the roof type. Check fasteners for back-out, overdrive, and missing neoprene washers; replace per manufacturer specs and local code. Look for cracks at sealant terminations, splits at corners, and punctures from service traffic. If a Roof coating is present, confirm it hasn’t bridged movement joints or pulled away around penetrations. Document findings, then rule out overflow paths by confirming gutter maintenance keeps water from backing up onto nearby penetrations.
Confirm Flashing Gaps Nearby
Once you’ve cleared penetrations, track the stain line uphill and inspect the nearest flashing laps and terminations for gaps that can funnel water under the roof covering. Start at the first darkened sheathing or wet insulation and move upslope in straight increments, marking each suspect joint. Check step flashing, counterflashing, and end dams for lifted edges, missing sealant, or fasteners placed in water lines, per manufacturer instructions and local code. Probe overlaps to confirm at least the required lap length, and verify continuity at corners and junctions. Compare roof color changes to locate chronic wetting and algae tracks. Assess material durability: thin or corroded metal, cracked membranes, and brittle sealants signal repeated movement and require replacement, not patching.
Check for Flashing Failure: Rust, Holes, Loose Nails
Next, you’ll inspect all roof flashing at penetrations, sidewalls, and valleys for rust or corrosion that can compromise a watertight seal. You’ll check for pinholes, cracks, lifted edges, and open seams, and you’ll verify fasteners aren’t loose or backing out. If you find deterioration or movement, you’ll treat it as a likely leak path and note the exact location for repair or replacement.
Spot Rust And Corrosion
Two quick checks will tell you if flashing failure is driving the leak: inspect for rust/corrosion and verify the metal is still mechanically secured. Start at roof-to-wall joints, chimneys, and valleys, then look for red-brown staining, pitting, flaking coatings, and white oxidation on aluminum. Use a putty knife to gently scrape suspect areas; sound metal resists, while corrosion powders or delaminates. Confirm compatibility: copper runoff will accelerate corrosion on galvanized steel, and dissimilar metals violate good practice unless separated. For Rust prevention, verify intact factory coating and seal cut edges with manufacturer-approved primer/paint. For corrosion repair, wire-brush to clean substrate, treat per product instructions, and document affected lengths for replacement if section loss is evident.
Find Holes And Lifts
Because even minor movement can open a capillary path, you’ll want to inspect flashing runs for punctures and lifted edges that break the water-shedding lap. Start at penetrations, valleys, and step flashing at sidewalls, then follow the course upslope to downslope. Look for nail pops, fasteners placed in exposed locations, and elongated holes that indicate movement or material deterioration. Probe suspect laps with a thin putty knife; if you can slip it under an edge, the lap’s likely below minimum overlap or the sealant has failed. Check for wrinkling, oil-canning, and cracks at bends. Mark defects, then confirm water entry points by tracing staining on underlayment. Document findings for roof maintenance and code-compliant repairs.
Chimney Flashing: Counterflashing and Cricket Leaks
When water shows up near a chimney, inspect the flashing system first, since even small breaks in the counterflashing lap or the cricket shift can funnel runoff straight into the roof deck. Verify counterflashing is reglet-cut into masonry, stepped into mortar joints, and lapped over base flashing by at least 2 inches. Check for open seams, corrosion, and fasteners driven through horizontal surfaces. Confirm compatible flashing materials: 26-gauge galvanized steel, copper, or stainless, not dissimilar metals that accelerate galvanic action.
Next, inspect the cricket on the high side where code requires it on wide chimneys. Make sure it sheds water, ties into the base flashing, and hasn’t split at the ridge or buckled under shingles. For Chimney maintenance, reseal reglets and replace deformed metal, not just tar.
Sidewall Step Flashing: Missing Steps and Bad Caulk
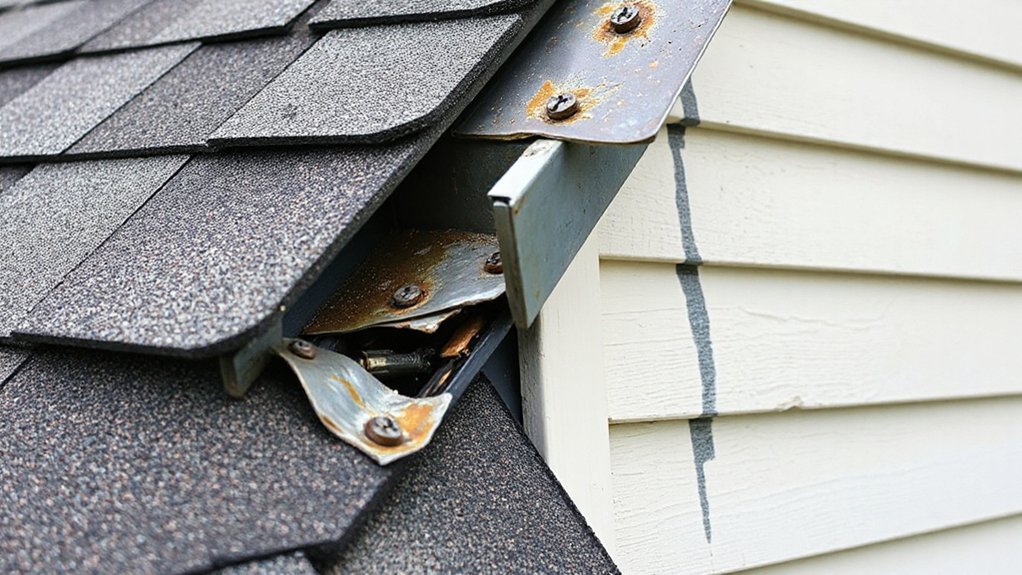
At sidewalls, you should see individual step-flashing pieces at every shingle course, lapped correctly and integrated with the wall’s WRB and counterflashing per code. If steps are missing, reversed, or face-nailed, you create a direct water path behind the siding and into the roof deck. Don’t rely on caulk as primary flashing—when sealant cracks or separates, you’ll get intermittent leaks that track along the wall line.
Missing Step Flashing
How does water sneak in where a roof plane dies into a sidewall? It slips behind shingles when step pieces are missing, letting runoff reach the underlayment and sheathing. You’ll often see staining at the wall line, damp insulation, and localized deck rot. Inspect the sidewall course-by-course: each shingle should overlap an individual step flashing, and each step should lap the one below to shed water outward. Verify minimum 2-inch headlap and that the vertical leg rises behind the wall’s weather-resistive barrier. Confirm kickout flashing at the eave. Look for metal corrosion on exposed edges, which can signal chronic wetting. If steps are absent, you’ll need a proper flashing installation with correctly sized, interleaved pieces, not continuous strips.
Failed Caulk Seals
Although sealant can mask small gaps in sidewall step flashing, it isn’t a code-compliant substitute for properly lapped, interleaved metal, and it will fail under UV exposure and thermal movement. When you see a continuous bead bridging shingle courses or siding laps, treat it as a red flag, not a repair.
To track failure, inspect for cracked, chalked, or separated caulk at the wall line, kickout, and nail penetrations. Probe gently; if the bead lifts or the substrate is dirty, adhesion has already failed. Verify each step piece overlaps the one below and turns up behind the WRB, per code intent. Then evaluate flashing materials: incompatible metals and sealants accelerate breakdown and reduce caulk longevity. Replace missing steps and reflash; don’t rely on resealing.
Vent Pipe Flashing: Cracked Boots and Lifted Edges
When rainwater follows a plumbing vent through the roof, the failure point often sits at the vent pipe flashing where the rubber boot meets the pipe and the flashing flange meets the shingles. Inspect the boot for UV splits, pinholes, and hardened rubber; cracked boots let water run down the pipe into the attic. Verify the boot is sized to the pipe and seats tight without gaps; replace, don’t tape.
Next, check the metal or molded flange. If edges lift, nails back out, or shingles bridge over the flange, you’ll get capillary entry. Per code and manufacturer instructions, the upslope flange must be fully underlapped, the downslope edge overlaid, and fasteners placed high and sealed by the shingle course. Reseat or replace and re-shingle as needed.
Skylight Flashing: Gaps, Corner Cracks, and Ice Dams
Before you blame the skylight itself, inspect the flashing system for open seams, displaced step flashing, and cracked corner pieces that let water bypass the shingle lap. Check that head flashing extends under underlayment above the unit and laps over side pieces per manufacturer instructions and IRC R903.2.1. Look for sealant-only “repairs”; they don’t replace proper counterflashing. Probe for gaps where fasteners backed out or where metal fatigued at corners. In winter climates, confirm an ice-and-water membrane wraps the curb and ties into the roof underlayment to resist ice dams. Verify diverter or cricket requirements for wide skylights to shed meltwater. During roof repair, match flashing materials (aluminum, steel, copper) to avoid galvanic corrosion and premature failure.
Valley Areas: Metal Showing, Debris, and Gaps
Because valleys concentrate the highest roof runoff, even minor defects in the lining or shingle cut can turn into active leaks fast. Start by clearing Valley debris so you can see the full flow path and expose the flashing edges. Check for metal showing where shingles were cut back too far or have slipped; code-compliant valleys maintain a defined, straight cut line and adequate exposure without puncturing the lining. Inspect for gaps at lap joints, end dams, and nail heads placed within the valley zone. Probe for soft decking along the centerline. Look for metal corrosion, pitting, or pinholes, especially at standing water marks. Verify underlayment integrity at the valley and confirm sealant isn’t used as the primary water barrier.
Dormers and Roof-to-Wall Transitions
Valleys may funnel the most water, but dormers and roof-to-wall lines create the most complicated water paths. Start by tracing stains uphill to the first intersection where siding meets shingles. Verify kick-out flashing at the base directs runoff into the gutter, not behind cladding, per IRC R903.2.1. Remove a small section of siding to confirm step flashing laps 2 in. minimum over each course and that housewrap or WRB shingle-laps over the vertical legs. Inspect Dormer flashing at headwalls for continuous counterflashing and sealed end dams. For roof to wall connection sealing, don’t rely on caulk alone; require metal laps, fasteners placed high, and compatible underlayment tie-ins. Water-test progressively, one joint at a time.
Eaves and Drip Edge: Wind-Driven Rain Entry
At the eaves, you should verify the drip edge is continuous and properly lapped, since gaps at seams or corners can violate manufacturer instructions and allow water bypass. When wind-driven rain hits the fascia line, it can ride under the shingle edge and wick through openings between the drip edge, underlayment, and decking. You’ll trace the entry path by checking for exposed nail heads, misaligned underlayment terminations, and missing sealant where required.
Drip Edge Gaps
When wind-driven rain hits the eaves, even a small gap at the drip edge can funnel water up under the first course of shingles and onto the fascia or into the soffit. Start by inspecting the metal along the rake and eave: you’re looking for lifted edges, missing fasteners, buckling, or corrosion. Confirm the drip edge laps over the underlayment at the eave and under it at the rake, per manufacturer instructions and IRC intent for water-shedding continuity. Measure any open seams; even 1/8 inch can act as a capillary break failure. Check joints at corners and junctions for flashing gaps, and verify sealant isn’t used as a primary lap. Refasten, replace, and overlap properly.
Wind-Driven Rain Pathways
Even if the shingles look tight, wind-driven rain can reverse the intended drainage path at the eaves and push water up the drip edge, under the starter course, and onto the fascia/soffit. To verify, inspect during or after a storm: look for staining at the soffit vents, swollen fascia boards, and damp nail tips in the first course. Check that the drip edge laps the underlayment at eaves, and that the starter strip seals to the drip edge flange; missing sealant allows Wind transport behind the edge. Confirm the ice-barrier membrane (where required) extends at least 24 inches inside the warm wall line and adheres to the metal. Any discontinuity accelerates Moisture migration into the sheathing and along fasteners.
Do a Controlled Hose Test (One Area at a Time)
Because roof leaks can travel along decking and framing before they show up indoors, you’ll get the most reliable results by running a controlled hose test one area at a time. Start with a Roof inspection: verify ladders are secured, wear fall protection, and keep the hose operator and observer in communication. Inside, remove a small ceiling access point if possible and position a light to spot first moisture.
On the roof, begin at the lowest suspect flashing and wet only a 2–3 foot section for 5–10 minutes, keeping water pressure moderate to mimic rainfall, not a pressure washer. Pause between sections to confirm timing. Work upslope and around penetrations, progressions, and terminations near Waterproof membranes. Log each area tested and the exact minute leaks appear.
Temporary Patch vs. Proper Repair (When to Call a Pro)
After you pinpoint the entry point, decide whether you’re applying a short-term patch to stop active water intrusion or scheduling a code-compliant repair that restores the roofing system’s water-shedding and flashing integrity. Use Temporary patching only to buy time: seal exposed fasteners, cover small gaps with roofing cement or butyl tape, and apply a compatible patch membrane, keeping it shingled-lap and out of standing water. Don’t trap moisture or bridge moving joints.
Choose Professional repair when flashing is corroded, detached, improperly lapped, or integrated wrong with underlayment. If the leak involves valleys, chimneys, step flashing, or penetrations, you’ll need proper counterflashing, correct fastener placement, and manufacturer-approved materials. Call a pro if you can’t safely access the slope or if decking feels soft.
Frequently Asked Questions
Does Homeowner’s Insurance Cover Leaks Caused by Flashing Damage?
Your homeowner’s insurance might cover flashing-damage leaks if a sudden, covered peril caused them, but it won’t cover wear or poor maintenance. Review Coverage limitations, document loss, and file Insurance claims with photos and estimates.
How Much Does Professional Flashing Repair Typically Cost?
Like a gasket sealing a joint, you’ll typically pay $200–$800 for professional flashing repair; complex chimneys run $900–$2,500. For Cost estimation, you’ll confirm scope, then follow a code-compliant Repair process: remove, replace, seal, test.
What Tools and Safety Gear Are Needed to Inspect Flashing Safely?
You’ll need ladder safety gear (stabilizer, tie-offs), a harness with lifeline, non-slip boots, gloves, and eye protection. Bring inspection tools: flashlight, mirror, moisture meter, probe, tape measure, camera, and sealant samples.
Can Solar Panels or Roof Antennas Interfere With Flashing Performance?
Yes, a solar panel or roof antenna can compromise flashing if mounts penetrate, compress, or bridge it. You’ll follow manufacturer specs, maintain clearances, use listed sealants, and route fasteners into rafters. Inspect regularly.
How Long Should Properly Installed Flashing Last Before Replacement?
Properly installed flashing should last 20–50 years, depending on roofing materials and exposure. You’ll replace it sooner if corrosion, sealant failure, or movement occurs. Follow code-required overlaps, fasteners, and maintenance tips: inspect annually, re-seal, clear debris.
Conclusion
You’ve traced the leak like a detective, and now you can act like an engineer. If the hose test isolates flashing, don’t chase symptoms—fix the water path. Install code-compliant flashing (proper laps, kickout at walls, sealed terminations) and replace any compromised underlayment or decking. Use a temporary patch only to stop immediate intrusion, not as a “repair.” When details are complex, steep, or tied to masonry, call a qualified roofer.
About the Author



