

Start by measuring from fixed walls to the ceiling stain’s center, then transfer those dimensions into the loft and mark the rafter bay with painter’s tape. Use walkboards, good lighting, and an FFP2/FFP3 mask, and never step on unsupported plasterboard. Pull insulation back gently to keep eaves ventilation clear, then trace the highest dampness, compressed insulation, and rusty nail trails upslope toward an entry point at valleys, flashings, vents, or gables. Keep going to learn the best timing, tools, and documentation.
Key Takeaways
- Measure from fixed walls to the ceiling stain, then transfer those dimensions into the loft to locate the leak’s overhead bay.
- Pull back insulation gently without compressing it, and inspect the roof deck, rafters, and penetrations for dampness or staining.
- Follow water tracks upslope using dark marks, wet insulation, and rusted nail tips to trace the likely entry point.
- Use a moisture meter or IR thermometer to confirm wet areas; timber moisture above 20% often indicates active leakage.
- Differentiate condensation from leaks by timing: condensation clears as temperatures rise, while leaks correlate with rain, wind, or thaw cycles.
Roof Leak or Condensation in the Loft?
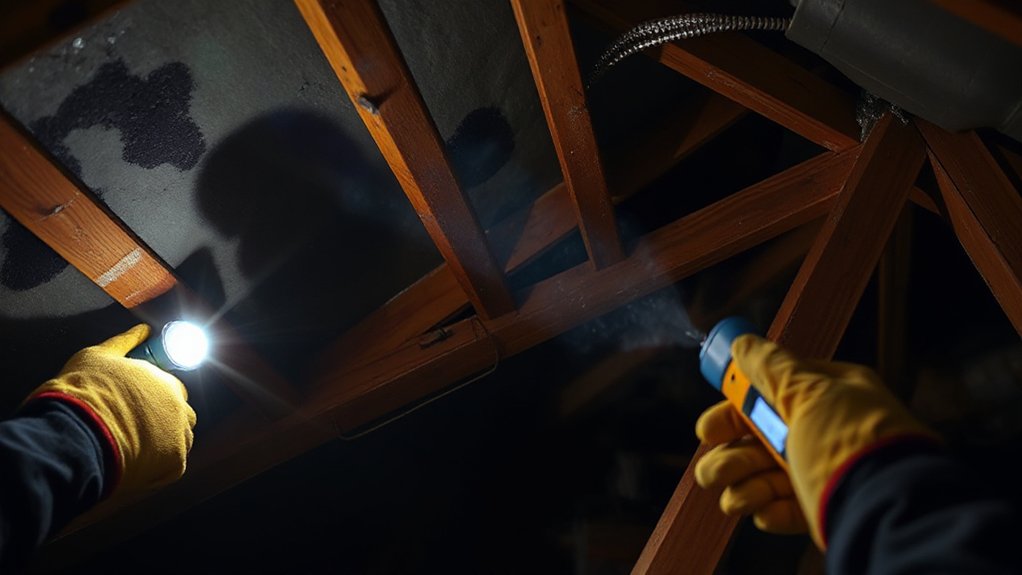
Before you assume you’ve got a roof leak, confirm whether the moisture in your loft is actually condensation, because the fixes (and the risks) differ considerably. Track timing: condensation peaks in cold mornings and clears as temperatures rise; leaks correlate with rain, wind-driven events, or thaw cycles. Look for uniform surface dampness, beads on nails, or wet underfelt without a clear entry path—those point to humidity and inadequate attic ventilation. By contrast, localized staining, decayed rafters, or a trail from ridge, valley, flashing, or penetrations suggests water ingress. Check the roof material condition from inside: torn underlay, cracked tiles, corroded fasteners. Keep insulation out of eaves; codes require continuous ventilation paths to limit interstitial moisture.
Loft Safety: Boards, Lighting, and Masks
Before you inspect for hidden leaks, you’ll need secure loft boarding fixed over joists so you don’t step through plasterboard and you maintain safe access. You should also use safe, low-heat task lighting with protected cabling and a stable power source so you can see staining without creating an electrical or fire hazard. Because lofts often contain insulation fibres and dust, you’ll want a correctly rated dust mask (e.g., FFP2/FFP3) that fits well and stays sealed while you work.
Secure Loft Boarding
Although loft spaces look solid from the hatch, you should only step onto properly fixed loft boards that span the ceiling joists and sit level without rocking, because a misstep through plasterboard can cause a serious fall and damage wiring or pipework. Use rated loft panels or 18 mm structural plywood, screw-fixed to battens or a raised-joist system; don’t rely on loose chipboard. Keep board edges supported, and leave a clear route from hatch to work area. Don’t compress Loft insulation; raise boarding above insulation depth to preserve thermal performance and prevent condensation. Maintain access to eaves and vents for Ventilation maintenance, and don’t block airflow paths. Store loads over joists, keep weight low, and check for hidden cables before drilling.
Safe Task Lighting
When you’re tracing a suspected leak trail across dark insulation and joists, you need task lighting that’s bright, stable, and electrically safe. Use an LED headlamp plus a low-voltage work light so your hands stay free and shadows don’t hide staining. Choose lights rated for damp locations and inspect housings, cords, and plugs for damage before entry. Keep all 120V connections outside the loft hatch; if you must use mains power, plug into a GFCI/RCD-protected receptacle. Route cords along boarded walkways, not across joists, and secure them to prevent trips and abrasion. Don’t rest hot lamps on insulation; LEDs reduce heat risk. Carry a backup torch and fresh batteries. These Safety precautions make Task lighting reliable.
Dust Mask Selection
Bright, stable task lighting lets you see staining and wet trails, but it also shows just how much dust and fiber you’ll disturb in a loft. Choose protection before you crawl in, and follow your local OHS and manufacturer instructions. For Dust mask types, use at least a P2/FFP2 (or N95) disposable respirator for general loft dust; step up to P3/FFP3 (or N99/N100) if you’ll disturb old insulation, heavy debris, or suspect mold. Avoid simple paper “nuisance” masks—they don’t seal or filter adequately. Prioritize Mask fitting: shape the nose clip, position straps correctly, and perform a seal check by inhaling and exhaling; you shouldn’t feel leaks at the edges. Replace masks when damp, clogged, or damaged.
Tools for Finding a Roof Leak in the Loft
You’ll find roof leaks faster in the loft if you bring essential inspection tools like a tape measure, inspection mirror, chalk/marker, and a camera to document defects for compliant repair planning. You should also use moisture detection devices—pin/pinless meter and, when needed, an IR thermometer—to confirm wet paths without damaging wiring or vapor barriers. You’ll work safer and see more by using rated lighting and access gear, including a headlamp or work light, stable boards, and a properly secured ladder that keeps clearances around electrical hazards.
Essential Inspection Tools
Because loft leak paths rarely match the drip point you see below, you’ll get better results by staging a small, safety-rated inspection kit before you enter the space. Bring a high-lumen headlamp plus a handheld flashlight to scan rafters, underlay, and nail lines without losing balance. Wear a P2/P3 respirator, gloves, and coveralls to limit contact with Roof insulation and dust. Use kneeling boards or crawl planks to keep your weight on joists, not plasterboard. Carry a tape measure and marker to tag suspect bays from hatch to eaves. Pack a mirror-on-a-stick and binoculars to check tight corners without disturbing attic ventilation baffles. Keep a notebook, phone camera, and spare batteries for documented, repeatable findings.
Moisture Detection Devices
Although water can travel along rafters, underlay laps, and nail shanks before it shows up as a drip, moisture detection devices let you confirm active wetting without pulling insulation or disturbing ventilation baffles. Use a pin-type meter to profile timber and deck moisture; compare readings to dry reference areas and flag anything trending above 20% as suspect. For finishes, use a pinless meter to scan plasterboard for elevated dielectric values without puncturing vapor control layers. An infrared camera helps you map cool, damp zones, but you’ll verify with contact readings to avoid false positives from airflow or thermal bridging. Log results and mark suspected paths as leak indicators, then recheck after rain to confirm moisture detection trends and location.
Lighting And Access Gear
Moisture readings tell you where wetting concentrates; lighting and safe access let you trace that path back to the entry point without damaging insulation or services. Use high-CRI LED headlamps plus portable Lighting fixtures aimed along rafters, underlay, and penetrations to reveal sheen, staining, and nail-track drips. Keep lamps IP-rated and low-heat to reduce fire risk near cellulose or wiring. Position light to create raking shadows; it’ll highlight depressions in felt and wet timbers. For entry, choose rated Access ladders set at a 4:1 angle on firm flooring, and tie them off where possible. Don’t step on plasterboard; lay crawl boards across joists. Maintain clearance from cables and avoid compressing insulation.
Best Times to Check the Loft (Rain, Wind, Thaw)
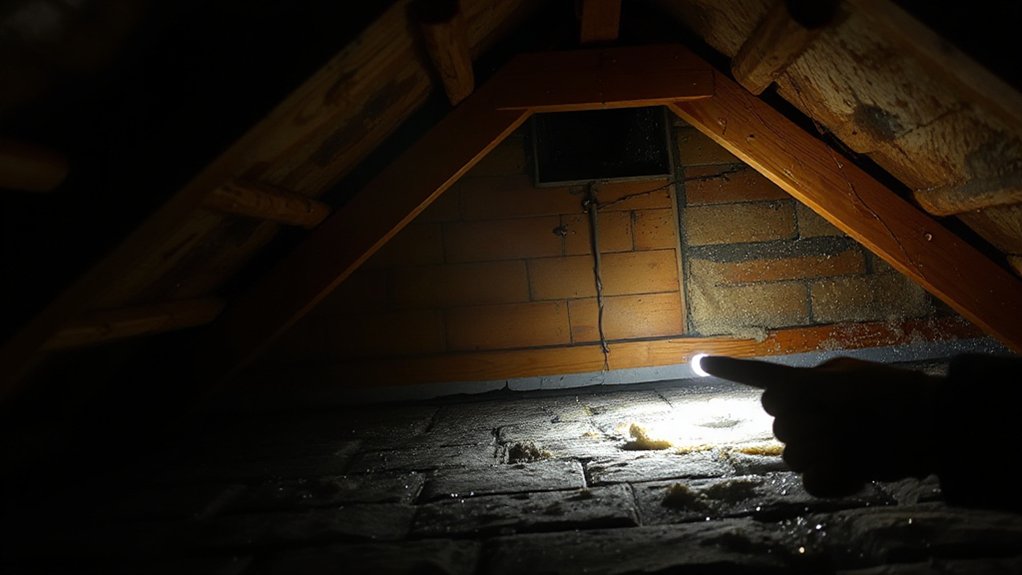
When weather loads your roof—steady rain, gusting wind, or a rapid thaw—you’ll spot active leaks in the loft faster than during dry spells. Check during a moderate rainfall to trace fresh drips and sheen on framing; avoid severe storms. In wind, look for water driven under laps at the Roof material connections (flashings, valleys, ridge). During thaw, inspect after overnight freezing: meltwater can back up at eaves and wet the underlay.
Stay code-compliant and safe: keep to stable walkboards, don’t step on plasterboard, and maintain clear access around electrical wiring. Move insulation types (mineral wool, PIR) only as needed and refit them to preserve U-values and ventilation paths. Wear gloves and a respirator if insulation is dusty.
Match the Ceiling Stain to the Loft Location
Start by matching the ceiling stain to the loft framing: you’ll trace it back to the nearest rafters and note the roof slope direction. Then you’ll inspect the loft area directly above the stain, staying on joists or boards for fall prevention and keeping clear of cables and insulation to maintain safe access. Finally, you’ll map any drip tracks along joists to pinpoint the highest wet point, since water often travels before it drops.
Trace Stain To Rafters
Although the stain shows up on the room ceiling, you’ll usually find the true leak point higher up and offset in the loft, so map the stain’s position to the rafters before you touch anything. Measure from two fixed walls to the stain’s center, note those dimensions, then transfer them in the loft using a tape and chalk line along the joist direction. Identify the nearest rafter bay and mark the rafter faces with painter’s tape so you don’t lose alignment in low light. Stay on joists or a rated walking board; don’t compress Roof insulation, and keep attic ventilation paths clear to meet code and prevent moisture trapping. Wear gloves, eye protection, and a respirator if debris is present. Photograph your marks for reference later.
Check Loft Area Above
After you’ve transferred the stain measurements to the loft, locate that exact spot from above by referencing your taped rafter bay and the joist spacing, then confirm you’re directly over the ceiling mark before inspecting anything else. Move only on joists or installed decking; don’t step on plasterboard. Wear a P2 respirator, gloves, and eye protection, and keep a torch and stable ladder per access guidance. Gently pull back Loft insulation without compressing it, and preserve required Ventilation gaps at eaves so soffit airflow isn’t blocked. Check the underside of the roof deck, rafters, and any penetrations within that bay for dampness, dark staining, or corrosion. Photograph findings, then re-lay insulation to maintain thermal continuity and clear airflow paths.
Map Drips Along Joists
A quick drip-map along the joists helps you tie the ceiling stain to the true leak point in the loft, since water can travel laterally before it drops. Start at the stain’s centerline, measure to two fixed walls, then transfer those dimensions into the loft to locate the corresponding bay. With a headlamp, inspect the underside of the roof deck and the tops of joists for dark tracks, rusted nail points, or compressed Roof insulation. Mark each wet point with tape and note its distance along the joist; the highest, freshest wetting usually sits up-slope of the stain. Don’t block attic ventilation paths while moving insulation, and don’t step on plasterboard—use joist walk boards and gloves.
Trace Water Paths on Rafters and Felt
When you spot damp insulation or staining, follow the water’s “travel line” across the rafters and underfelt to narrow down the entry point. Track water flow by looking for darker grain, tide marks, or shiny residues that run downslope, then note where the line stops or splits at nail lines, laps, or penetrations.
Work methodically: inspect each rafter bay from ridge to eaves, and check underfelt for pinholes, torn laps, or failed tape at overlaps. Use a torch at a low angle to highlight moisture pathways and surface texture changes. Keep three points of contact, don’t step on plasterboard, and avoid disturbing electrical cables. Photograph each marker and measure its distance from gable or chimney to pinpoint the likely defect location.
Insulation Clues: Damp, Crushed, or Mouldy Patches
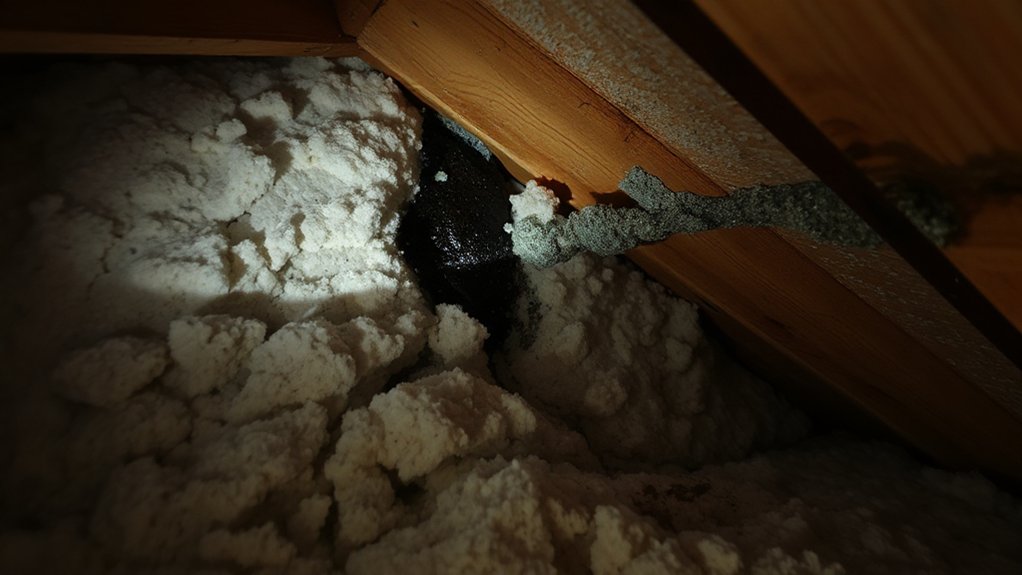
Although insulation often hides the defect, it records the leak’s footprint: look for patches that feel damp or cold, appear flattened or crusted, or show mould speckling, and treat each as a marker rather than “just condensation.” During Insulation inspection, wear gloves, a P2/P3 respirator, and eye protection; disturbed fibres and mould spores are irritants. Work from the loft hatch on boards or joists only—don’t step between them. For Damp patch identification, gently lift batts in small sections and check the underside and the ceiling lining for moisture, tide marks, or softened plasterboard. Bag any mouldy insulation, don’t dry it in place, and keep insulation clear of recessed lights and cables per manufacturer and electrical safety guidance.
Rusty Nail Tips: Tiny “Leak Pins” to Follow
In the loft, you’ll often spot rusty nail tips with faint rust-shadow trails on the timber, which can map the water’s path. You should trace each nail tip drip upward along rafters and sheathing seams while keeping clear of live wiring and maintaining stable footing on joists only. Then you can confirm the nearby entry point by checking the roof deck around that line for staining, softened wood, or fastener penetrations consistent with the leak path.
Spot Rust-Shadow Trails
Because water carries dissolved iron and tannins as it migrates, rusty nail tips often leave thin brown “shadow” streaks that point back toward the leak path. In your loft, scan rafters and nail lines with a high-lumen flashlight held at a low angle; raking light makes rust shadows and stain trails stand out on pale timber and sheathing. Follow each streak upslope and upwind, marking direction with painter’s tape so you don’t lose the pattern. Keep your inspection code-compliant: don’t disturb insulation near recessed luminaires unless they’re IC-rated, and don’t move wiring outside approved supports. Wear nitrile gloves and a P2/95 respirator; rust-laden dust and mold can co-occur. Document locations for targeted roof-side checks later.
Trace Nail Tip Drips
Rust-shadow trails show you the direction of travel; nail-tip drips can pinpoint the exact entry point. In the loft, scan the underside of the roof deck for fastener points that look darker, rusty, or damp. A single Nail tip may act like a “leak pin,” collecting condensate or rainwater and releasing it as a repeatable drip pattern.
Work safely: wear eye protection, gloves, and a P2 respirator if insulation dust is present. Keep your footing on joists or a rated crawl board, and don’t compress insulation against recessed lights or wiring. Use a headlamp at a low angle to make beads glint. Mark each active Nail tip with tape, then note spacing and alignment to map the flow path.
Confirm Nearby Entry Points
Once you’ve marked a dripping fastener, confirm the nearby entry point by inspecting the surrounding nail tips and deck seams for matching corrosion, damp halos, or fresh staining that radiates upslope. Follow the rust trail to the highest wet point; that’s typically where water first hit the sheathing. Check for gaps at panel joints, missed underlayment laps, or shiner nails that can wick moisture.
Stay on framing, keep three-point contact, and wear eye and respirator protection when disturbing insulation. Don’t cut or probe wiring; maintain required clearances around recessed fixtures and chimney chases per code. If staining trends toward Roof vents, inspect vent flashings, fastener patterns, and sealant failures above. Mark suspected entry points with tape for topside verification and repair.
Flashing Basics You Can Spot From the Loft
Even if you can’t see the roof surface from inside the loft, you can still spot flashing-related leaks by inspecting the roof-plane penetrations and junction lines for water staining, darkened sheathing, damp insulation, or corroded fasteners. Focus on plumbing vents, chimneys, skylight curbs, and sidewall intersections; these details rely on correctly lapped Roof flashing and a continuous water-shedding path. Look for drip tracks starting at nail points, split underlayment at penetrations, or rust lines beneath metal edges, which can indicate improper overlap or missing counterflashing. Check for dampness around penetrations after wind-driven rain, not just condensation. Maintain safe access: walk on joists, wear a respirator, and don’t disturb Loft ventilation baffles or blocking, which must remain clear to meet airflow requirements.
Valleys: Where Roof Leaks Love to Hide
Roof penetrations aren’t the only leak triggers you can diagnose from inside the loft—roof valleys also concentrate runoff and expose any defect in the water-shedding layers. From below, trace the Roof valley line by following the deepest staining on rafters and the valley board; moisture often appears downslope from the breach due to capillary travel. Check for darkened sheathing seams, swollen OSB, rusty nail tips, and insulation clumping at Valley intersections. Hidden valleys behind dormer tie-ins can trap debris, forcing water sideways under underlayment. You can confirm Valley leaks by using a moisture meter, then marking locations for exterior repair. Stay code-aware: don’t disturb insulation baffles or vapor control layers, and keep safe footing. Wear PPE and avoid live wiring.
Chimney Area: Common Roof Leak Entry Points
In your loft, you’ll often trace roof leaks back to the chimney where step flashing, counterflashing, or sealant laps fail and let wind-driven rain track down the sheathing. You should also check for a cracked chimney crown or deteriorated crown mortar, since it can shed water into the masonry and behind the flashing. Use proper fall protection and avoid disturbing masonry or flashing assemblies unless you can restore them to code-compliant, watertight condition.
Flashing Failures Around Chimneys
Because a chimney breaks the continuity of the roof covering, failed flashing at this penetration often becomes your most likely leak entry point. In the loft, trace damp staining uphill to the chimney line, then check for daylight where step flashing should overlap each shingle course. If you’ve got a Roof valley terminating near the chimney, expect higher water volume and faster failure.
From the exterior, work from a secured ladder and use fall protection. Confirm counterflashing is embedded in reglet cuts and laps at least 2 inches over base flashing, with joints sealed, not face-caulked. Look for loose nails, corrosion, and gaps at saddle/cricket transitions. Verify kick-out diverters where roof-to-wall meets. Replace damaged metal; don’t rely on patch tar.
Cracked Chimney Crown Mortar
Although the flashing might check out, a cracked chimney crown (the sloped mortar cap on top of the stack) can still funnel rainwater into the masonry and down into your loft. In the loft, look for damp staining on rafters nearest the chimney chase, efflorescence on brick, and wet insulation after wind-driven rain. From ground level, use binoculars to spot crown cracks, spalling, or gaps at the flue tile; Mortar deterioration often starts at the crown edge. Don’t climb without fall protection and stable access; follow local codes for roof work and clearances. For Chimney repair, you’ll typically need a properly sloped, reinforced crown with a drip edge and sealed flue interface, not surface caulk. Call a qualified mason.
Skylights: Check Corners, Seals, and Staining
When you’re tracking a loft leak, treat skylights as high-risk penetrations and start with a close visual inspection at the inside corners, frame joints, and glazing seals. Look for dark staining, swollen drywall returns, rusted fasteners, and damp insulation directly downslope of the opening, then trace moisture trails back to the curb. Follow safe access practices and don’t disturb wiring or fragile glazing.
For code-compliant Skylight maintenance, confirm the curb is sound and that interior finishes aren’t trapping moisture against wood. Perform a careful sealant inspection: check for brittle, separated, or missing sealant at glazing stops and frame intersections. Use a moisture meter to verify suspected areas, and document findings before any repair or temporary tarp work.
Vents & Pipe Boots: Common Leak Points
If you’re chasing a hidden loft leak, prioritize every roof penetration—especially plumbing vent stacks, exhaust vents, and their pipe boots—since small flashing failures can route water straight onto the underlayment and rafters. From inside, trace staining or rusty nail heads uphill from each penetration and check for wet insulation around the stack. During Vents inspection, confirm the vent pipe is centered, the flashing sits flat, and the shingle courses lap correctly over the upper flange (per typical manufacturer details). Look for cracked neoprene collars, UV-split rubber, or gaps where sealant was used as a substitute for proper flashing. Replace any failed Pipe boot rather than caulk it. Work from a stable ladder, use fall protection, and avoid stepping on brittle sheathing.
Eaves and Gutters: Leaks That Track Inward
Because water can wick along the underside of roof decking, a failure at the eaves or gutters often shows up deeper in the loft than the actual entry point. Start your eaves inspection at the lowest rafters and look for darkened sheathing, swollen fascia, rusty nail tips, and wet insulation trails that run upslope.
Outside, confirm gutter maintenance is current: clear debris, verify downspouts flow freely, and check for back-pitch, loose hangers, and separated joints. Guarantee drip edge metal laps correctly into the gutter and that the underlayment or ice-barrier (where required) isn’t torn at the edge. Don’t step on unsupported soffits; use a rated ladder, maintain three points of contact, and keep clear of electrical cables in the loft.
Gable Ends: Wind-Driven Rain Telltales
Although gable ends sit away from the main drainage path, wind-driven rain can force water past gable trim, rake flashing, and siding joints, then deposit it along the verge rafters inside the loft. Start your inspection at the gable peak and work down the rake, using a headlamp and stable walkway boards; don’t step on drywall or insulation. Look for darkened sheathing, rusty nail shanks, raised grain on rafters, and water tracks that run parallel to the rake, not downhill from the ridge. Check for daylight at trim returns, split caulk lines, and missing kick-out flashing where roof meets wall. Verify vents have baffles and intact screens so wind driven spray can’t jet inward.
Confirm Dampness With a Moisture Meter
Visual clues along the gable rake can point you to a suspect area, but a moisture meter confirms whether the staining is active moisture or old, dried-in wetting. Use a pin-type meter for timber and a scan mode for sheathing so you don’t puncture membranes. Wear gloves and a P2/95 respirator if insulation looks disturbed, and keep your footing on joists, not plasterboard. Zero the meter on known-dry wood, then take readings in a grid around the stain. Compare Moisture levels to adjacent framing; elevated readings that taper away are strong Leak indicators. Treat sustained readings above 20% in structural wood as a risk for decay, and investigate nearby penetrations and flashing paths safely.
What to Photograph and Write Down for a Roofer
Once you’ve confirmed active moisture, document the loft in a way a roofer can verify code-compliant repair details without guesswork. Photograph the leak path: wet rafters, nail points, sheathing staining, and any daylight at penetrations. Take wide shots showing location relative to ridge, valleys, chimneys, vents, and eaves, then close-ups with a ruler for scale. Capture Roof insulation condition (compressed, missing, wet) and any vapor retarder tears. Record attic ventilation details: soffit baffles, ridge/roof vents, blocked intakes, and fan terminations. Write down the date, recent weather, wind direction, moisture-meter readings, and exact distance from hatch or gable end. Note electrical fixtures, junction boxes, or recessed lights near damp areas for safety planning.
When to Stop DIY and Call a Pro
Good photos and notes give a roofer a clear repair target, but you shouldn’t keep troubleshooting if conditions in the loft create a safety or code-risk situation. Stop immediately if you see active sparking, wet wiring, a sagging ridge, cracked rafters, or widespread mold. If you suspect asbestos insulation, vermiculite, or lead dust, don’t disturb materials—call a licensed contractor. You should also stop if you can’t maintain safe footing, adequate lighting, or compliant access. If your Roof insulation is saturated, compacted, or blocking soffit paths, you risk rot and code violations, and you can’t fix it with tape. A pro can verify flashing, underlayment, and attic ventilation, and perform moisture mapping and targeted opening-ups.
Frequently Asked Questions
Can a Roof Leak Cause Electrical Hazards in Loft Wiring?
Yes, a roof leak can create electrical hazards in loft wiring. You’ll risk short circuits, arcing, and corrosion as Moisture damage wets junctions and cables, saturates Roof insulation, and defeats grounding. Shut power, then inspect.
Will Home Insurance Cover Damage Found From a Hidden Loft Leak?
Yes, your policy may cover it, but only if Insurance coverage includes sudden water events and you report promptly. Like a silent rusting wire, hidden damage spreads; document, mitigate, follow code, guarantee safe electrical shutdown.
How Do I Temporarily Patch a Leak Until Repairs Are Scheduled?
You can do temporary patching by placing an EPDM tarp over the entry point, securing with battens/screws into framing, and sealing edges with butyl tape. Improve leak prevention by diverting runoff, and isolate circuits.
Could Pests or Birds Be Causing Water Entry Into the Loft?
Yes, pests or birds can cause loft water entry by dislodging flashing or blocking drainage. Check for Bird nests and Pest droppings near vents. Seal openings per code, wear PPE, and schedule licensed repairs.
How Much Does a Professional Roof Leak Inspection Typically Cost?
You’ll typically pay $150–$500 for a professional Roof inspection with basic Leak detection; complex tracing or infrared can run $600–$1,200. You’ll get code-compliant documentation, safe access setup, and moisture-mapping.
Conclusion
You’ve tracked the leak like a detective in a dark crawlspace: you ruled out condensation, worked safely on stable boards, and followed stains back to their source. Now lock in your findings—meter readings, dates, weather, and clear photos—so a roofer can repair to code and maintain the roof’s weatherproofing. If you spot active dripping, widespread mold, sagging plaster, or electrical hazards, stop immediately and call a qualified pro.
About the Author



