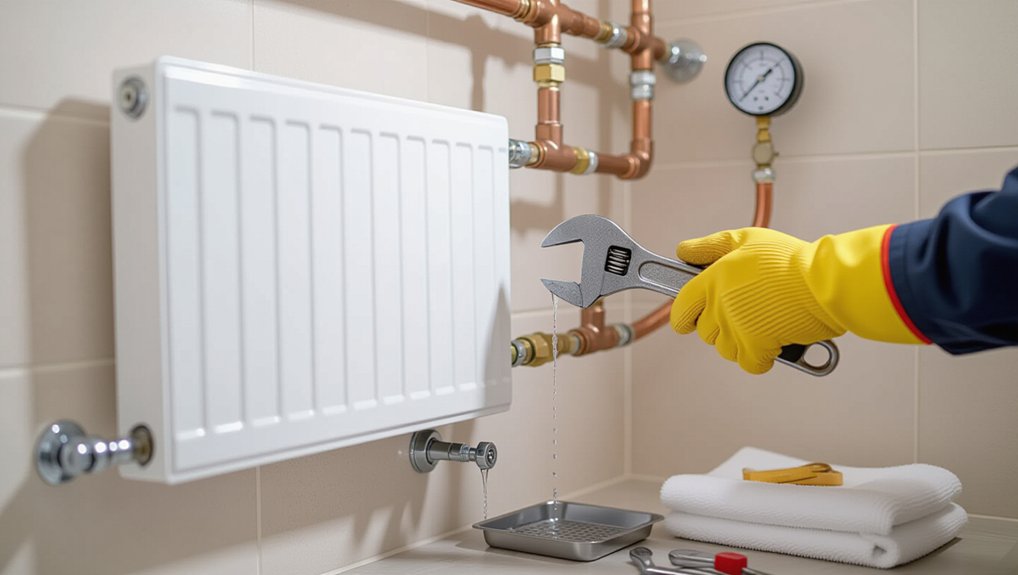
Start by checking boiler pressure cold, then after a heat cycle; a repeatable drop points to an internal leak or venting issue. Dry valve bodies, bleed screw, and unions, run heat for 10 minutes, and use tissue to spot damp rings or tan mist residue. If the radiator’s top stays cold, bleed air with heating off and top up pressure. If the bottom’s cold, flush sludge or powerflush. Next, balance lockshields for even flow—you’ll find the full step-by-step sequence next.
Key Takeaways
- Check boiler pressure cold and after heating; a repeatable drop suggests an internal leak or venting issue.
- Inspect for micro-leaks: rusty seams, swollen paint, tan residue on tissue, or brief hissing when hot.
- Diagnose cold spots by touch: cold top/middle indicates air; cold bottom indicates sludge restricting circulation.
- Bleed radiators when cool, then top up system pressure to spec; low pressure can draw in air and worsen cold sections.
- If sludge is confirmed, flush the radiator or powerflush the system, then add inhibitor and fit a magnetic filter to prevent recurrence.
Leak or Cold Spot? Start With Quick Checks
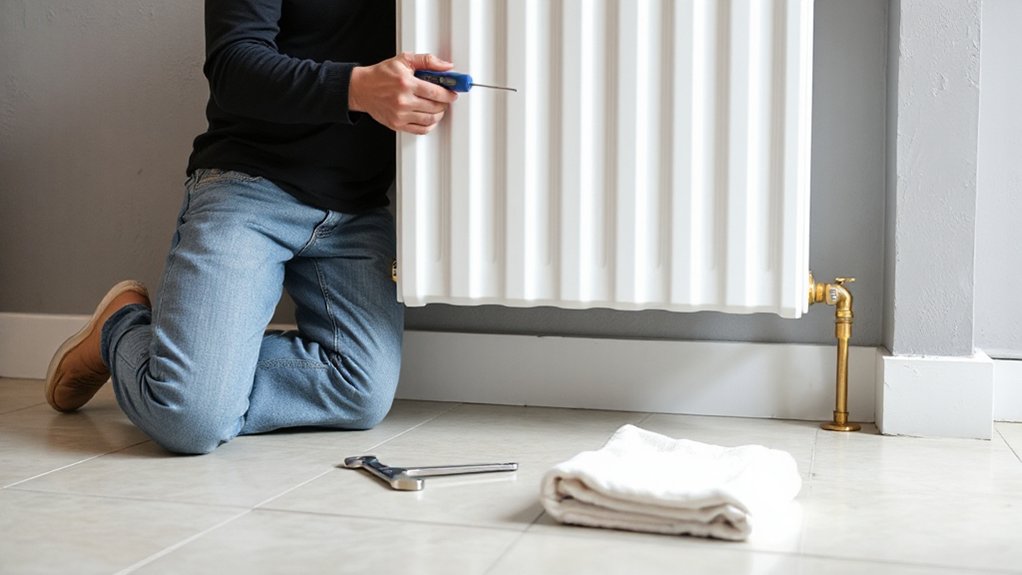
Before you assume you’ve got a major radiator fault, run a few fast checks to separate a true leak from a heating imbalance. Dry the valve bodies, bleed screw, and union nuts with a towel, then wrap each joint in tissue and recheck after 10 minutes of heat; damp tissue points to an external seep. Confirm Thermostat settings: set the room stat above ambient, open the TRV fully, and verify the boiler fires. Feel the radiator top-to-bottom; if the top warms and the bottom stays cool, you’re likely seeing flow restriction. Check the lockshield valve position and note if it’s nearly closed. Inspect Radiator paint for blistering caused by trapped air or uneven heating, not necessarily leakage. Bleed briefly, then reassess temperature spread.
Signs of an Internal Radiator Leak (and What They Mean)
Where does the water go when you can’t find any damp joints or drips? Assume it’s escaping inside the radiator body or into the system and verify by measuring. Check boiler pressure cold, then again after a full heat cycle; a repeatable drop points to an internal leak or active venting. Look for rusty staining at panel seams, swollen paint, or pinhole “weeping” that evaporates—often masked after Radiator painting. Use tissue to sweep along the bottom edge and behind convection fins; fine mist leaves a tan residue. Listen for hissing when hot, then silence as it cools, indicating micro-leaks. Confirm heat output: poor output with stable flow suggests sludge, but pressure loss plus uneven heating suggests leakage. Recheck Thermostat calibration to rule out short cycling.
Check for Leaks at Radiator Valves and Joints
Start by inspecting the valve stem seals for dampness or mineral staining, since even a slow seep can trigger pressure loss and cold spots. Next, check each union joint and tighten the union nut in small increments while holding the valve body steady to avoid twisting the pipework. Finish by scanning for corrosion, fresh drips, or rust tracks around the valve, tailpiece, and adjacent fittings to pinpoint the leak source.
Inspect Valve Stem Seals
Even if the radiator body looks dry, the valve stem seal and threaded joints can weep slowly and still trigger cold spots from pressure loss. Start your valve inspection with a dry tissue around the stem, packing nut, and cap. Look for staining, green crust, or a damp ring after a heat cycle. Slide a small mirror behind the valve and check the underside for beads. If you suspect seepage, shut the system off, let it cool, then crack the cap and inspect the stem for scoring or wobble. A loose, hardened, or split stem O-ring/packing needs seal replacement. Refit the cap, reopen the valve, and recheck for moisture after repressurizing. Repeat at both valves.
Tighten Union Joint Nuts
Once the stem seals check out, move to the union joint nuts at each radiator valve, since a slight looseness here can weep under pressure and pull heat out of the affected section. You’ll verify by drying the area, running the system to operating temperature, and watching for a fresh moisture line at the Union joints. Hold the valve body with a backup wrench so you don’t twist the piping. Then do Tightening nuts in small increments: turn the union nut 1/8 to 1/4 turn clockwise, stop, and recheck. If the joint squeals or binds, back off and realign the mating faces before retightening. Don’t overtighten; you’ll crush the sealing surface and worsen leakage. Recheck after a full heat cycle.
Spot Corrosion And Drips
After you’ve confirmed the union nuts aren’t the source, inspect each radiator valve and joint for spot corrosion and active drips that can track along the piping and mimic a leak elsewhere. Wipe the valve body, stem packing, and threaded adapter dry, then watch for re-wetting within 5–10 minutes. Look for Paint peeling, green/white mineral crust, or rust pinholes around the gland nut, bonnet, and elbow. Run a tissue under the joint; capillary wetting shows even tiny seepage. Check where Pipe insulation meets the pipe: trapped moisture can accelerate corrosion and hide drips. If you find seepage, snug the packing nut 1/8 turn, retest, and stop if resistance spikes. Replace washers or repack if it persists.
Fix a Leaking Radiator Valve Without Draining
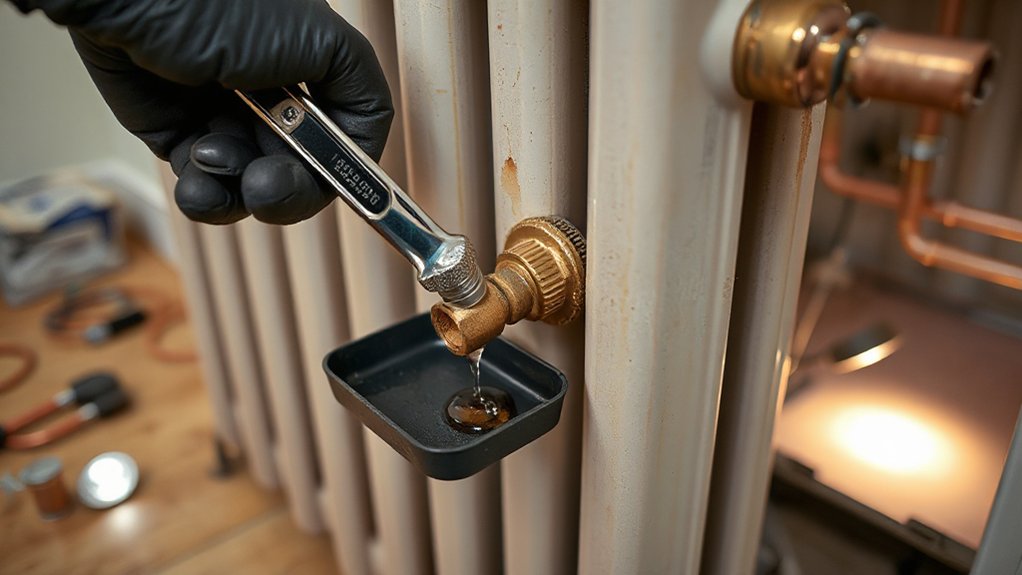
Start by pinpointing the leak source at the valve—check whether moisture is weeping from the spindle/gland nut rather than the union or valve body. If it’s the gland, hold the valve body steady and tighten the gland nut in small increments until the seep stops, without crushing the packing. If tightening won’t seal it, back the nut off slightly and repack the gland, then retighten to restore a dry seal without draining the system.
Diagnose Valve Leak Source
Even if the puddle seems to be coming from the valve body, you’ll get a faster, drain-free fix by pinpointing the exact leak point before you touch a spanner. Dry the valve, tail, and pipe with tissue, then wrap each joint with fresh paper. Reopen the system and watch for the first damp ring. Check the union nut-to-tail joint, the valve body casting, the spindle area, and the compression nut on the pipe. A drip at the union usually tracks along the nut; a compression leak beads at the olive line; a spindle leak wets above the bonnet. Add a mirror and torch to inspect underneath, protecting radiator aesthetics. Confirm flow temperature stays stable for energy efficiency.
Seal The Valve Gland
If the damp ring appears above the bonnet or around the spindle, the valve’s gland packing has loosened and you can usually stop the leak without draining anything. Dry the area, then confirm the seepage returns from the spindle, not the union nut or body casting. Hold the valve body with a second spanner so you don’t stress the pipework. Turn the gland nut (packing nut) clockwise 1/8–1/4 turn, then wipe and watch for 2–3 minutes with the system hot. Don’t overtighten; you’ll bind the spindle and damage the packing. If it still weeps, back the nut off, wrap graphite valve packing cord under the nut, and retighten for reliable gland sealing. Recheck after cooling as part of valve maintenance.
Radiator Cold at Top or Middle: Trapped Air Signs
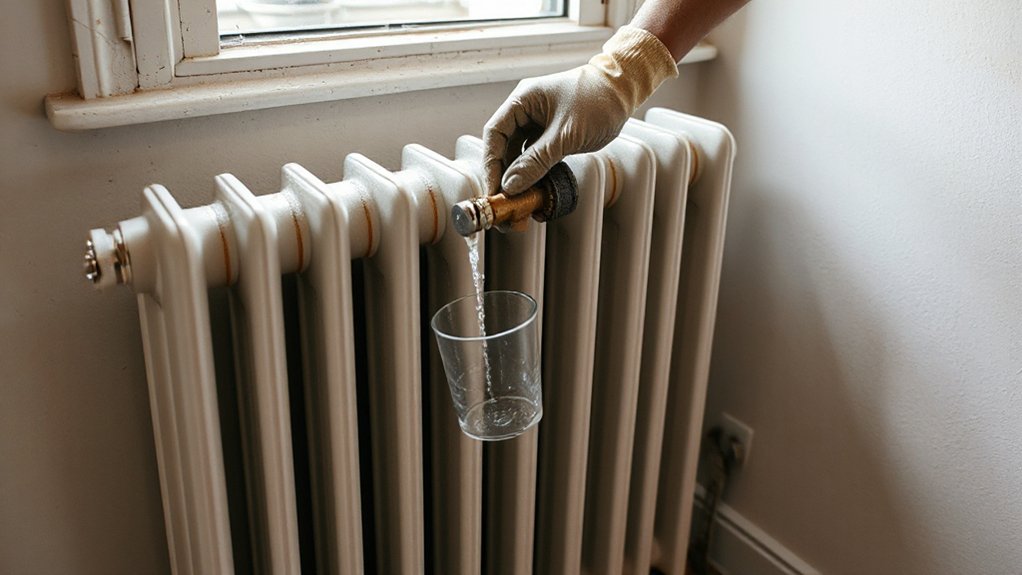
When air gets trapped inside a hot-water radiator, it blocks circulation and you’ll see a distinct temperature pattern: the top or a band through the middle stays cold while the rest warms up. Confirm it by running the system to steady state, then feel the radiator from bottom to top; you’re looking for a sharp temperature shift rather than a gradual gradient. Check pressure at the boiler gauge, because low fill pressure can pull air into high points and mimic poor heat output. Verify thermostatic valves aren’t stuck shut or mis-set; a closed head can create a cold upper section by restricting flow. Inspect Radiator insulation and nearby drafts, which can falsely suggest a “cold” zone by stripping surface heat. Listen for gurgling or ticking as air shifts.
Bleed a Radiator Safely (Step by Step)
Before you bleed the radiator, you’ll gather a radiator key (or flat screwdriver), a cloth, and a tray, then turn the heating off and let the system cool to reduce pressure and scald risk. You’ll locate the bleed valve at the radiator’s top corner, seat the key firmly, and open it slowly counterclockwise until trapped air hisses out. Once water flows in a steady stream, you’ll close the valve snugly, wipe any drips, and recheck system pressure if your boiler has a gauge.
Gather Tools And Prep
Although bleeding a radiator is a quick job, you’ll get safer, cleaner results by staging the right tools and isolating the system first: a radiator key (or flat screwdriver for slotted vents), a small bowl or bleed bottle, absorbent towels, and gloves, plus a torch to spot the bleed valve and any staining. Turn the heating off and let the unit cool so pressure and scald risk drop. Note the system type (combi vs sealed) and find the filling loop or header tank so you can restore pressure afterward. Check the TRV and lockshield positions and record them for Thermostat calibration consistency after rebalancing. Protect walls and floors; fresh Radiator painting scratches easily. Inspect the valve gland, tail, and unions for weeping before you touch the vent.
Bleed Valve Procedure
How do you bleed a radiator without dropping system pressure or spraying dirty water? You control flow, capture discharge, and stop the moment air clears. Turn the heating off and let the radiator cool. Fully open thermostatic valves so trapped air migrates to the bleed point. Protect walls and any Radiator paint with a towel, then hold a cup under the bleed valve. Insert the bleed key and crack the valve a quarter-turn counterclockwise. Listen for hissing; that’s air escaping. Keep the valve barely open to prevent pressure collapse. When the stream turns steady (no sputter), close it firmly but don’t overtighten. Wipe the vent, check for seepage, then confirm system pressure at the boiler and top up only if needed.
Radiator Cold at Bottom: Sludge Buildup Signs
When a radiator stays warm at the top but turns noticeably cold at the bottom, you’re usually looking at restricted water circulation caused by sludge settling in the lower channels. Confirm it by feeling the temperature gradient across panels and checking that the bleed valve expelled air during your last purge. Verify Thermostat calibration so the boiler isn’t short-cycling and misreading demand. Inspect the lockshield and TRV: if the inlet gets hot but the outlet stays tepid, flow’s impaired inside the radiator. Look for discolored water at the bleed point, metallic grit on a magnet, and gurgling after heat-up. Don’t mistake thick Radiator paint or trapped dust for cold spots; paint insulates evenly, sludge creates a sharp boundary. Record findings for comparison later.
Flush a Radiator to Clear Sludge (DIY vs Pro)
If sludge buildup keeps the bottom of your radiator cold, flushing it restores flow by physically removing magnetite and debris from the water channels. First, verify symptoms: strong Temperature fluctuations across the panel and a heavy, dark drain sample from the bleed point or valve tail. For DIY, isolate the radiator, protect floors, then drain it fully and disconnect. Take it outside, run a hose through each port, and agitate until water runs clear; avoid harsh chemicals that can react with your Radiator material, especially aluminum. Refit with new valve washers, refill, and vent air. Choose a pro powerflush when multiple radiators show sludge, flow rates stay low, or you suspect internal corrosion; they’ll use a pump, filter, and inhibitor dosing.
Balance Radiators for Even Heat in Every Room
Although your boiler might run perfectly, unbalanced radiators still leave some rooms roasting while others stay lukewarm because water takes the path of least resistance through the nearest circuits. Diagnose imbalance by timing warm-up: start from cold, turn heating on, and note which radiators heat first and fastest.
To balance, open all TRVs fully, then fully open every lockshield valve. Let the system reach steady temperature, then start with the closest radiator to the boiler: close its lockshield, then reopen 1/4 turn. Measure the flow/return temperature drop; target roughly 10–12°C. Move outward, repeating, making later radiators progressively more open. Keep covers off during testing; radiator aesthetics can hide trapped convection. Confirm thermal insulation isn’t blocking airflow around valves and pipework.
Fix Pinhole Radiator Leaks: Sealant vs Repair
Balanced flow won’t help much if a radiator’s losing water through a pinhole leak, so switch from temperature diagnostics to a quick integrity check: dry the suspect area, run the system up to pressure, and watch for fresh beads, staining, or a fine mist at welds, seams, or around the valve tail. If it’s weeping slowly and you need a temporary fix, dose a compatible internal sealant, then re-pressurize and confirm the leak rate drops; note it can mask faults and may clog microbore sections. For a durable remedy, isolate, drain below the radiator, remove it, and braze/solder or replace the panel. After refit, bleed, top up, verify Thermostat calibration, and confirm Pipe insulation hasn’t trapped moisture near joints.
Stop Radiator Corrosion With Inhibitor and Maintenance
Once you’ve ruled out active leaks, stop future pinholes and cold spots by treating corrosion at the system level: test the heating water for inhibitor strength (and pH, where possible), then dose the correct volume of manufacturer-approved inhibitor to match your total system capacity. Bleed radiators to purge oxygen, top up, and recheck concentration after circulation. If sludge is suspected, isolate, powerflush, and refill with treated water; log dates and test results. Inspect valves and vents for weeping that introduces air. Keep system pressure within spec and avoid frequent drain-downs. Touch up bare metal with Radiator paint to limit surface rust, but don’t paint over active corrosion. After any insulation upgrade, rebalance flow and verify return temperatures to prevent low-flow cold zones.
When to Replace the Radiator (Cost and Safety Cues)
If a radiator keeps leaking, developing expanding cold spots, or throwing off rust-colored bleed water despite correct inhibitor levels and balanced flow, you’re likely past economical repair and into replacement territory. Confirm by pressure-testing the system to working pressure; if the radiator weeps at seams, valve tails, or pinholes, replacement beats repeated callouts.
Replace immediately if you see bulging panels, soft spots, or ongoing vent spitting—these are rupture cues. Compare costs: if flushing, powerflushing, new valves, and labor exceed ~50–60% of a new radiator fitted, stop spending. Don’t mask faults with Radiator paint; repaint only after a dry, stable test. After fitting, use insulation techniques on nearby pipework, rebalance, dose inhibitor, and re-bleed.
Frequently Asked Questions
How Long Can I Run Heating With a Suspected Internal Radiator Leak?
You can run it only briefly—hours to a day—while you monitor pressure drop and isolate the radiator. Internal leaks accelerate radiator corrosion and system contamination, so shut down and repair if symptoms worsen.
Will an Internal Radiator Leak Increase My Boiler Pressure Unexpectedly?
Yes—it can, but only if you’re topping up; most boilers expect ~1–1.5 bar. Radiator corrosion can cause microleaks, so you add water, raising pressure. Verify Boiler efficiency, bleed, then monitor pressure drop.
Can Radiator Leaks or Cold Spots Indicate Problems With the Expansion Vessel?
Yes, you can see Expansion vessel issues through Radiator leak signs and cold spots. You’ll check system pressure cold/hot, watch rapid swings, test the Schrader valve, and confirm the vessel’s precharge and isolation.
Does Radiator Size or Type Affect How Often Cold Spots Return?
Yes—like sludge in an artery, it can. You’ll see cold spots recur if Radiator sizing mismatches flow or if Radiator materials trap debris. You should flush, balance valves, and dose inhibitor to stabilise heat.
Will Radiator Leak Sealant Damage Smart TRVS or Thermostatic Valves?
You can damage smart TRVs and thermostatic valves if sealant clogs fine passages; Sealant safety depends on particle size and dose. Verify Valve compatibility, isolate valves, dose upstream, run full flow, then flush filters.
Conclusion
You’ve tested the theory: leaks and cold spots usually share a single cause—pressure loss or blocked flow. Visualize the system as a loop: boiler → supply → radiator → return. A wet joint marks a breach; a cold top maps to trapped air; a cold middle points to sludge restricting the core. Tighten or reseal valves first, bleed next, then balance lockshields. If pinholes recur or metal flakes appear, replace the radiator.
About the Author