Start by confirming your attic can legally become a guest suite: you’ll need safe, code-compliant stairs, adequate headroom, and an engineer-verified structure, plus checks for moisture, pests, and old wiring. Plan the layout around full-height zones, keep the main walkway tall, and place any bath near existing plumbing. Add a proper egress window or dormer, then air-seal, insulate, and ventilate to prevent condensation and ice dams. Keep going to see smart storage and soundproofing moves.
Key Takeaways
- Confirm attic legality and structure: adequate headroom, engineered joist capacity, and safe permanent stairs instead of pull-down ladders.
- Plan layout around full-height zones: place the bed and main walkway where you can stand comfortably, using low areas for built-ins.
- Provide code-compliant egress and light: install an egress window or dormer, plus layered lighting with dimmers for comfort and safety.
- Build a moisture-safe roof system: air-seal thoroughly, insulate to code, and ensure proper ventilation or approved unvented assembly to prevent condensation.
- Improve comfort and privacy: use mineral wool, isolation clips, and 5/8-inch drywall, and choose efficient HVAC like a ductless mini-split.
Check If Your Attic Can Be a Guest Suite
Before you start designing finishes, verify that your attic can legally and safely function as a guest suite by checking four basics: access, headroom, structure, and life-safety. Confirm you’ve got a code-compliant stair or permanent access, not just a pull-down ladder, and that the path is clear and protected. Review framing: size, span, and condition of joists/rafters, then have an engineer verify load capacity before you install attic flooring. For life-safety, plan for emergency egress and interconnected smoke/CO alarms on required levels, plus safe electrical upgrades. Address Attic insulation next: you’ll need proper R-values, air sealing, and ventilation to prevent condensation and ice dams. Also check for pests, moisture stains, and knob-and-tube wiring before moving forward.
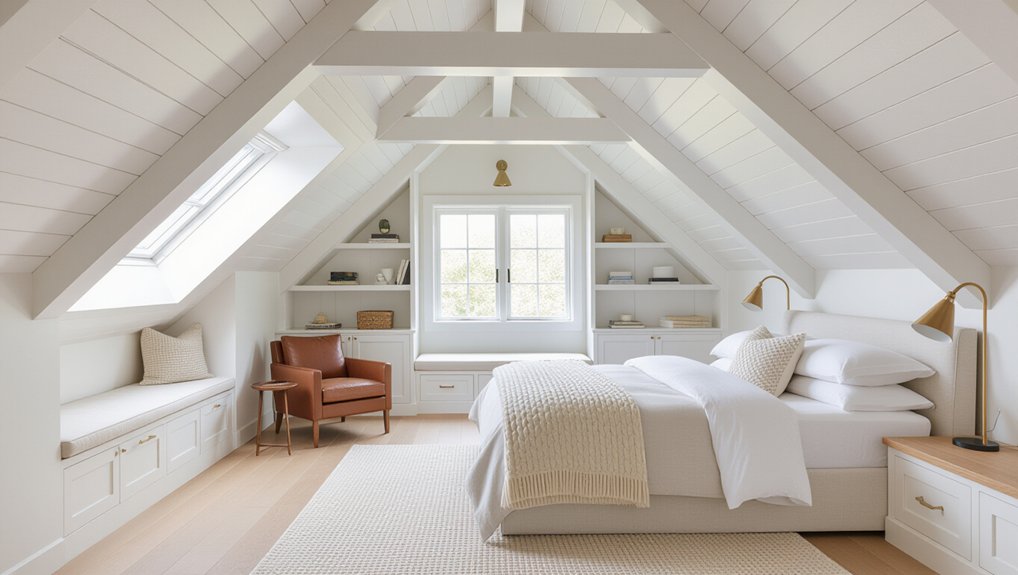
Plan Headroom Zones, Stairs, and Bath Placement
Once you’ve confirmed the attic can meet access, structural, and life-safety requirements, lay out the suite around the roof geometry: map full-height zones (and any areas that fall below the code minimum) and reserve the lowest slopes for storage or built-ins, not circulation. Use those headroom zones to position the bed where you can sit up, and keep the main path through the room in the tallest run. Plan stairs placement early: align the opening with existing framing bays, maintain required clear width, and protect required headroom along the full stair run and at landings. Place the bath where plumbing can stack over existing wet walls, and keep fixtures out of low-slope pinch points. Use a pocket door to save clearance, and reserve space for exhaust ducting.
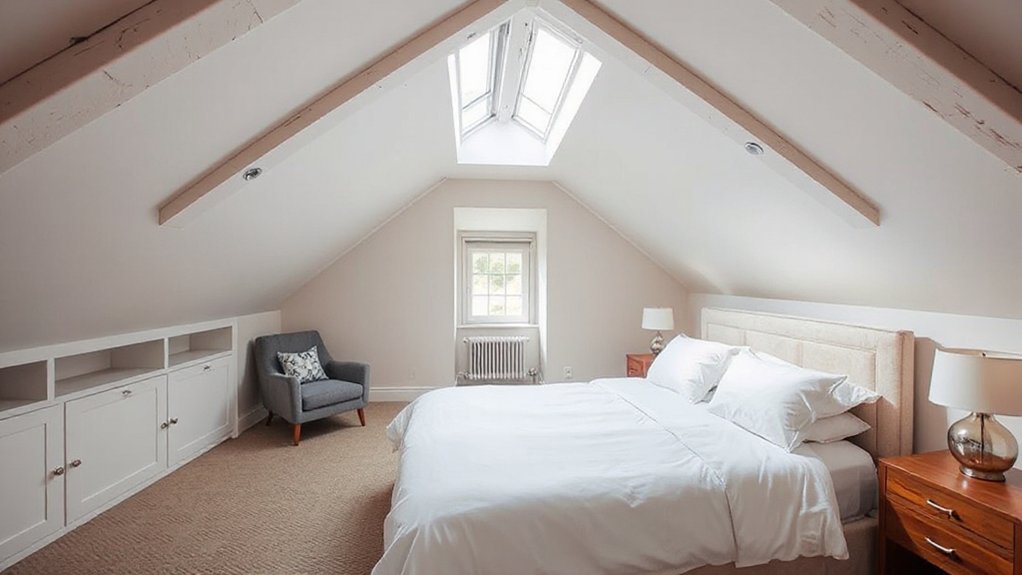
Add Egress Windows, Skylights, and Daylight
Because an attic suite often sits under tight roof planes, you’ll get the safest, most livable result by designing daylight and emergency escape together: add at least one code-compliant egress window (typically in the sleeping area) with the required clear opening size, minimum clear width/height, and maximum sill height above the finished floor, and provide a compliant window well if it’s a roof-to-grade condition.
Choose Window styles that fit rafters: dormers for full-height openings, roof windows for reachable sash, or egress-rated skylights where allowed by your jurisdiction. Verify tempered glazing where required (near floors, stairs, or tubs) and use proper flashing kits. Layer daylight with Lighting fixtures: recessed or surface-mount rated for sloped ceilings, plus task lights at the bed and vanity. Put fixtures on dimmers and add a night-path switch at the stair landing.
Insulate, Vent, and Heat/Cool the Attic Suite
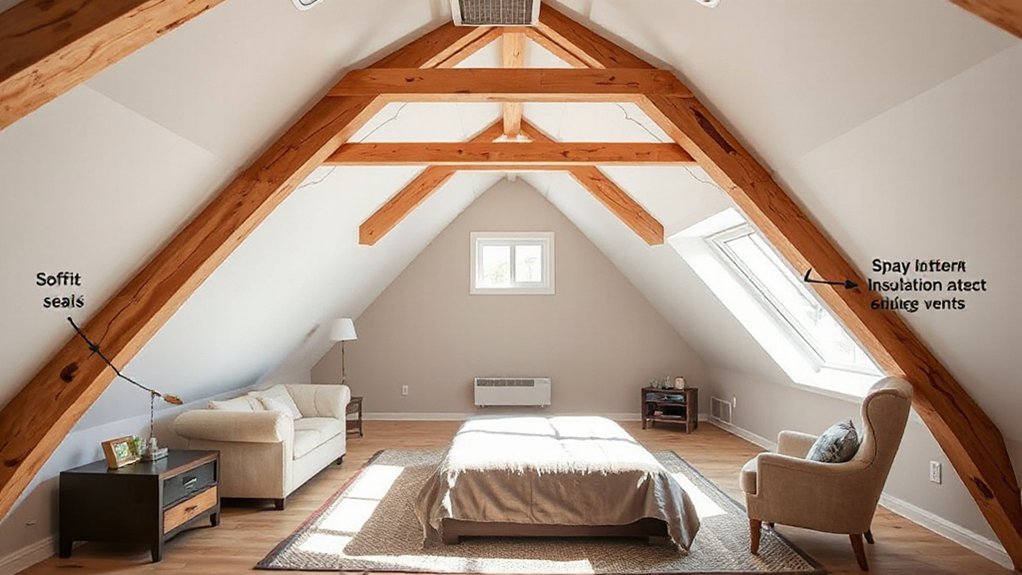
Daylight and egress openings change your roof assembly, so lock in your insulation, ventilation, and HVAC plan next to keep the suite comfortable and code-compliant year-round. Choose a vented or unvented roof per local code and manufacturer specs; don’t mix approaches. For vented roofs, maintain continuous soffit-to-ridge airflow with baffles and verify net free vent area for proper attic ventilation. Air-seal all penetrations first, then install insulation materials to the required R-value: spray foam or rigid foam for tight rafter bays, dense-pack cellulose or fiberglass where depth allows. Add an ignition/thermal barrier where required. For conditioning, size loads for the small volume; a ductless mini-split often fits. If you extend ducts, seal, insulate, and provide return-air pathways.
Soundproof the Attic Suite for Quiet Sleep
Even if you insulate the roof perfectly, sound will still travel through framing, gaps, and ductwork, so plan your sound control before you close up the attic suite. Start by sealing every penetration with fire-rated acoustical sealant, and keep required fireblocking intact. Add dense soundproofing materials: mineral-wool batts in rafter bays and a decoupled ceiling using resilient channel or sound-isolation clips. Hang 5/8-inch Type X drywall where code requires it, and consider two layers with damping compound for better STC. Treat floors too: screw the subfloor tight, add an underlayment rated for IIC, and use carpet or rugs. Finish with acoustic treatment like heavy curtains and a solid-core door with perimeter gaskets.
Turn Knee Walls Into Built-In Storage
Although knee walls can look like wasted “dead space,” you can turn them into code-compliant built-in storage by keeping insulation and air sealing continuous while adding access from the room side. For a knee wall conversion, frame a short “service chase” behind the wall: keep the thermal boundary on the sloped roofline with baffles, R-value to local code, and a sealed air barrier (taped sheathing or rigid foam). Seal top plates, electrical penetrations, and rim areas with foam or caulk, and maintain required ventilation paths to the ridge or roof vents.
Then choose built in storage options that don’t pierce that barrier: recessed cabinets on the room side, shallow drawers between studs, or hinged access panels with weatherstripping and latches. Use fire-rated drywall where required.
Frequently Asked Questions
How Much Does It Typically Cost to Convert an Attic Into a Guest Suite?
You’ll typically pay $30,000–$80,000 to convert an attic into a guest suite. Costs rise with code-required attic insulation, upgraded electrical wiring, plumbing, stairs/egress, HVAC, permits, and structural reinforcement for proper load capacity.
Do I Need a Permit or Inspections for an Attic Guest Suite Conversion?
Yes—you’ll likely need permits and inspections. You must meet Building codes and confirm zoning regulations for habitable space, stairs, egress, electrical, plumbing, and fire safety. Contact your local building department before starting.
How Long Does an Attic-To-Guest-Suite Renovation Usually Take From Start to Finish?
You’re looking at 6–12 weeks start to finish—though it can feel like forever. You’ll move faster once permits clear and rough inspections pass; attic insulation, ventilation improvements, and drywall finishing often set the schedule.
What Materials and Finishes Are Best for a Durable, Low-Maintenance Guest Suite?
Choose durable, washable finishes: semi-gloss paint, PVC trim, and solid-core doors. For Insulation options, install closed-cell spray foam or mineral wool with proper vapor control. Pick Flooring choices like LVP or porcelain tile over sound-rated underlayment.
Will Converting the Attic Into a Guest Suite Increase My Home’s Resale Value?
Yes, it can increase your resale value if you add permitted, code-compliant square footage. You’ll boost buyer appeal with proper attic insulation and roof ventilation, plus safe egress, HVAC, and documented workmanship.
Conclusion
Before you celebrate your new guest suite, test a common theory: “Any attic can become livable with insulation and drywall.” You’ll find it’s only true when code essentials line up—minimum headroom in key zones, safe stair geometry, permitted plumbing locations, and compliant egress. If you verify daylight, ventilation, and HVAC loads, you won’t create a hot box or a mold trap. Finish with real sound control and knee-wall storage, and guests will sleep well.