Confirm humidity first: log RH with a digital hygrometer; if it’s above ~55%, run exhaust fans or a dehumidifier for two days and retest. Find the rub point by closing the door slowly and using paper or painter’s tape to mark contact. Tighten hinge screws with a snug bit, then replace one jamb screw per hinge with a 3-inch #8/#9 into the stud. Shim hinges next, then sand/plane minimally and reseal. More fixes follow.
Key Takeaways
- Confirm humidity is causing swelling by logging RH with a hygrometer; doors often stick above 55% and improve after dehumidifying.
- Identify exact rub points using paper, painter’s tape, or burnish marks, then mark them before making any adjustments.
- Tighten hinges and replace loose jamb screws with 3-inch screws into studs to correct sagging and restore an even reveal.
- If binding persists, remove the door and sand or plane only the marked areas, then seal bare wood to reduce future swelling.
- Control indoor humidity to 35–50% with fans, HVAC dry mode, and a dehumidifier to prevent recurring seasonal sticking.
Confirm Humidity Is Causing the Sticking
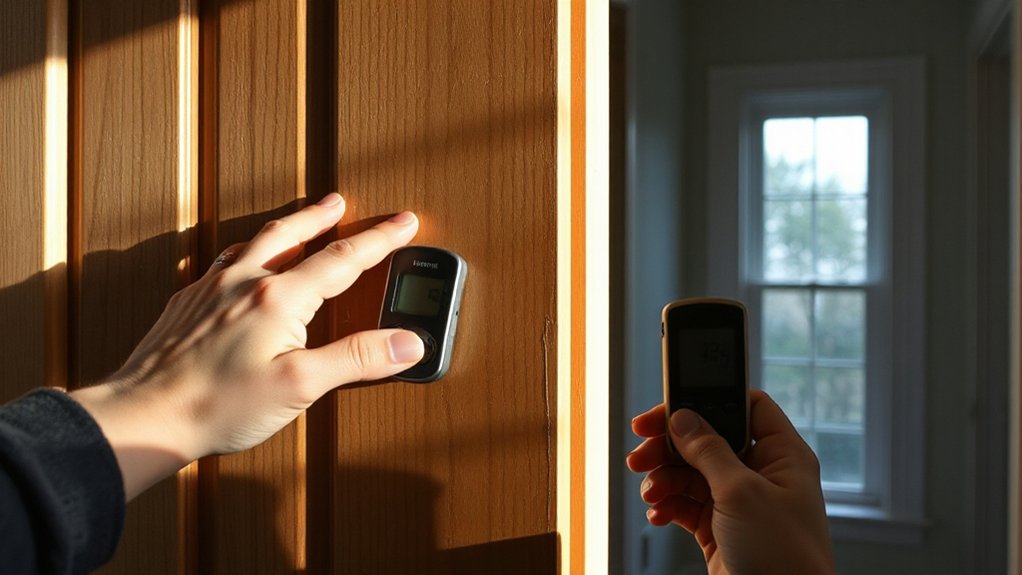
Before you plane or sand anything, verify that humidity—not a loose hinge or warped slab—is what’s making the door bind. Grab a digital hygrometer and log indoor humidity levels for 24 hours; anything consistently above ~55% can swell wood. Compare readings near the door to another room, and note spikes after showers, cooking, or rain. Next, check seasonal behavior: if it sticks only in humid months and frees up during dry spells, you’ve got a moisture-driven problem. Run a dehumidifier, turn on the HVAC fan, or use bath/kitchen exhaust for two days, then retest the door. If operation improves without hardware changes, prioritize moisture control before any trimming.
Find the Rub Point (Hinge Side, Latch Side, or Floor)
Once you’ve ruled out humidity and hardware issues, pinpoint exactly where the door’s rubbing so you only remove material where it’s needed. Close the door slowly and watch the gaps at the jamb and head. Slide a thin strip of paper around the perimeter; where it binds is your contact point. Mark those spots with painter’s tape or a pencil. For hinge-side rub, look for shiny burnish marks on the door edge and hinge knuckles; note any change in reveal that suggests hinge maintenance is due. For latch-side rub, check the strike-side jamb for scuffs and verify the latch clears the strike without dragging on door hardware. For floor rub, place a flashlight behind the door and spot where light disappears, then mark the threshold line.
Quick Fix: Tighten Loose Hinge Screws
With the rub point marked, start with the fastest fix: snug up the hinge screws so the door hangs square again. Grab a #2 Phillips or the correct bit for your door hardware, plus a flashlight. Open the door halfway and support it with a shim under the latch edge. Check each hinge leaf: if you see a gap between hinge and jamb or loose screw heads, tighten them in a crisscross pattern. Keep the driver straight so you don’t cam-out and chew the heads. Close the door and test the swing and latch. If the door still kisses the jamb, recheck for any screws that spin without tightening. Protect surrounding paint, then do quick paint touch up if the driver scuffed the jamb.
Replace a Hinge Screw With a Long Screw
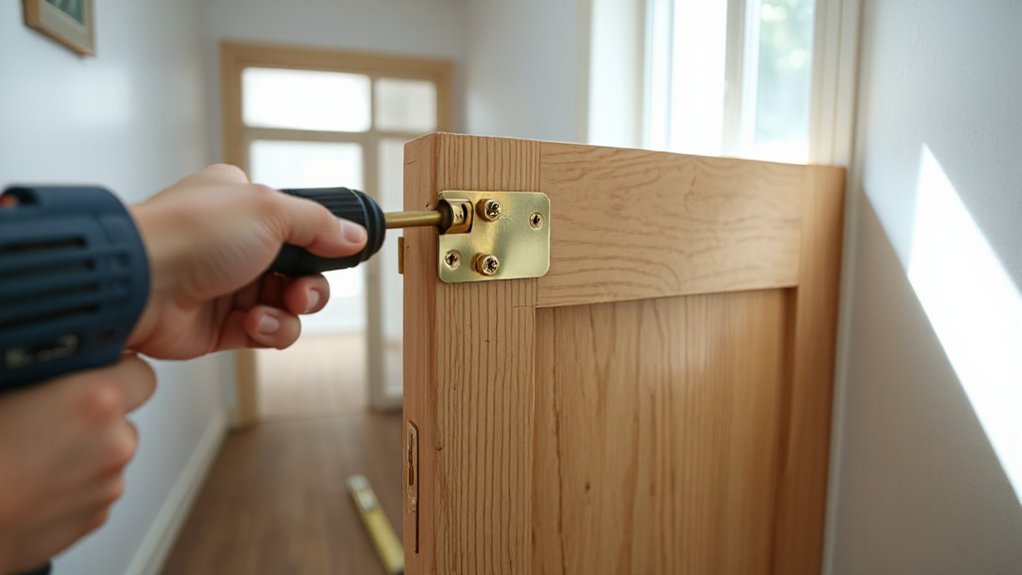
Grab a 3-inch wood screw that matches your hinge screw’s head style, and keep a drill/driver and bit ready. Back out one loose screw from the hinge leaf on the jamb side, and aim the replacement through the same hole. Drive the long screw straight until it cinches the hinge tight and bites into the wall stud behind the jamb.
Choose Correct Long Screw
If the door still rubs after minor hinge tweaks, you’ll get more pull by replacing one hinge screw with a longer one that bites into the wall stud. Choose a #8 or #9 wood screw, 3 in. long, with a bugle or flat head that matches your hinge countersink. Match the finish to your decorative hardware (brass, nickel, black) so the head disappears. For painted hinges, keep a screw that won’t chip interior paint; use a smooth, quality head and avoid oversized Phillips that cam-out. Grab a driver bit that fits tight, plus a tape measure and a straight pick. If the jamb is hardwood, predrill a 1/8-in. pilot to prevent splitting and stripped heads.
Target The Loose Hinge
Once you’ve confirmed the door still rubs, locate the hinge that’s actually shifting by watching the reveal as you lift the latch-side edge of the door a 1/8 in.; the hinge that shows movement or a widening gap at its knuckle is the loose one. Open the door, support it with a wedge, and back out one jamb-side screw from that hinge using a #2 Phillips or impact driver. Keep the other screws snug so the hinge stays aligned. Swap in your selected long screw and drive it until the hinge leaf seats flat without pulling the mortise out of square. Check swing and reveal. Add a drop of Hinge lubrication at the pin and work the door to distribute it. If the leaf is bent or cracked, plan Door hinge replacement instead.
Drive Screw Into Stud
Because the jamb trim and shims don’t offer much bite, replace one jamb-side hinge screw with a 3-in. #9 or #10 wood screw so it reaches the wall stud and pulls the hinge tight. Open the door, wedge it, and back out one top-hinge jamb screw. Probe the hole with an awl; if it’s stripped, pack it with a wood splint and glue, then re-drill a 1/8-in. pilot. Angle the bit slightly toward the stud, not the casing. Set the hinge leaf flat, then Drive screw slowly with a drill/driver on low clutch until the head seats without dimpling the hinge. Check reveal and swing. This Stud reinforcement often stops seasonal rubbing without planing. Repeat on the middle hinge if needed.
Shim a Hinge to Realign the Interior Door
When a sticking door rubs the jamb at the latch side or drags at one corner, you can realign it by shimming a hinge to shift the slab in the opening. Close the door, note where it binds, then pick the hinge to adjust: shim the top hinge to pull the latch side up, the bottom to push it down, or the middle for small corrections.
Support the door with a wedge. Remove one hinge leaf’s screws from the jamb with a screwdriver. Slip in a Hinge shim (cardstock, veneer, or purpose-made), matching the leaf outline; start with one layer. Reinstall screws, snug them, and check the swing. Add or trim shims until the reveal looks even. This Door realignment method stays reversible and clean.
Adjust the Strike Plate So the Latch Closes
Even after you’ve shimmed a hinge and the reveal looks right, the latch may still hit the strike plate and refuse to click shut. Mark where the latch rubs using a pencil or lipstick, then close the door gently to transfer the mark onto the strike plate area.
Remove the strike plate with a screwdriver. Loosen the two screws, then shift the strike plate slightly up, down, in, or out to match the mark and restore proper latch alignment. If the screw holes won’t let you move enough, plug the old holes with toothpicks and wood glue, trim flush, and re-drill small pilot holes. Reinstall the strike plate, snug the screws, and test the latch three times. You want a clean click without forcing the knob.
Sand or Plane a Sticking Interior Door Edge
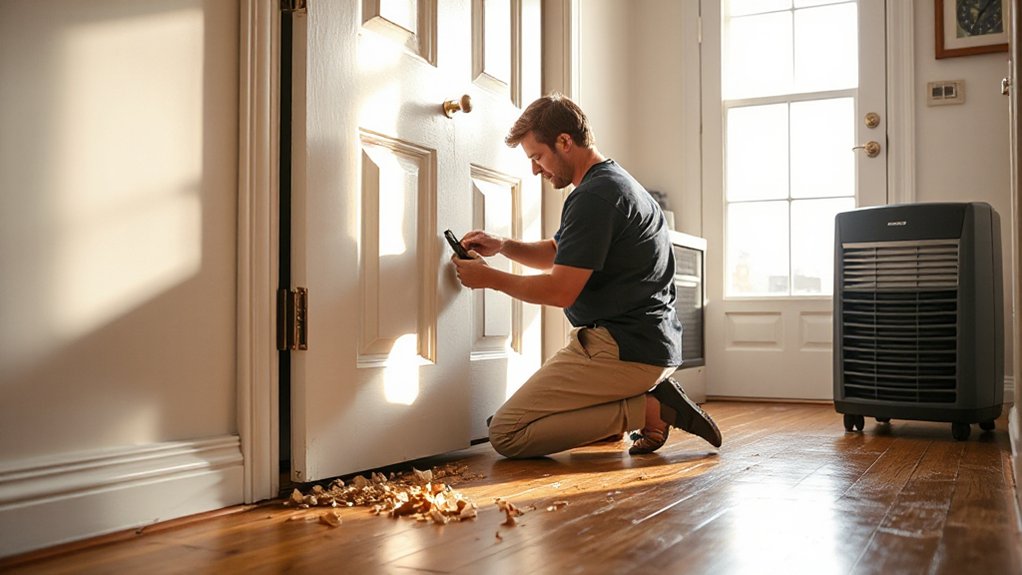
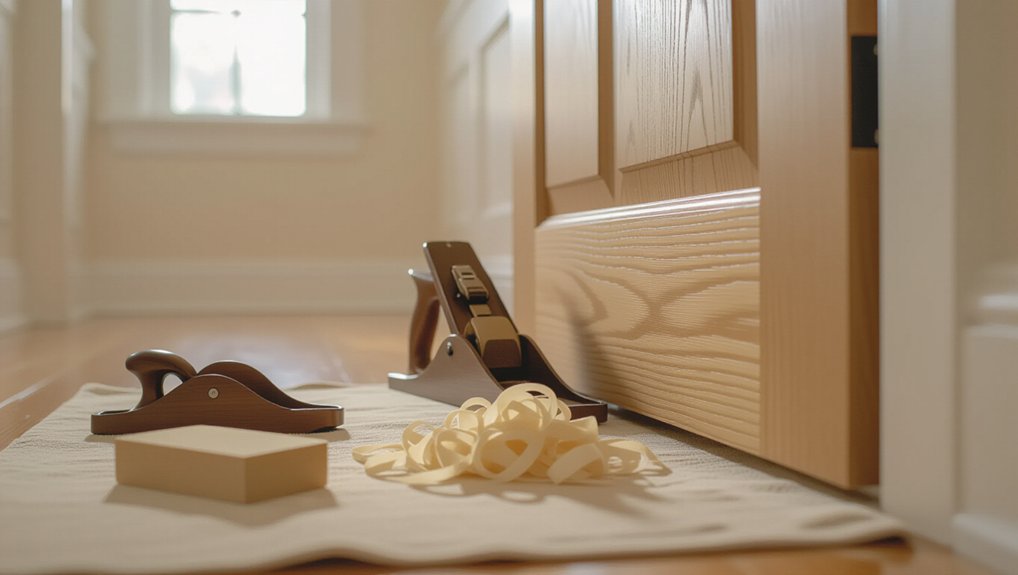
Close the door and mark the rub points with a pencil or masking tape, then open it and confirm the contact area. Pop the hinge pins, lift the door off, and clamp it securely on sawhorses. Use a block plane or sanding block to shave the sticking edge in light passes, test-fit often, and stop as soon as it swings freely.
Identify Rub Points
Before you sand or plane anything, pinpoint exactly where the door’s binding. Close the door slowly and watch the reveal line along the jamb. Mark tight spots with painter’s tape or a sharp pencil. Slide a thin card or feeler gauge around the perimeter; it’ll snag where contact occurs. Dust the edge lightly with chalk, then cycle the door once—chalk transfers to the rub point. Check both faces for scuffs that could damage Decorative finishes; use low-tack tape to avoid lifting paint. Confirm humidity swelling by testing clearance at the top rail and latch side. Note if the strike plate drags, but don’t adjust hardware yet. Record marks for later, plus Weatherproofing tips if drafts show.
Remove And Secure Door
Once you’ve marked the rub points, pull the hinge pins with a nail set and hammer, then lift the door off with a helper. Swing it clear of the jamb and carry it to a flat work surface. For clean door removal, keep the hinges oriented: tape each hinge leaf to the door edge, or bag the screws and label locations. Set the door on padded sawhorses or a bench, face up, and wedge it so it can’t rack. If you’ll remove hinges, back out screws with a driver bit that fits snugly to avoid stripping. For securing hinges during the next steps, reinstall screws in the hinge leaves or thread them into a scrap to keep threads protected and hardware together.
Sand Or Plane Edge
After you’ve got the door stable on padded sawhorses, start removing material only where you marked the rub: use a sanding block or random-orbit sander with 80–120 grit for small tight spots, and switch to a sharp hand plane for longer, heavier binds. Plane with the grain, take thin shavings, and check often with a straightedge. For sanding, keep the pad flat and feather the edges so you don’t dish the face. Aim for a consistent 1/16 in. clearance, allowing for Doorframe expansion during humid swings. Vacuum dust, then dry-fit the door to confirm it swings freely and latches without force. If you hit bare wood, spot-prime and repaint to prevent swelling and paint peeling later. Let primer dry fully.
Seal Bare Wood to Prevent Humidity Swelling
Even if you’ve already trimmed a sticking door, it’ll swell again if bare wood can still drink in humidity. Your next step is Wood treatment: seal every freshly cut or sanded edge so moisture can’t re-enter.
Remove the door or wedge it steady. Vacuum dust, then wipe the edge with a tack cloth or denatured alcohol. Mask faces with painter’s tape. For Sealant application, brush on a thin coat of sanding sealer, shellac, or polyurethane, working end grain first. Tip off runs with the brush and keep the coat even. Let it dry fully, then scuff lightly with 220-grit and wipe clean. Apply a second coat. Don’t forget the top and bottom edges; they absorb humidity fastest. Rehang after curing.
Fix an Interior Door Rubbing the Threshold or Carpet
If the door drags on the threshold or carpet, start by pinpointing exactly where it’s hitting before you remove any material. Close it slowly on a strip of painter’s tape or carbon paper, then mark the rub line with a pencil. Check clearance with a feeler gauge or thin cardboard.
Pop the hinge pins, lift the door onto sawhorses, and plane or sand the bottom edge only where marked. Take light passes, rehang, and test often. If carpet is the culprit, trim the carpet fibers with a sharp utility knife and reset the threshold height if it’s adjustable. After you’ve got smooth clearance, seal the fresh edge and do a quick paint touch up. Reinstall any Door decoration hardware after everything cures fully.
If the Jamb Swells: Sand, Seal, or Adjust Stops
When humidity makes the jamb swell, the door usually binds along the latch side or at the head. Mark the rub spots with painter’s tape, then close the door to confirm contact points. For minor Jamb expansion, pull the door open and sand the jamb lightly with 120-grit on a sanding block, staying square to the edge. Vacuum dust, then seal the bare wood with primer or clear finish so it won’t fuzz and grab again. If the bind is at the stop, score paint lines with a utility knife, pry the Stop molding gently with a putty knife, and reset it 1/16 in. back using 18-gauge brads. Recheck the reveal, then touch up paint.
Stop Interior Doors Sticking: Lower Indoor Humidity
Sanding and stop adjustments fix today’s bind, but the jamb and door will keep moving unless you control the moisture that caused the swell. Start by placing a hygrometer near the problem door; you’re aiming for 35–50% RH. Run your bathroom and range fans for 20 minutes after use, and verify airflow with a tissue test.
Next, set a dehumidifier on the same floor and drain it to a sink or condensate pump so you won’t forget buckets. If your HVAC has a “dry” mode, enable it and replace the filter.
Seal moisture sources: fix leaks, caulk gaps at baseboards, and add a vapor barrier in crawlspaces. Stable humidity protects Interior decor and prevents Flooring materials from cupping, which can push doors out of square.
Mistakes to Avoid: and When to Call a Carpenter
Before you touch a hand plane or sander, mark the rub spots with a pencil and take off material in thin passes—you can’t put wood back if you over-plane or over-sand. Next, check hinge alignment: tighten loose screws, swap in longer screws, and shim or adjust hinges before you start shaving the door. Call a carpenter only after these checks, or immediately if the frame’s out of square, the door’s twisted, or the hinge mortises need re-cutting.
Over-Planing And Sanding
How do you fix a sticking interior door without making it worse? Start by marking rub points with painter’s tape and a pencil, noting Humidity effects on the swollen edge and your door material (solid wood, MDF, hollow-core). Remove the door, then take off minimal stock: set a block plane for a thin shaving, and plane with the grain in 3–4 passes. Rehang and test after each round. Switch to 120-grit on a sanding block only to blend and break sharp edges; don’t “freehand” with a power sander. Seal the fresh edge with primer or finish to prevent re-swelling. Call a carpenter if you’ve already exposed core, created a tapered edge, or need to rebuild a split stile.
Ignoring Hinge Alignment
Even with careful planing and edge sealing, a door can still bind if the hinges sit out of line or the screws have loosened and let the slab sag. Don’t ignore hinge alignment before you remove more wood.
Open the door halfway and lift the knob; if you feel play, you’ve got door sagging. Tighten every hinge screw with a #2 Phillips. If screws spin, pull them, dip 3-in. wood screws in wood glue, and drive them into the stud. Check the hinge leaves: they should sit flush in their mortises. If a leaf stands proud, score the paint with a utility knife and chisel the mortise flat. Rehang and test the swing, then recheck the reveal.
Calling A Carpenter Early
When does it make sense to stop shaving the door and call a carpenter? Do it when you’ve removed 1/8 in. and it still binds, the latch won’t line up, or the gap at the hinge side is uneven. You’re likely fighting a twisted jamb, loose framing, or a settled header.
First, verify with tools: check plumb with a 4-ft level, measure reveals with a feeler gauge, and sight the jamb for bow. If screws strip, the hinges crack, or you need to move the strike plate, call early. A carpenter can reset hinges, shim the jamb, or rehang the slab without ruining edge seal. You’ll also avoid damaged Decorative hardware and messy Paint touch ups.
Frequently Asked Questions
How Long Does It Take for a Swollen Door to Shrink Back Naturally?
It usually takes 1–3 weeks for a swollen door to shrink naturally. Track humidity effects with a hygrometer, run a dehumidifier, improve airflow, and watch door warping; if swelling persists after 3 weeks, adjust.
Does Door Material (Solid Wood, MDF, Hollow-Core) Affect Humidity Sticking?
Yes—Door material changes humidity effects: solid wood swells most, MDF edges puff, hollow-core shifts least. Measure gaps, mark rub spots, plane lightly, seal edges, then set a dehumidifier. Your door’s drama subsides.
Can Painting the Entire Door Help Prevent Seasonal Sticking?
Yes, painting the entire door can reduce seasonal sticking if you seal all faces. Use proper Painting techniques: sand, prime, and apply two coats. Don’t skip edges or top/bottom; Surface sealing slows moisture uptake.
What Humidity Level Is Ideal Indoors to Prevent Doors From Sticking?
Aim for 35–45% indoor RH. Like a sponge, wood swells past 50%. For humidity control: set your humidifier/dehumidifier, verify with a hygrometer, and adjust HVAC. For door maintenance, recheck clearances seasonally.
Should I Leave a Gap Under the Door for Summer Humidity Expansion?
Yes, you should leave a small gap under the door. Measure clearance, aim for 1/2 inch. If the door swells, plane the bottom. Maintain air circulation with a vent or undercut.
Conclusion
You’ve confirmed humidity’s the culprit, found the rub point, and handled alignment: tighten hinge screws, swap one for a long screw, or shim the hinge to pull the slab true. If it’s scraping the floor, plane or sand the edge, then seal it. If the jamb’s swollen, sand lightly and reset the stops. Want fewer repeats? Control indoor RH with a dehumidifier. Measure twice, cut once—then call a carpenter if the frame’s warped.
About the Author